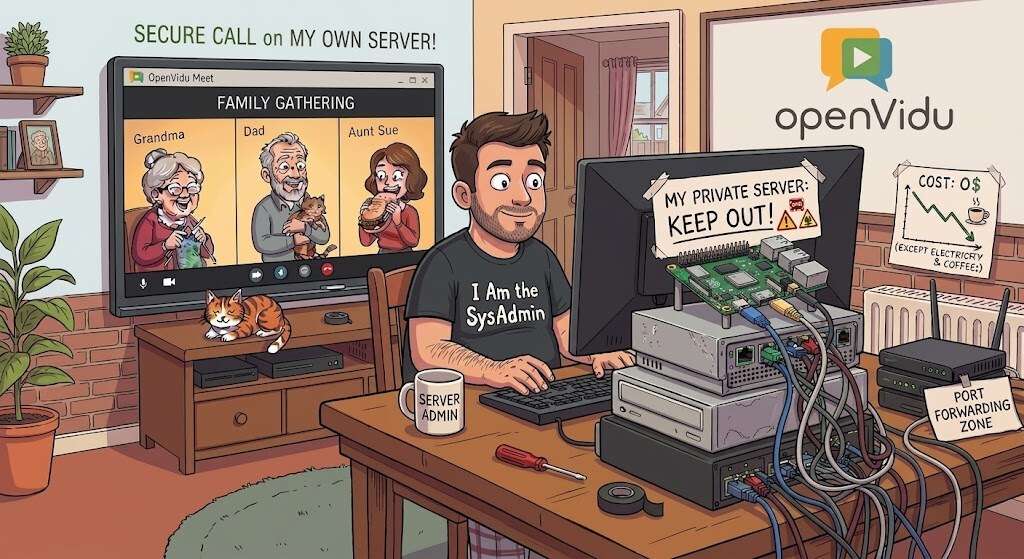
Host Your Own Secure Video Calls at Home: A Private Server for Family and Friends#
We're all used to reaching for a third-party app to call friends and family: Google Meet, Zoom, Microsoft Teams, etc. Almost nobody wants to complicate their life by running their own server, and if you mention "spinning up a WebRTC media server" to an experienced sysadmin, they'll probably put their head in their hands thinking about how complicated it must be.
In reality, it's much easier than you might think. At OpenVidu we've worked hard to make a self-hosted video conferencing service as easy to install and run as possible, and hosting it yourself comes with some genuine advantages. It's completely free, there are no 40-minute timers or participant limits, your guests join straight from a browser with no account and no app, and every call stays on hardware that lives in your own home.
With a tiny computer like a Raspberry Pi, an old laptop or a mini-PC, you can have your own private video conferencing server running in a matter of minutes. This guide walks you through it in three simple steps using OpenVidu Meet.
Why self-host your video calls?#
If tinkering is your idea of a fun weekend, you probably don't need convincing 😉. Just in case, here are the benefits:
- Privacy and ownership. Your video and audio never leave your own server. Conversations stay on hardware you can physically touch, in your own home, with no ads and nothing to sign up for. It's a calmer, more personal way to keep in touch.
- No artificial limits. No 40-minute cutoff, no "upgrade to invite more than 3 people". The only limit is your hardware, and it's more generous than you'd think. A single small machine comfortably handles a family gathering.
- Free and open source. OpenVidu Community is free and fully open source. You pay for electricity and your internet bill.
- A second life for old hardware. A Raspberry Pi 5 sips just a few watts and costs less than a year of most subscription plans. That retired laptop or mini-PC in your closet works just as well. It's greener and cheaper than yet another SaaS account.
Is this setup valid for everyone? If you need five-nines uptime for a business, run it properly in the cloud (OpenVidu does that too; see the end of this post). But for keeping in touch with the people you love, a box at home is perfect, private, and yours.
What you'll build
A production-ready video conferencing server running OpenVidu Meet at your home, reachable from anywhere through a secure https:// address, with automatic SSL certificates. Your family and friends join from any browser (phone, tablet or laptop) with a single link. No account, no app to install.
What you'll need#
- A computer to run it on. A Raspberry Pi 5 (4 GB or more) is the recommended option: quiet, cheap and low-power. Any idle PC or laptop works too, as long as it has at least 4 GB of RAM and 4 CPU cores and runs Linux (Ubuntu is recommended).
- A home internet connection with a real public IP.
- A free DuckDNS account. This gives your home OpenVidu Meet server an easy-to-remember web address that keeps working even when your IP changes.
- Access to your router's admin page, to forward a few ports.
Prerequisites & Connectivity Checks#
Before you start, make sure your network setup is ready for hosting a server.
1. Are you behind a CGNAT?#
Many internet providers no longer give each home a unique public IP. They share one between many customers (this is called CGNAT), and that prevents people from reaching your server.
Quick check: look at the "Internet" / "WAN" IP your router reports. Open a browser and go to 192.168.0.1 or 192.168.1.1 (the most common addresses). If neither works, check the label on the underside of your router, which usually shows the address, username, and password.
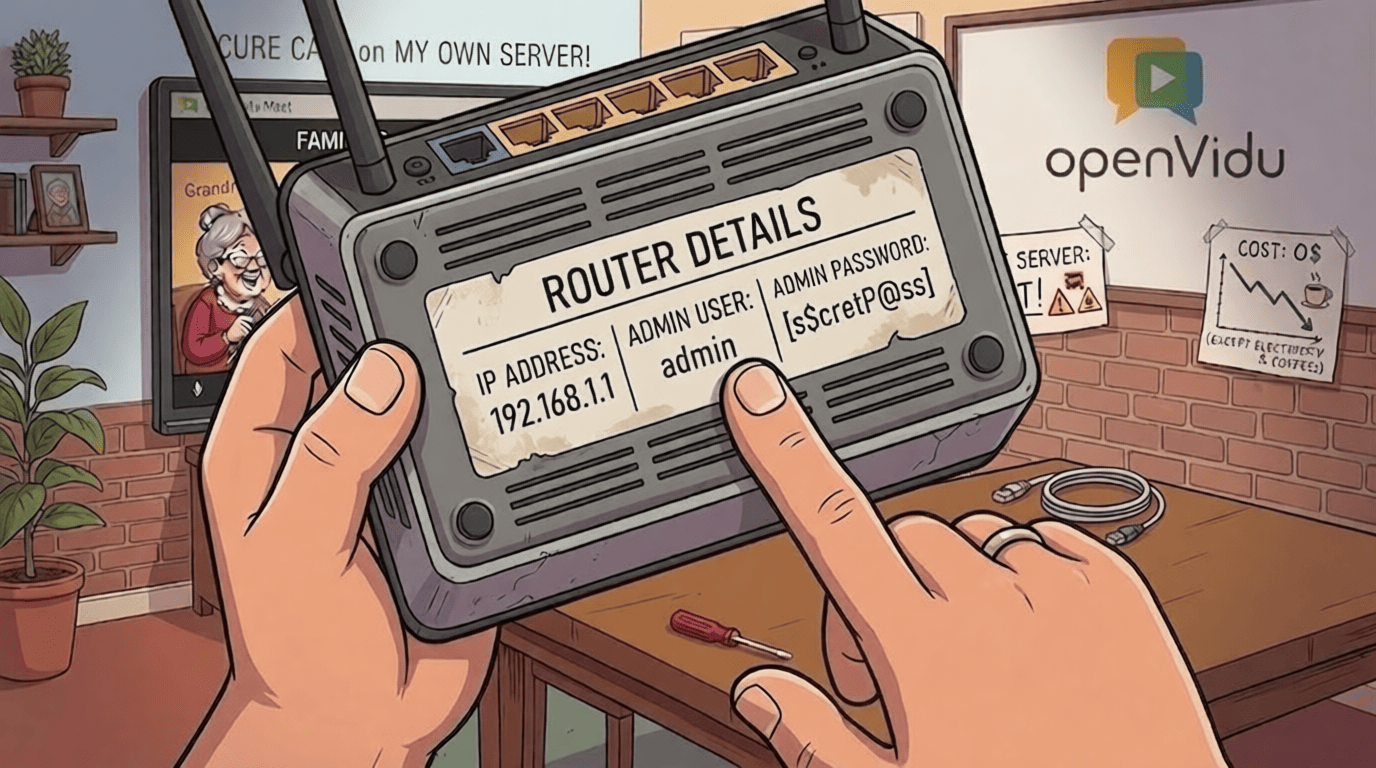
Then compare it with the IP shown at whatismyip.com (or run curl ifconfig.me).
- If they match, you have a public IP.
- If they differ, or your router's WAN IP starts with
100.64.x.xto100.127.x.x, you're behind CGNAT. Contact your ISP and ask for a public IP (often free, sometimes a small monthly fee). - If they refuse, you can still run OpenVidu Meet, but only on your local network (no one outside can reach it) or in a cloud server (see the end of this post).
Setting up OpenVidu Meet#
If all the prerequisites above are good, you're all set. OpenVidu Meet is just four steps away.
Step 1: Get a free address with DuckDNS#
Your home IP usually changes from time to time. DuckDNS gives you a fixed name (like <your-subdomain>.duckdns.org) that automatically follows it, for free.
- Go to duckdns.org and sign in (with Google, GitHub, etc.).
- In the sub domain box, type the name you want for your subdomain (e.g.
my-home-video) and click add domain. This will be your<your-subdomain>throughout this guide. - Copy your token from the top of the page. You'll need it in a moment.
Now make your address always point to your home. On the server, add a small task that updates DuckDNS every few minutes. Run crontab -e and add this line (replace <your-subdomain> and <your-token> with your actual subdomain and token):
*/5 * * * * curl -fsS "https://www.duckdns.org/update?domains=<your-subdomain>&token=<your-token>&ip=" >/dev/null 2>&1
Leaving ip= empty tells DuckDNS to detect your current public IP automatically, so even when your ISP changes it, <your-subdomain>.duckdns.org keeps pointing home.
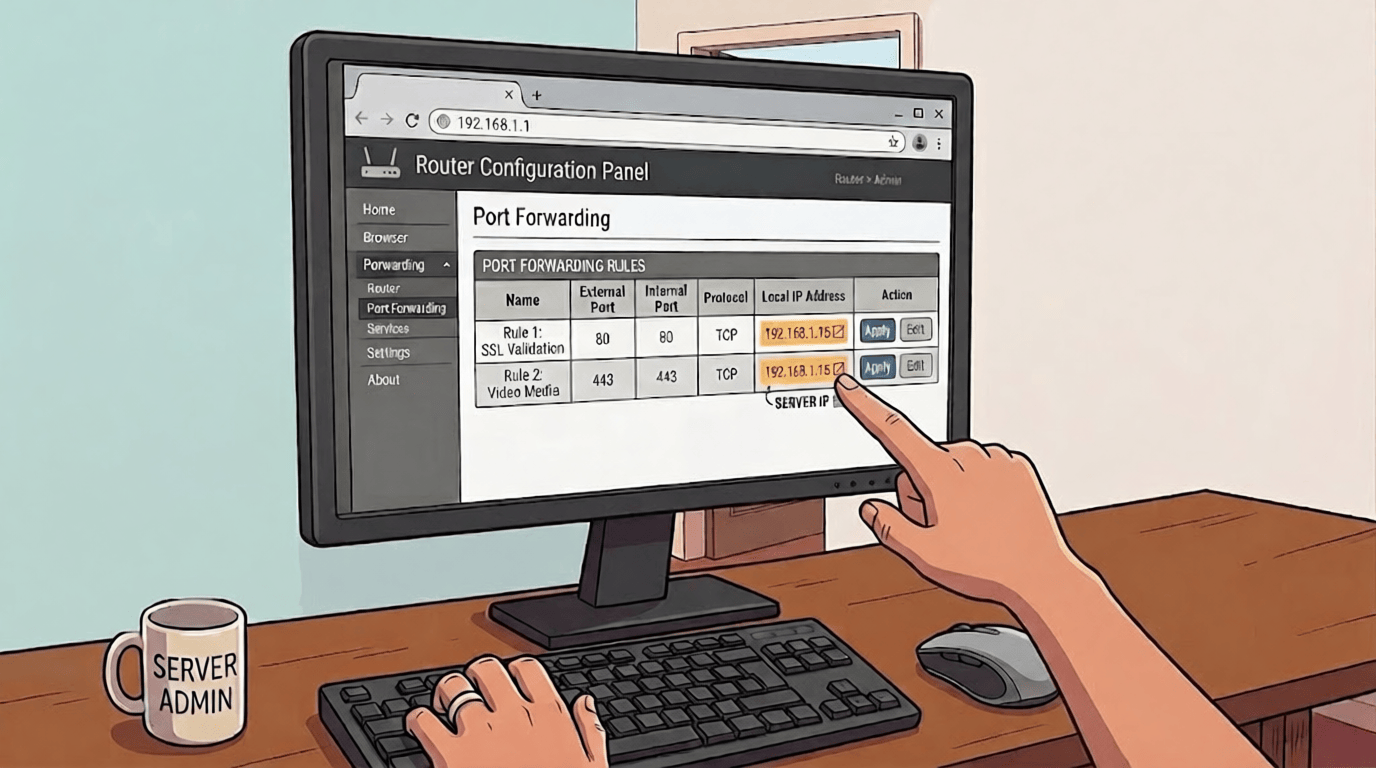
Step 2: Forward ports 80 and 443#
OpenVidu needs two ports accessible from the internet. First, get your server's private IP:
Then, in your router's admin page, find Port forwarding (usually under Advanced > NAT, Security > Firewall, or Network > WAN) and forward these ports to that IP address:
| Port | Protocol | Forward to | What it's for |
|---|---|---|---|
80 |
TCP | <SERVER_IP> |
Redirects to HTTPS and validates your SSL certificate |
443 |
TCP | <SERVER_IP> |
The video app, the secure connection and media TURN relay |
If your server's Linux firewall is active, open ports 80 and 443 there too. We also recommend giving your server a fixed local IP (DHCP reservation) in your router so the forwarding rules stay put after a reboot.
Verify the ports are reachable#
To confirm that ports 80 and 443 are open from the internet:
-
Start a listener. On your server, run these commands:
For port 80:
For port 443:
This keeps the port open and waiting for connections, nothing else.
-
Check from the outside. Open canyouseeme.org and check port 80. Once it shows "Success", repeat the same check for port 443. Both ports must be open. Press
Ctrl+Cto stop each listener.
If both ports show "Success", proceed to Step 3.
If your ISP blocks ports 80 and 443#
If either port fails, your ISP is blocking inbound connections on it. Automatic Let's Encrypt won't work in that case, because validating a certificate requires one of those ports to be reachable from the internet. You won't be able to follow Step 3 as written; use this alternative instead.
Install the full OpenVidu Platform installer (instead of the simple Meet one) and choose its "Own Certificate" option, --certificate-type='owncert', supplying a valid certificate obtained either:
- via a Let's Encrypt DNS-01 challenge, which proves you own the domain through a DNS TXT record and needs no open ports at all. DuckDNS supports TXT records, so a tool like acme.sh (or certbot with a DuckDNS plugin) can issue it for you; or
- any certificate you already own, however it was issued.
You'll also serve the app on a non-standard port. In your router, forward port 8443 (TCP) to your server's IP, exactly as you did for ports 80 and 443 above. Then set CADDY_HTTPS_PUBLIC_PORT=8443 in /opt/openvidu/config/openvidu.env and run sudo systemctl restart openvidu. Your server will be reachable at https://<your-subdomain>.duckdns.org:8443/ (note the :8443 in the URL).
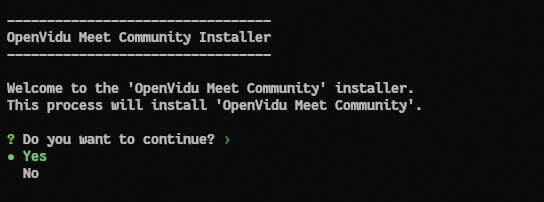
Step 3: Install OpenVidu Meet (one command, three questions)#
This is the easy part. On your server, run:
The installer takes care of everything (it even installs Docker for you) and asks just three things.
1. Confirm you want to continue. Choose Yes.
2. Enter your domain. Type the DuckDNS address you created, e.g. <your-subdomain>.duckdns.org, and press Enter. OpenVidu automatically requests a free, valid SSL certificate from Let's Encrypt for it, with no extra steps.

3. Confirm to proceed, then wait a few minutes while it downloads and starts. When it's done, you'll see the address of your new video app and the admin password, so write these down.
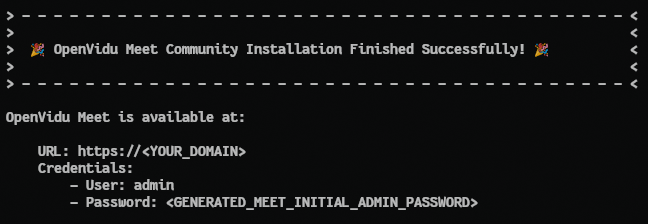
That's it. OpenVidu now starts automatically with your machine. You can manage it any time with:
sudo systemctl start openvidu     # start
sudo systemctl stop openvidu      # stop
sudo systemctl restart openvidu   # restart
Step 4: Make your first call#
Open https://<your-subdomain>.duckdns.org/ in your browser. You'll land on your own OpenVidu Meet. Log in with the admin user and the password from the installer.


Click Create Room, give it a name, and you get a room with its own shareable link.


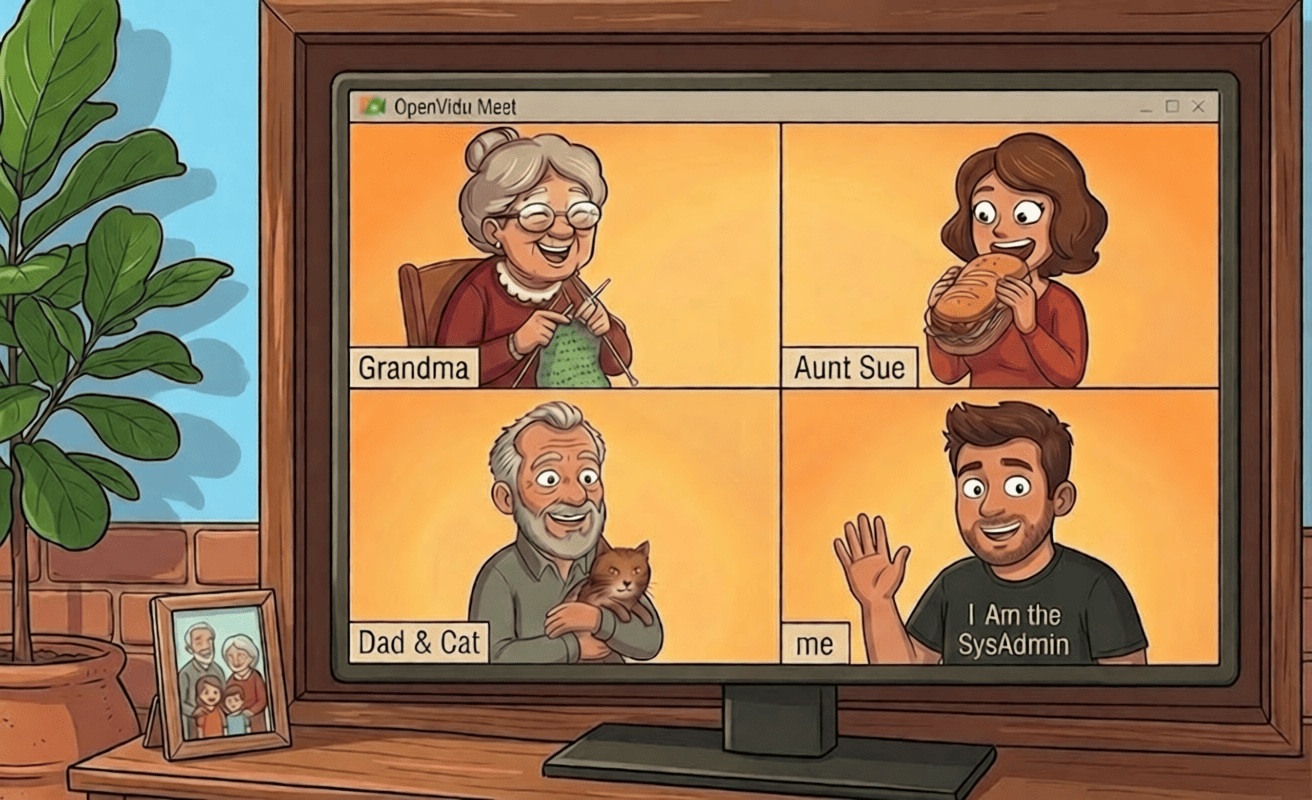
Now send that link to your family and friends however you like: WhatsApp, email, a text. When they open it they just type their name and join, with no account and no app to install, straight from the browser, on a phone, tablet or computer.
Share the link from the copy button, not the address bar
Use the copy button next to "Invite others with this meeting link". That link carries a secret token that lets people in. The plain URL from your browser's address bar won't grant access.


Inside the call you get exactly what you'd expect from a modern app: HD video, crisp audio, screen sharing and chat, except this time it's all running on the little box in your home.
Keep it secure#
You've just put a server on the internet, so a few minutes of good habits go a long way:
- Use strong passwords. The installer generates random ones for you; keep them safe. They live in
/opt/openvidu/config/openvidu.envif you need to look them up. - Only open the ports you actually use. Ports 80 and 443 TCP are enough for calls; don't forward anything you don't need.
- Keep it updated. Update your operating system regularly, and upgrade OpenVidu when new versions ship.
- Remember it's exposed. A home server reachable from the internet is convenient and powerful, so treat it with the same care you'd give any device that's online 24/7.
Go further: end-to-end encryption
For the most private calls, OpenVidu Meet can turn on end-to-end encryption (E2EE) on a per-room basis, covering audio, video and chat. With it enabled, only the people in the call can decrypt the media: not even your own server can read it.
What to do next?#
Once your server is up and running, there are a few things you can do to get more out of it. OpenVidu exposes additional ports that improve media quality and reduce latency, and opening them is worth it if you want the best possible call experience. And if the one-command installer felt too opinionated, the full OpenVidu Platform installer gives you fine-grained control over which modules to enable, how to configure them, and how to automate the whole process.
- Full port list: open additional ports for better media performance or to match your Linux firewall rules.
- Non-interactive install:
install_meet.shis the quick path; for disabling modules, enabling only specific ones, or scripting the install, use the full OpenVidu Platform installer.
Need more than this?#
This guide deploys OpenVidu Single Node Community, which is perfect for family and friends and can comfortably host a crowd. But the very same OpenVidu can grow far beyond a single box. If one day you outgrow your little home server or running into its limits, check the other deployment types:
- OpenVidu Single Node PRO: the same single-machine setup, with 2x performance using Mediasoup and advanced observability.
- OpenVidu Elastic: adds a cluster of media servers that scale up and down with demand.
- OpenVidu High Availability: adds fault tolerance so a single failure never takes your calls down.
- OpenVidu Local: a development setup for your own laptop.
- Plain Docker Compose: install the same single node from plain config files, less automated and opinionated.
And it's not limited to a Raspberry Pi at home: you can deploy on-premises or on AWS, Azure, Google Cloud, DigitalOcean or Oracle Cloud with the same ease. See the OpenVidu Meet deployment options.
That's all it takes. For the price of a tiny computer and a fun weekend, you are now sovereign over your own video conferencing server, with the power to connect with anyone, anywhere, without giving up your privacy. Happy calling!