Embed OpenVidu Meet step by step#
This step-by-step guide explains how to embed OpenVidu Meet into your web application, covering setup, room creation, embedding options, and deployment best practices.
Following this guide with an AI coding agent?
Install the OpenVidu Agent Plugin and let it follow along: it reads the REST API, web component and webhook references for your OpenVidu version and edition.
1. Run OpenVidu Meet#
You need Docker Desktop. You can install it on Windows , Mac or Linux .
Run this command in Docker Desktop's terminal:
Info
For a detailed guide on how to run OpenVidu Meet locally, visit Try OpenVidu Meet locally .
2. Create a room#
You can create a room from the "Rooms" page in OpenVidu Meet:
Automating room creation#
You can automate the room creation process by using the OpenVidu Meet REST API. This allows you to create rooms programmatically from your application's backend, without manual intervention.
Check out the API reference for creating rooms . Below you have copy-paste snippets for most common languages.
Info
Remember to replace YOUR_DOMAIN and YOUR_API_KEY in the snippets below.
const https = require('https');

const options = {
    method: 'POST',
    hostname: 'YOUR_DOMAIN',
    port: 443,
    path: '/meet/api/v1/rooms',
    headers: {
        'Content-Type': 'application/json',
        Accept: 'application/json',
        'X-API-KEY': 'YOUR_API_KEY'
    }
};

const req = https.request(options, function (res) {
    const chunks = [];
    res.on('data', function (chunk) {
        chunks.push(chunk);
    });
    res.on('end', function () {
        const body = Buffer.concat(chunks);
        console.log(body.toString());
    });
});

req.write(JSON.stringify({
    roomName: 'My Room',
}));

req.end();
package main

import (
    "fmt"
    "strings"
    "net/http"
    "io"
)

func main() {

    url := "https://YOUR_DOMAIN/meet/api/v1/rooms"

    payload := strings.NewReader("{\"roomName\":\"My Room\"}")

    req, _ := http.NewRequest("POST", url, payload)

    req.Header.Add("Content-Type", "application/json")
    req.Header.Add("Accept", "application/json")
    req.Header.Add("X-API-KEY", "YOUR_API_KEY")

    res, _ := http.DefaultClient.Do(req)

    defer res.Body.Close()
    body, _ := io.ReadAll(res.Body)

    fmt.Println(res)
    fmt.Println(string(body))

}
require 'uri'
require 'net/http'
require 'openssl'

url = URI("https://YOUR_DOMAIN/meet/api/v1/rooms")

http = Net::HTTP.new(url.host, url.port)
http.use_ssl = true

request = Net::HTTP::Post.new(url)
request["Content-Type"] = 'application/json'
request["Accept"] = 'application/json'
request["X-API-KEY"] = 'YOUR_API_KEY'
request.body = "{\"roomName\": \"My Room\"}"

response = http.request(request)
puts response.read_body
HttpRequest request = HttpRequest.newBuilder()
    .uri(URI.create("https://YOUR_DOMAIN/meet/api/v1/rooms"))
    .header("Content-Type", "application/json")
    .header("Accept", "application/json")
    .header("X-API-KEY", "YOUR_API_KEY")
    .method("POST", HttpRequest.BodyPublishers.ofString("{\"roomName\": \"My Room\"}"))
    .build();
HttpResponse<String> response = HttpClient.newHttpClient().send(request, HttpResponse.BodyHandlers.ofString());
System.out.println(response.body());
import http.client

conn = http.client.HTTPSConnection("YOUR_DOMAIN")

payload = "{\"roomName\": \"My Room\"}"

headers = {
    'Content-Type': "application/json",
    'Accept': "application/json",
    'X-API-KEY': "YOUR_API_KEY"
}

conn.request("POST", "/meet/api/v1/rooms", payload, headers)

res = conn.getresponse()
data = res.read()

print(data.decode("utf-8"))
// Cargo.toml:
// reqwest = { version = "0.12", features = ["blocking", "rustls-tls"] }

use reqwest::blocking::Client;
use reqwest::header::{ACCEPT, CONTENT_TYPE};

fn main() -> Result<(), Box<dyn std::error::Error>> {
    let client = Client::new();
    let url = "https://YOUR_DOMAIN/meet/api/v1/rooms";
    let payload = r#"{"roomName": "My Room"}"#;

    let resp = client
        .post(url)
        .header(ACCEPT, "application/json")
        .header(CONTENT_TYPE, "application/json")
        .header("X-API-KEY", "YOUR_API_KEY")
        .body(payload)
        .send()?;

    println!("Status: {}", resp.status());
    println!("{}", resp.text()?);
    Ok(())
}
<?php

$curl = curl_init();

curl_setopt_array($curl, [
    CURLOPT_URL => "https://YOUR_DOMAIN/meet/api/v1/rooms",
    CURLOPT_RETURNTRANSFER => true,
    CURLOPT_POST => true,
    CURLOPT_POSTFIELDS => json_encode(['roomName' => 'My Room']),
    CURLOPT_HTTPHEADER => [
        "Accept: application/json",
        "Content-Type: application/json",
        "X-API-KEY: YOUR_API_KEY"
    ],
]);

$response = curl_exec($curl);
$err = curl_error($curl);

curl_close($curl);

if ($err) {
    echo "cURL Error #:" . $err;
} else {
    echo $response;
}
using System.Net.Http.Headers;
var client = new HttpClient();
var request = new HttpRequestMessage
{
    Method = HttpMethod.Post,
    RequestUri = new Uri("https://YOUR_DOMAIN/meet/api/v1/rooms"),
    Headers =
    {
        { "Accept", "application/json" },
        { "X-API-KEY", "YOUR_API_KEY" },
    },
    Content = new StringContent("{\"roomName\": \"My Room\"}")
    {
        Headers =
        {
            ContentType = new MediaTypeHeaderValue("application/json")
        }
    }
};
using (var response = await client.SendAsync(request))
{
    response.EnsureSuccessStatusCode();
    var body = await response.Content.ReadAsStringAsync();
    Console.WriteLine(body);
}
The response to this request will be a JSON object as below. The properties needed for the next step are the room's anonymous access links (access.anonymous.moderator.url and access.anonymous.speaker.url), used to embed the room into your application as explained in step 3.
{
  "roomId": "room-123",
  "roomName": "My Room",
  "owner": "admin",
  "creationDate": 1620000000000,
  "access": {
    "anonymous": {
      "moderator": {
        "enabled": true,
        "url": "https://YOUR_DOMAIN/meet/room/room-123?secret=123456"
      },
      "speaker": {
        "enabled": true,
        "url": "https://YOUR_DOMAIN/meet/room/room-123?secret=654321"
      },
      "recording": {
        "enabled": true,
        "url": "https://YOUR_DOMAIN/meet/room/room-123/recordings?secret=987654"
      }
    },
    "user": {
      "enabled": false,
      "url": "https://YOUR_DOMAIN/meet/room/room-123"
    }
  },
  "status": "open",
  "rolesUpdatedAt": 1620000000000,
  "meetingEndAction": "none",
  "_extraFields": [
    "config",
    "roles"
  ]
}
3. Get the room URL#
To embed a room into your application's frontend you need a room URL, which is simply a room access link: the URL an individual opens to access the room. You can copy the room URL from the "Rooms" page in OpenVidu Meet app:
Which room access link should I use?
This guide uses the room's anonymous moderator and speaker links, which let anyone access without logging in. A room also offers user and identified-guest access links for controlled, per-person access. See Room Access to learn about all of them and choose the right one for your use case.
Automating room URL retrieval#
You can get the room URLs programmatically using the OpenVidu Meet REST API. The anonymous links are available in properties access.anonymous.moderator.url and access.anonymous.speaker.url — and the user access link in access.user.url — of object MeetRoom . This object is returned as a JSON response from methods:
4. Embed the room into your application#
Once you got the desired room URL, there are 3 alternatives to embed the OpenVidu Meet room into your application's interface:
Use a direct link#
This is the simplest and easiest way to embed an OpenVidu Meet room into your application. It's a perfect fit if your frontend is a web application, and you don't need any custom elements in the video meeting UI: the polished UI of OpenVidu Meet will be displayed in its own browser tab.
Just link to the room URL from any element in your frontend. For example, with a simple <a> tag:
After clicking on the element, the individual will be redirected to the OpenVidu Meet room, ready to join the meeting.
Info
You can customize the room by simply appending query parameters to the room URL. For example, you can send participants back to your application when they close the End view after the meeting by appending this query param: https://{{ your-room-url }}&leave-redirect-url=https://myapp.com
See Passing attributes to a direct link for more information.
Use the Web Component#
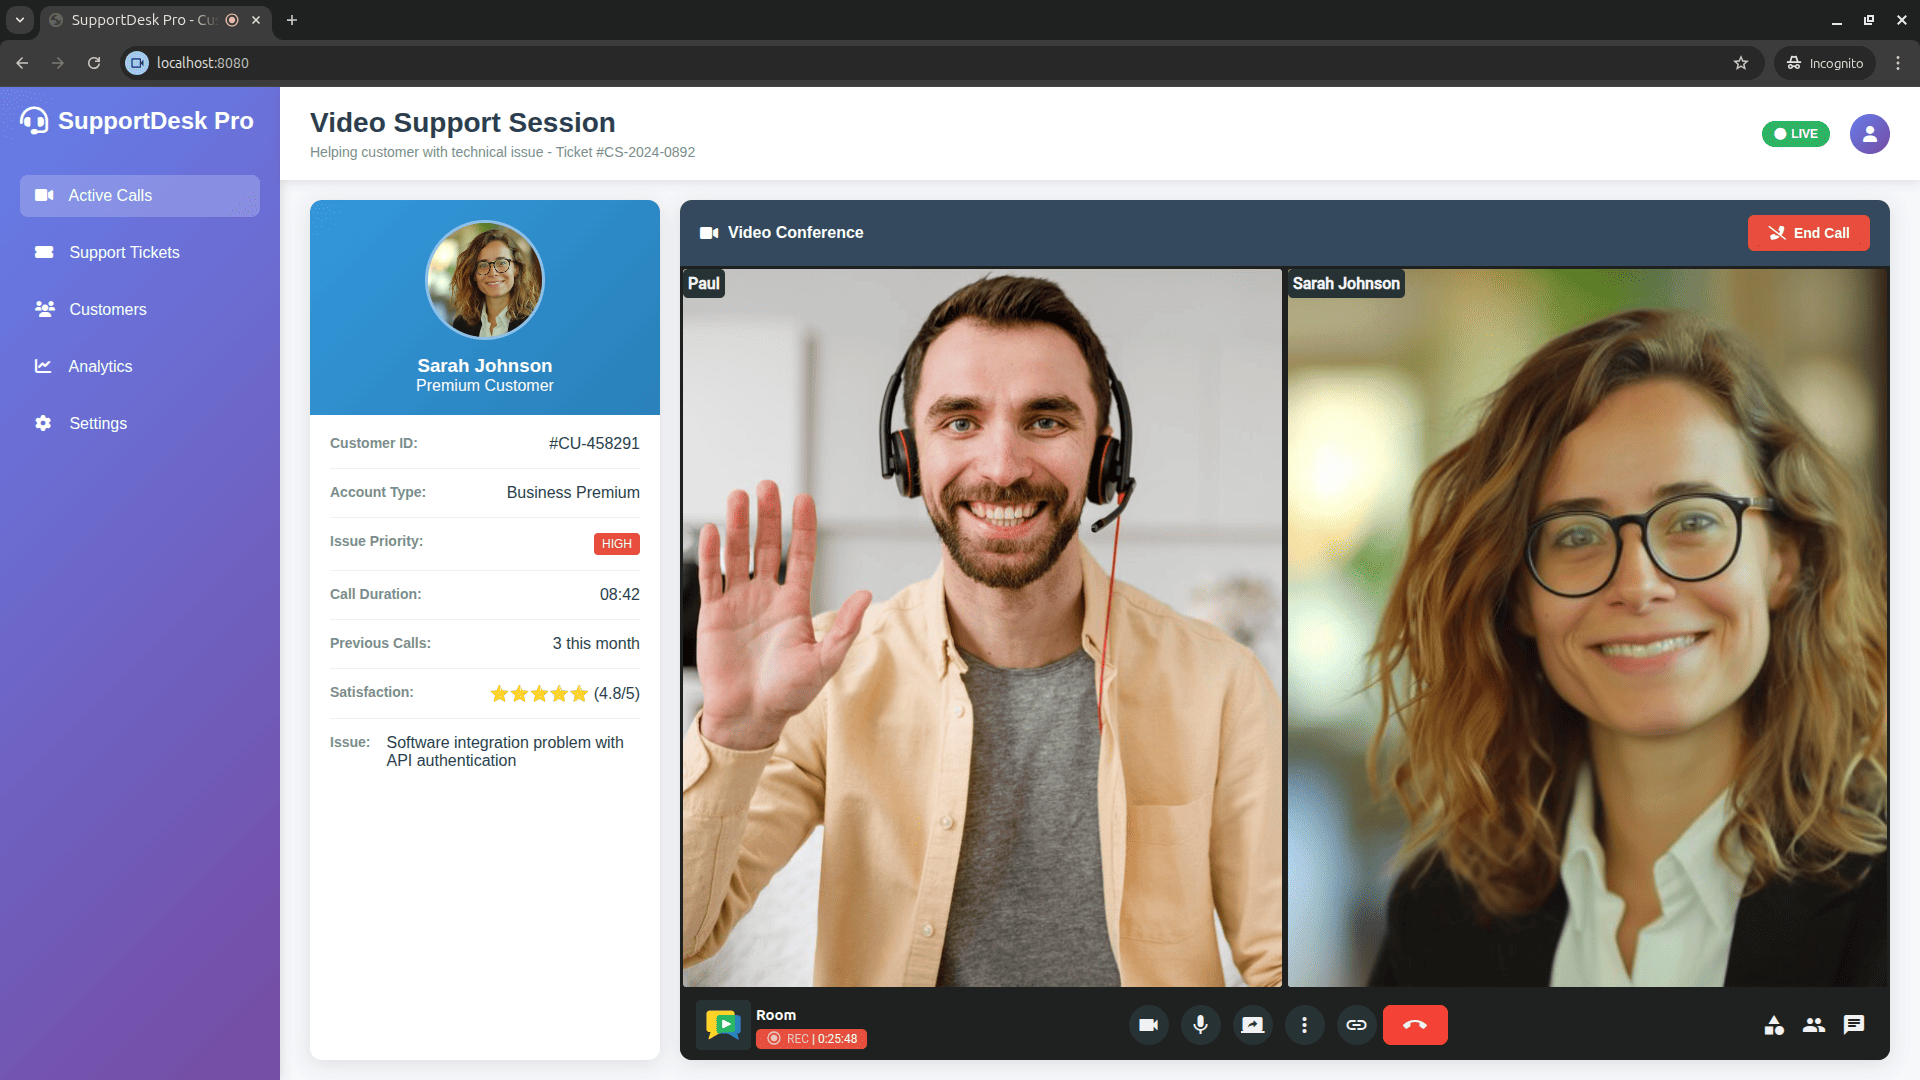
The OpenVidu Meet Web Component is the best option if you want to integrate the OpenVidu Meet UI along your own custom UI. OpenVidu Meet will simply become another component of your UI, blending seamlessly with your application's design and logic.
Include a <script> tag to load the OpenVidu Meet Web Component definition from your OpenVidu deployment. Then, you can use the <openvidu-meet> custom element in your HTML, setting the room-url attribute.
Info
Check out the Web Component reference for the complete list of attributes, commands and events offered by it.
<html>
    <head>
        <title>My meeting</title>
        <script src="https://{{ your-domain }}/meet/v1/openvidu-meet.js"></script>
    </head>
    <body>
        <div>
            <openvidu-meet room-url="{{ your-room-url }}"></openvidu-meet>
        </div>
    </body>
</html>
Use an iframe#
Some applications may not allow including a Web Component. For these cases OpenVidu Meet can be embedded using a traditional iframe.
<html>
    <head>
        <title>My meeting</title>
    </head>
    <body>
        <div>
            <iframe
                src="{{ your-room-url }}"
                allow="camera; microphone; display-capture; fullscreen; autoplay; compute-pressure;"
                width="100%" height="100%">
            </iframe>
        </div>
    </body>
</html>
The required iframe attributes are:
src: the room URL.allow: the minimum permissions required by the iframe for the room to work fine. These are:camera: allow access to the camera.microphone: allow access to the microphone.display-capture: allow screen sharing.fullscreen: allow full screen mode.autoplay: allow autoplay of media.compute-pressure: allow access to the device's compute pressure API.
Info
The same attributes, commands and events available for the Web Component may also be used in an iframe. Check out these sections to learn how:
5. Embed recordings into your application#
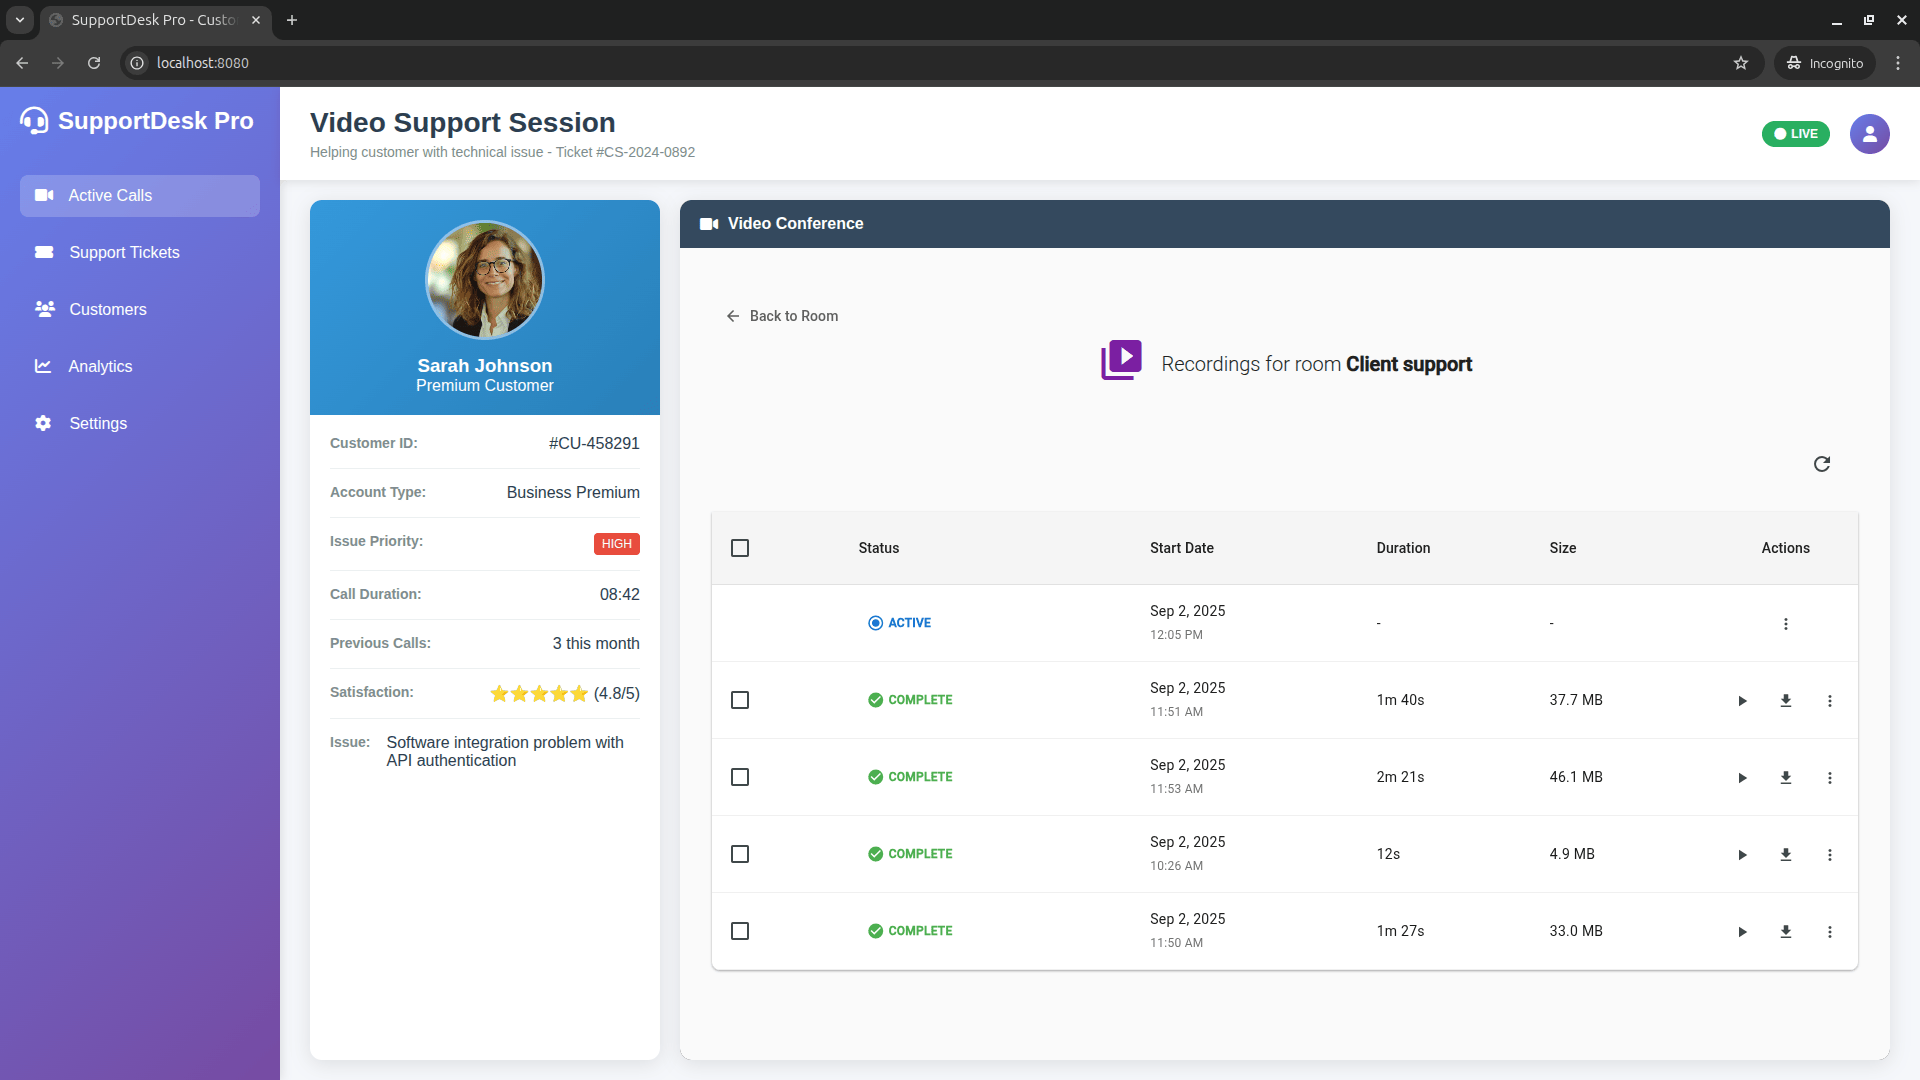
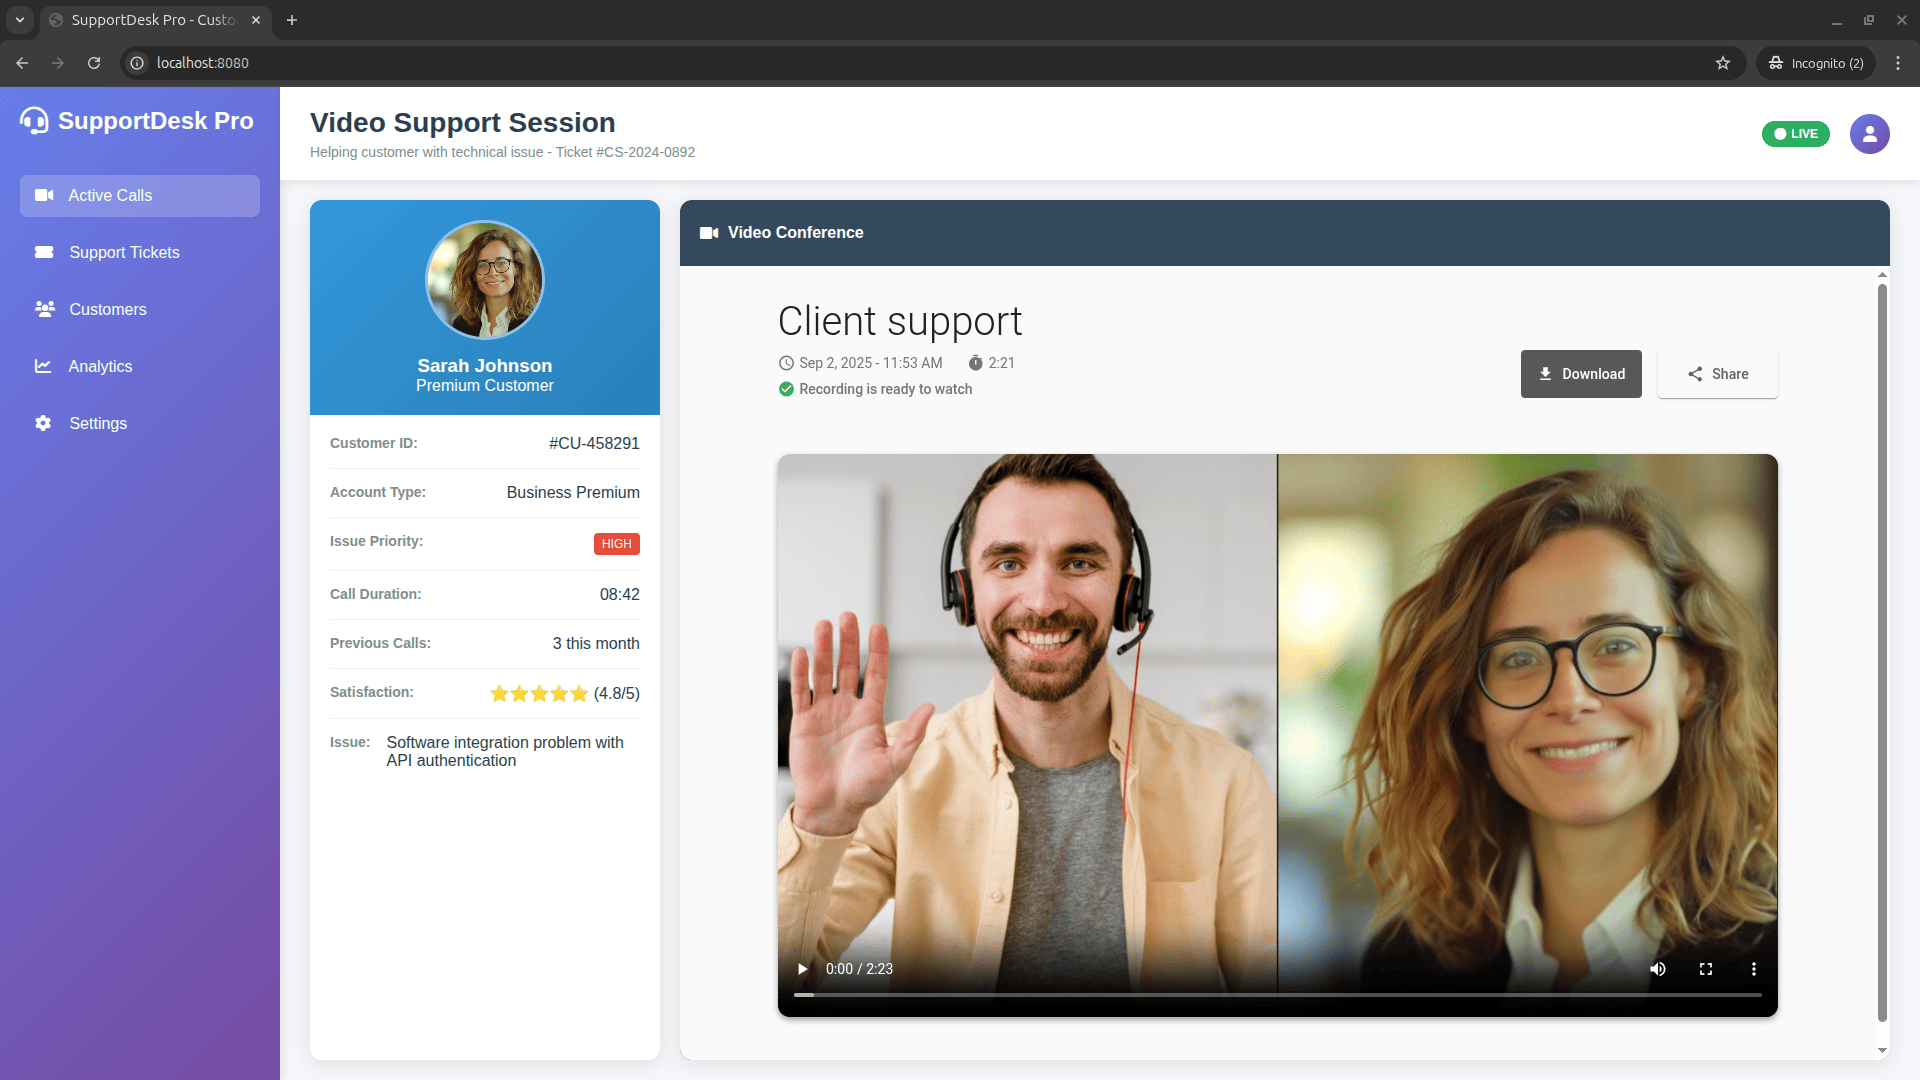
If your use case includes recording your meetings, you can also embed them right into your app. You can embed the list of recordings of a room or directly show the player for a specific recording.
Embed the list of recordings of a room#
To show the list of recordings of a room, declare attribute show-only-recordings in the embedding element:
Info
Checkout the Web Component's attributes section for more information.
This will show the list of recordings for the specified room:
Embed the player for a specific recording#
To show the player for a specific recording, replace attribute room-url with recording-url in the embedding element. The recording URL can be obtained from:
Info
Checkout the Web Component's attributes section for more information.
This will show the player for the specified recording:
6. REST API and Webhooks#
Up to this point everything has been focused on the client-side integration of OpenVidu Meet. To integrate OpenVidu Meet into your application's backend you have available: