OpenVidu Elastic administration: Oracle Cloud Infrastructure#
Oracle Cloud Infrastructure
The deployment of OpenVidu Elastic on Oracle Cloud Infrastructure is automated using the Terraform CLI, where Media Nodes are part of an OCI Instance Pool . An OCI Function takes care of triggering scale-in actions, while the Instance Pool itself handles scale-out when more capacity is needed.
Internally, the Oracle Cloud Infrastructure Elastic deployment mirrors the On Premises Elastic deployment, allowing you to follow the same administration and configuration guidelines of the On Premises Elastic documentation. However, there are specific considerations unique to the Oracle Cloud Infrastructure environment that are worth keeping in mind:
Cluster shutdown and startup#
The Master Node is a Compute instance, while the Media Nodes are part of an OCI Instance Pool. The process for starting and stopping these components differs:
To shut down the cluster, you need to stop the Media Nodes and then stop the Master Node.
Gracefully stopping Media Nodes
Setting the Instance Pool size to 0 terminates the Media Nodes immediately without waiting for active Rooms to complete. The graceful drain that the scale-in OCI Function performs is not invoked on a manual pool resize.
Wait for your active Rooms to finish before stopping the cluster, or SSH into each Media Node and run /usr/local/bin/graceful_shutdown.sh to drain it before saving the change.
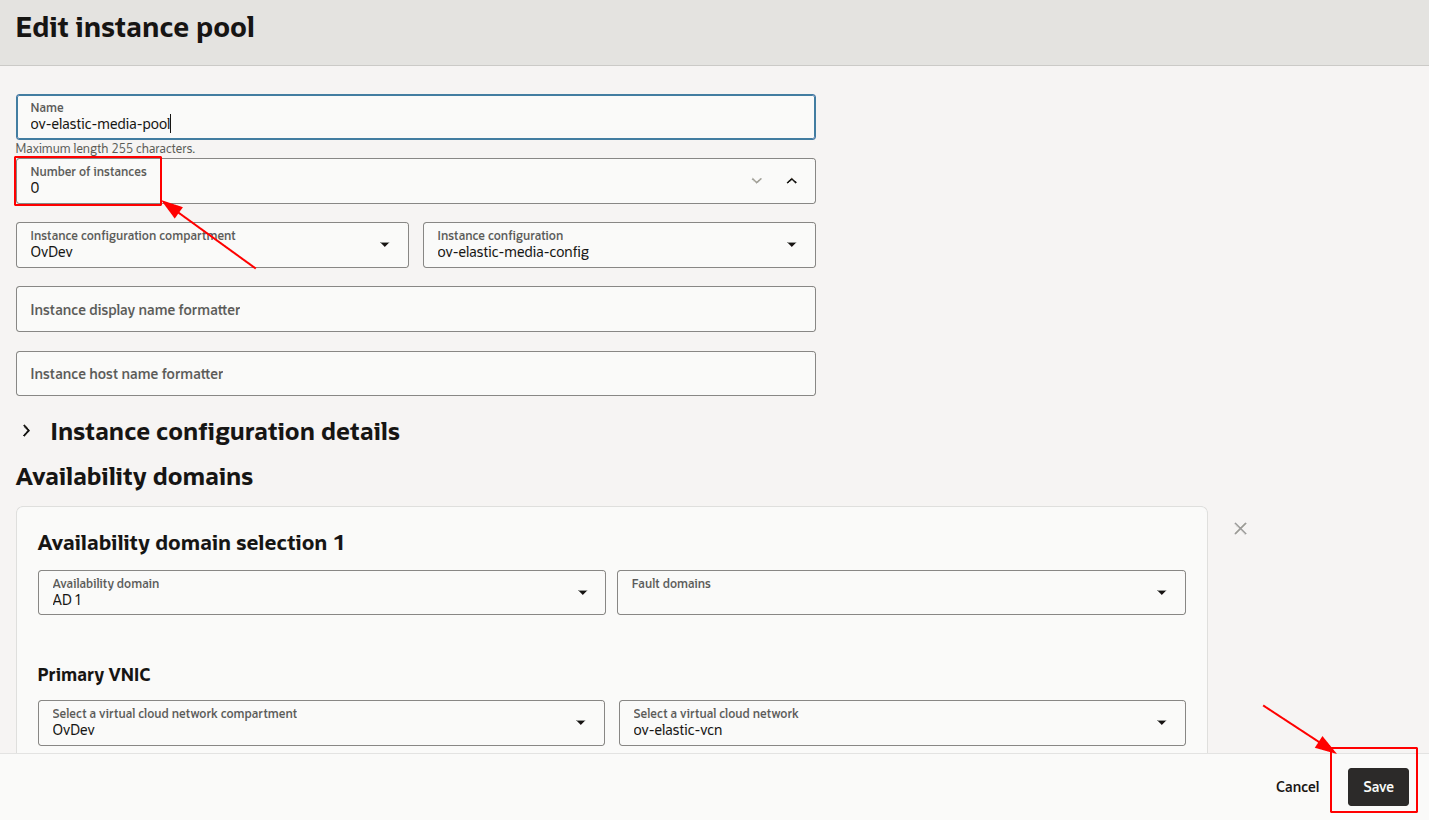
- Navigate to the OCI Instance Pools .
- Click into the Instance Pool called
<STACK_NAME>-media-pool, then click on "Edit".
- Set the Number of instances to 0, then click "Save changes" and wait for the change to be applied.
- After confirming that all Media Node instances are terminated, go to OCI Compute Instances and click the instance called
<STACK_NAME>-master-node. There, click "Stop" to stop the Master Node.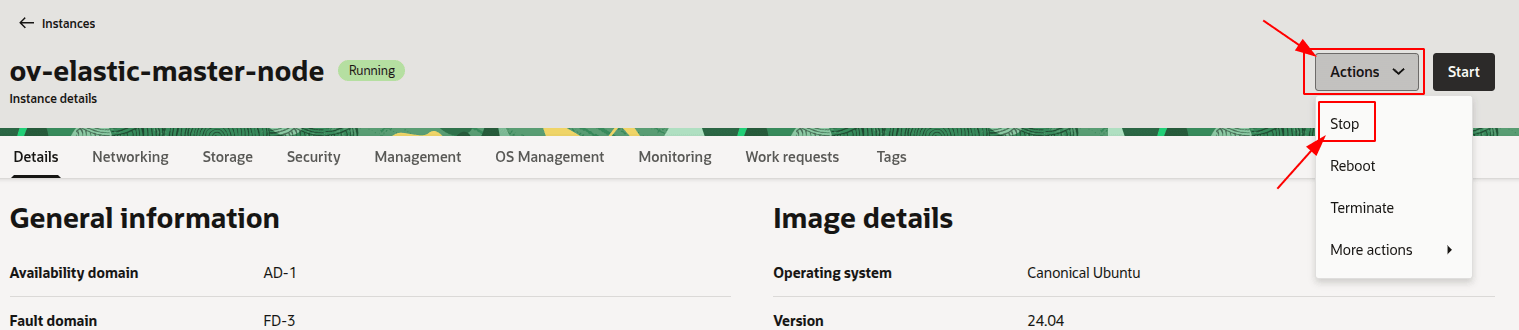
To start the cluster, first start the Master Node and then the Media Nodes.
- Navigate to the OCI Compute Instances .
- Select the instance named
<STACK_NAME>-master-node, then click "Start" to start the Master Node.
- Wait until the instance is running.
- Go to the OCI Instance Pools and click the Instance Pool called
<STACK_NAME>-media-pool, then click on "Edit".
-
Set the Number of instances to your desired value and click "Save changes", then wait for the Instance Pool to apply the changes.
Warning
This Number of instances is just an initial set — it does not become a fixed size and does not raise
minNumberOfMediaNodes. If you set it aboveminNumberOfMediaNodes, the scale-in OCI Function may terminate the extra Media Nodes back down to the minimum as soon as it detects low CPU usage.
Change the instance shape#
You can change the OCI Compute shape of both the Master Node and the Media Nodes. Since the Media Nodes belong to an Instance Pool, the process differs. The following section details the procedures:
Warning
This procedure requires downtime, as it involves stopping the Master Node.
-
Info
You can stop only the Master Node instance to change its shape, but it is recommended to stop the whole cluster to avoid any issues.
-
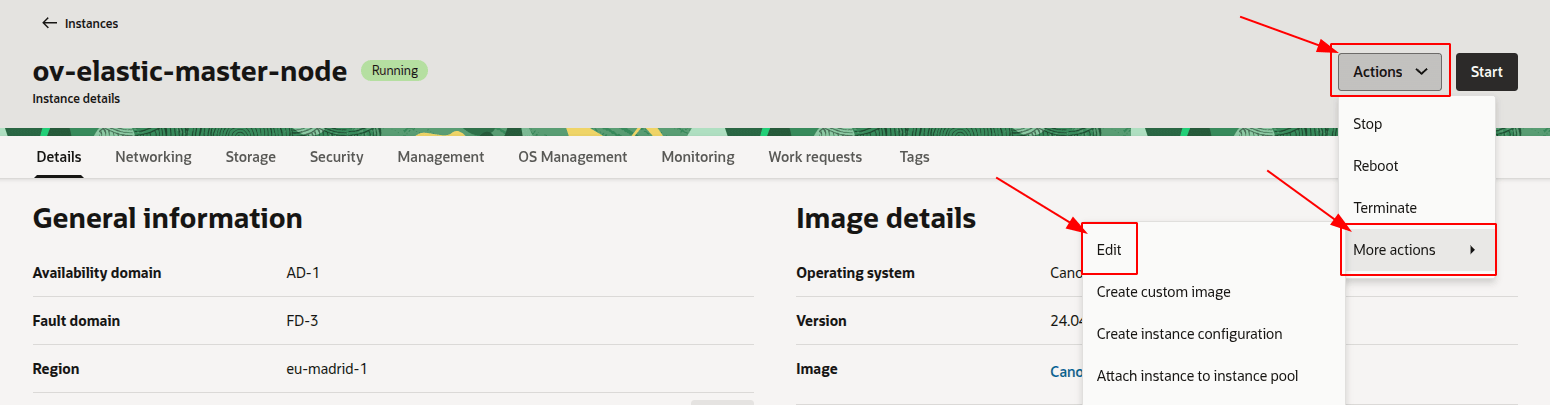
Go to the OCI Compute Instances and locate the resource with the name
<STACK_NAME>-master-nodeand click on it. - Click "Edit" next to the Shape field, select the new shape (or adjust OCPUs/Memory for Flex shapes) and click "Save changes".
- Start the cluster.
Warning
This will replace the running Media Nodes without graceful shutdown. If you want to drain them gracefully, run /usr/local/bin/graceful_shutdown.sh on each Media Node and wait for it to finish before changing the Instance Configuration, since the Instance Pool will terminate existing instances and launch new ones with the updated configuration.
- Navigate to the OCI Instance Configurations .
-
Locate the Instance Configuration used by
<STACK_NAME>-media-pool, click on it, open the "Actions" menu and select "Create duplicate". The form opens pre-filled with the current configuration — adjust the shape (or OCPUs/Memory for Flex shapes) and create the new Instance Configuration.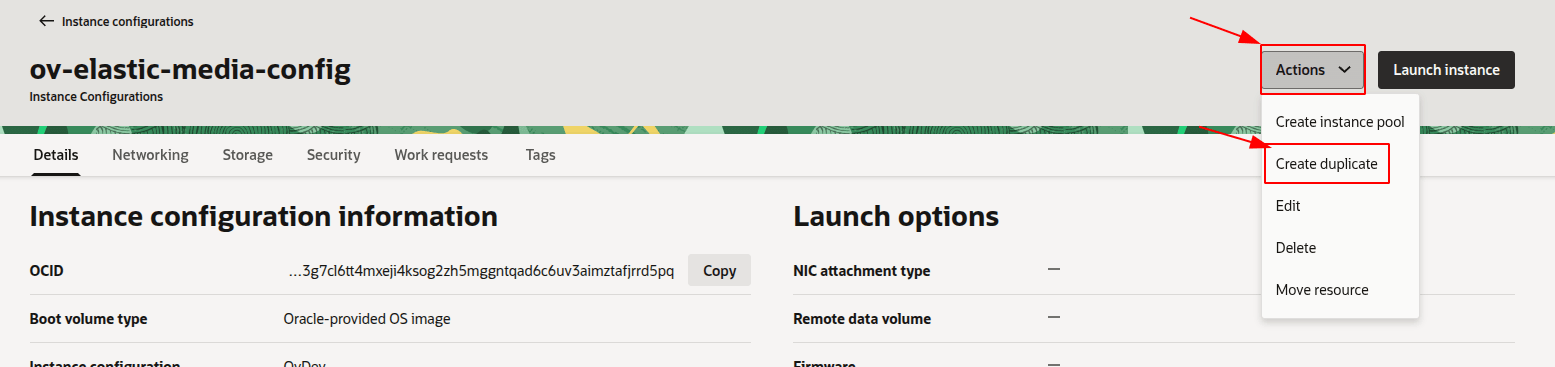
Warning
Only change the shape (or OCPUs/Memory for Flex shapes). Do not modify any other field — the rest of the configuration must remain identical to the original so the Instance Pool keeps working as expected.
-
Go back to the OCI Instance Pools , open
<STACK_NAME>-media-pool, click "Edit", and change the Instance Configuration to the one you just created. Click "Save changes" and wait for the Instance Pool to roll out the new configuration.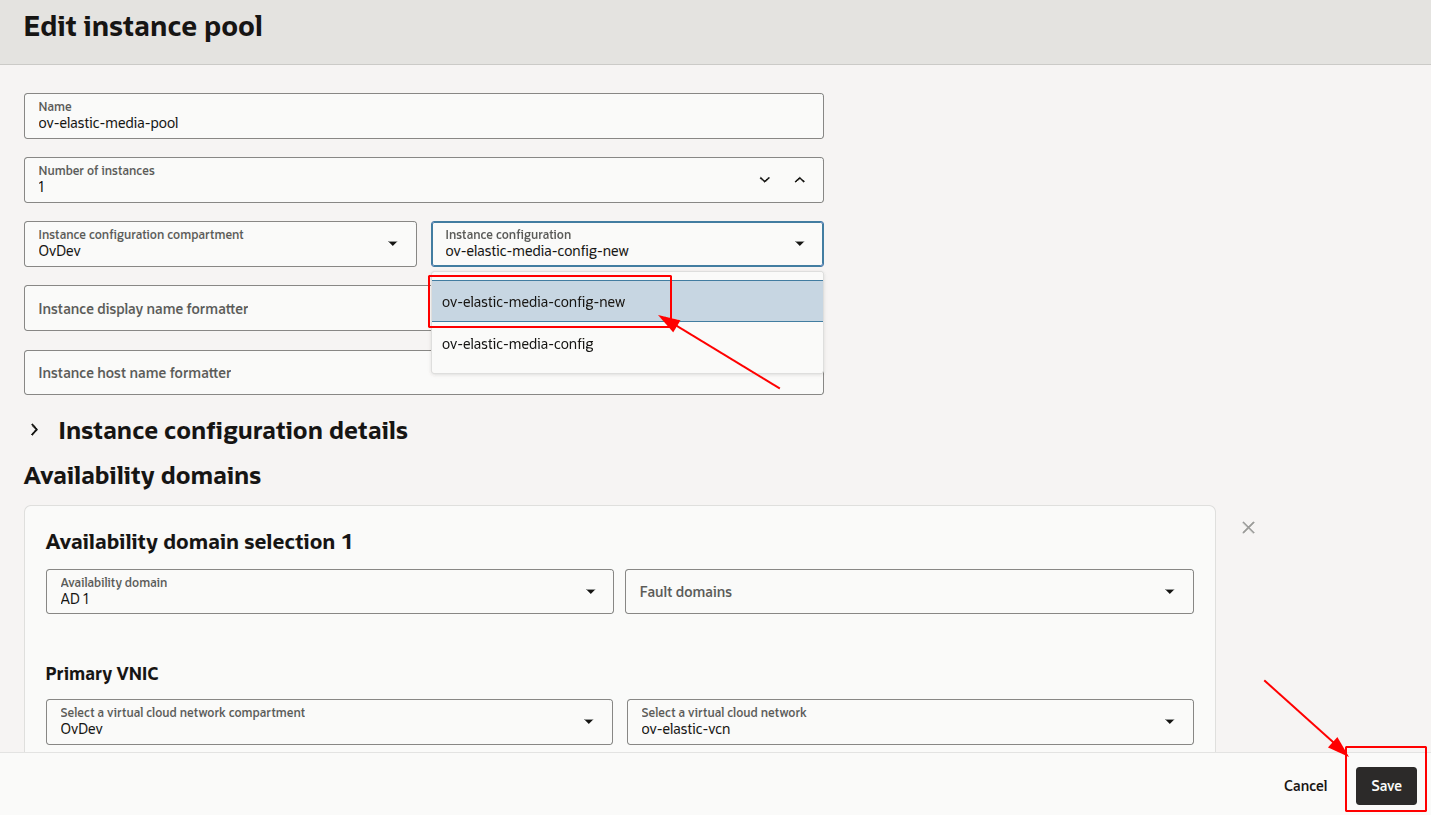
- Terminate the existing Media Nodes from the OCI Compute Instances page so the Instance Pool replaces them with new ones launched from the updated Instance Configuration. Old Media Nodes are not replaced automatically when the Instance Configuration changes — only newly launched instances use the new shape.
Media Nodes Autoscaling Configuration#
Warning
If you previously changed the Media Node shape by creating a duplicated Instance Configuration manually from the OCI Console, Terraform is unaware of it. Running terraform apply will point the Instance Pool back to its own Instance Configuration (the original one, recreated by Terraform), and the manually duplicated Instance Configuration will be orphaned.
You can modify the autoscaling configuration of the Media Nodes via the terraform.tfvars file and terraform apply:
-
Go to the
terraform.tfvarsfile and change the values related to autoscaling, such as:- scaleTargetCPU
- minNumberOfMediaNodes
- maxNumberOfMediaNodes
-
Open a terminal and run the following command once you have updated the value(s):
- Confirm the change that Terraform proposes (it will update the autoscaling configuration, and the scale-in OCI Function when
scaleTargetCPUorminNumberOfMediaNodeschange), and the changes will take effect.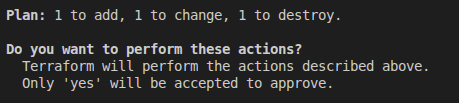
Fixed Number of Media Nodes#
You can switch between autoscaling mode (autoscaling Instance Pool + scale-in OCI Function) and fixed mode (a static number of Media Nodes with no autoscaling) by changing the fixedNumberOfMediaNodes variable and running terraform apply.
Switching modes does not recreate the Master Node. It carries a scale-in-mode freeform tag that Terraform flips in place (elastic ⇄ fixed), and the scale-in scripts on every node read this tag at runtime. The Master Node and the Media Node Instance Configuration are therefore left untouched — only the scale-in OCI Function and the autoscaling configuration are created or destroyed, and the Instance Pool is resized.
Warning
Any Media Nodes terminated during these transitions are killed immediately without running the graceful shutdown — active Rooms on those nodes are cut.
-
Go to the
terraform.tfvarsfile and set:fixedNumberOfMediaNodesto the desired number of Media Nodes (must be greater than 0).
-
Open a terminal and run:
-
Confirm the change that Terraform proposes. It will destroy the scale-in OCI Function and the autoscaling configuration, flip the Master Node's
scale-in-modetag tofixed, and resize the Instance Pool to the fixed number of Media Nodes.
Activate Scale In#
Switch a fixed-size deployment back to autoscaling mode, re-enabling automatic Media Node scaling and the scale-in OCI Function.
-
Go to the
terraform.tfvarsfile and set:fixedNumberOfMediaNodesto0.scaleTargetCPUif you don't want the default.minNumberOfMediaNodesif you don't want the default.maxNumberOfMediaNodesif you don't want the default.
-
Open a terminal and run:
-
Confirm the change that Terraform proposes. It will recreate the scale-in OCI Function, re-attach the autoscaling configuration to the Instance Pool, and flip the Master Node's
scale-in-modetag back toelastic.
Administration and configuration#
Regarding the administration of your deployment, you can follow the instructions in section On Premises Elastic Administration.
Regarding the configuration of your deployment, you can follow the instructions in section Changing Configuration. Additionally, the How to Guides offer multiple resources to assist with specific configuration changes.
In addition to these, an Oracle Cloud Infrastructure deployment provides the capability to manage global configurations via the OCI Console using OCI Vault Secrets:
- Navigate to the OCI Secrets Manager in the OCI Console.
- Click the secret you want to change.
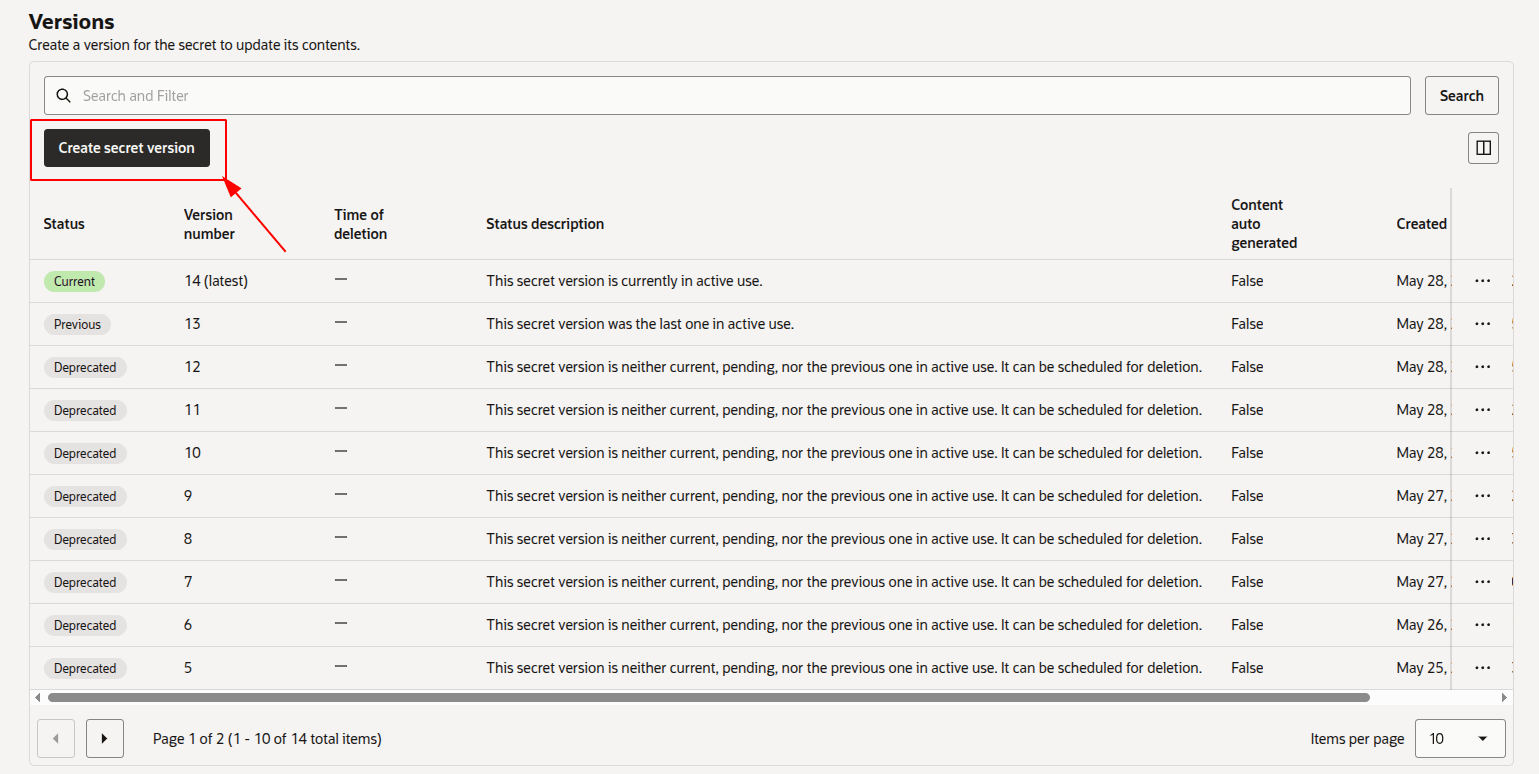
- Scroll down to "Versions" and click "Create secret version" to add a new version with the updated value.
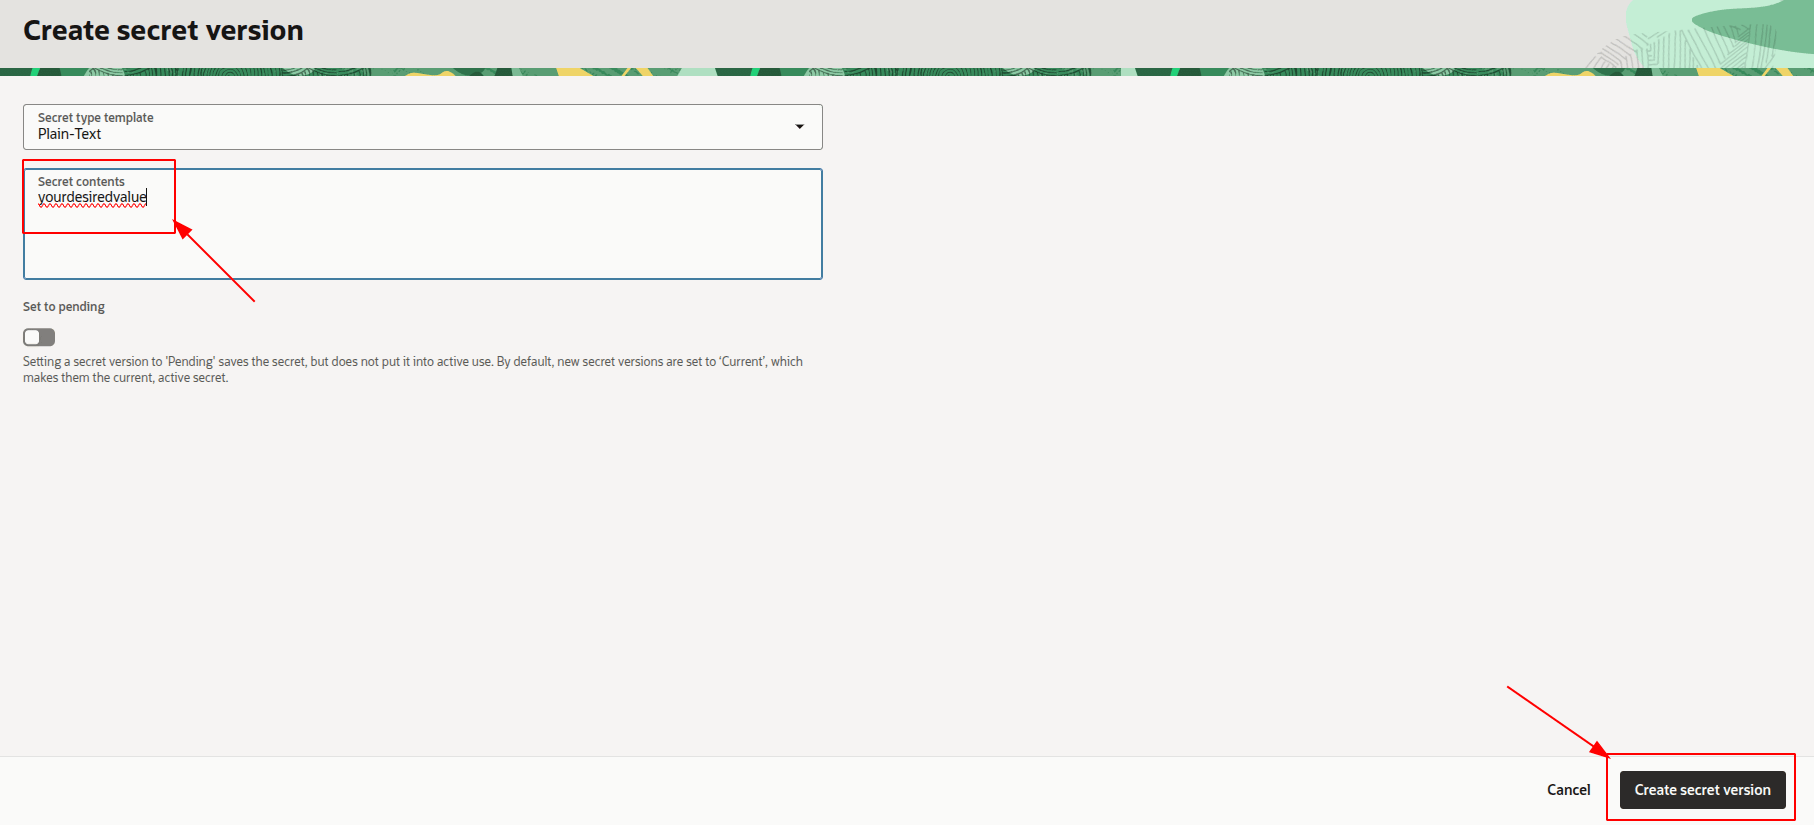
- Enter the new secret value and click "Create secret version".
- Shut down and start up the cluster to apply the changes to the OpenVidu Elastic deployment.
Changes will be applied automatically on all nodes of your OpenVidu Elastic deployment.
Backup and Restore#
Review the Backup and restore OpenVidu deployments guide for recommended backup workflows.