Users Tutorial#
This tutorial extends the Identified Guests tutorial to show how to create OpenVidu Meet users with the Users API and add them to a room as members.
A user is a real OpenVidu Meet account. Whereas an identified guest accesses the room through a unique link without an account, all user members share the room's user access URL and prove their identity by logging in with their own OpenVidu Meet credentials. A room can therefore admit both users and identified guests as members, in addition to the anonymous access kept from the previous tutorials.
Building on the Identified Guests tutorial, it adds the following:
- Create, list and delete OpenVidu Meet users.
- Add a user (in addition to identified guests) as a member of a room.
- A user member accesses the room by logging in with their OpenVidu Meet credentials.
The application uses the OpenVidu Meet API to manage users, rooms and room members, and the OpenVidu Meet WebComponent to embed the meeting.
Users, identified guests and anonymous guests
A room member can be a user (a real OpenVidu Meet account that authenticates with its credentials) or an identified guest (no account, accesses the room through a unique link). On top of explicit members, a room also accepts anonymous guests through the shared moderator/speaker links. See the Room Members feature for the full picture.
Running this tutorial#
1. Run OpenVidu Meet#
You need Docker Desktop. You can install it on Windows , Mac or Linux .
Run this command in Docker Desktop's terminal:
Info
For a detailed guide on how to run OpenVidu Meet locally, visit Try OpenVidu Meet locally .
2. Download the tutorial code#
3. Run the application#
To run this application, you need Node.js (≥ 18) installed on your device.
- Navigate into the application directory
- Install dependencies
- Run the application
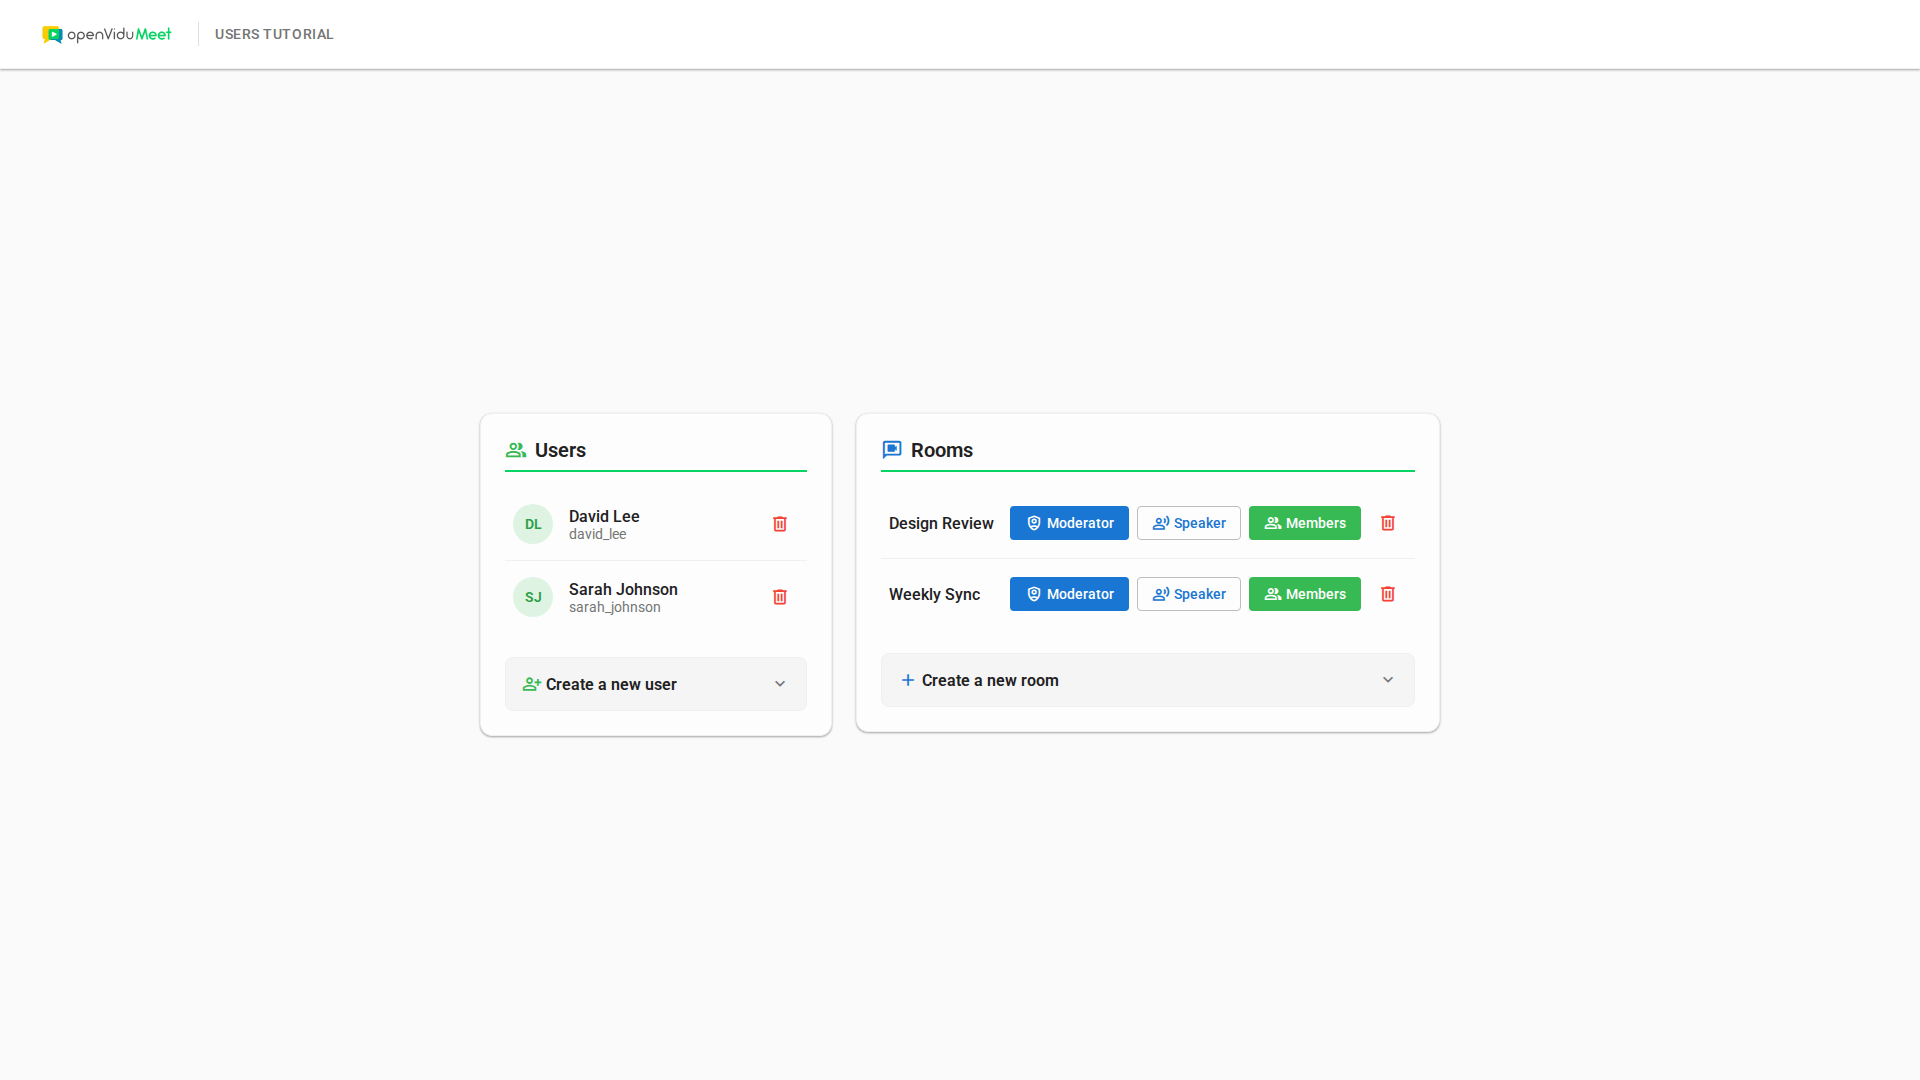
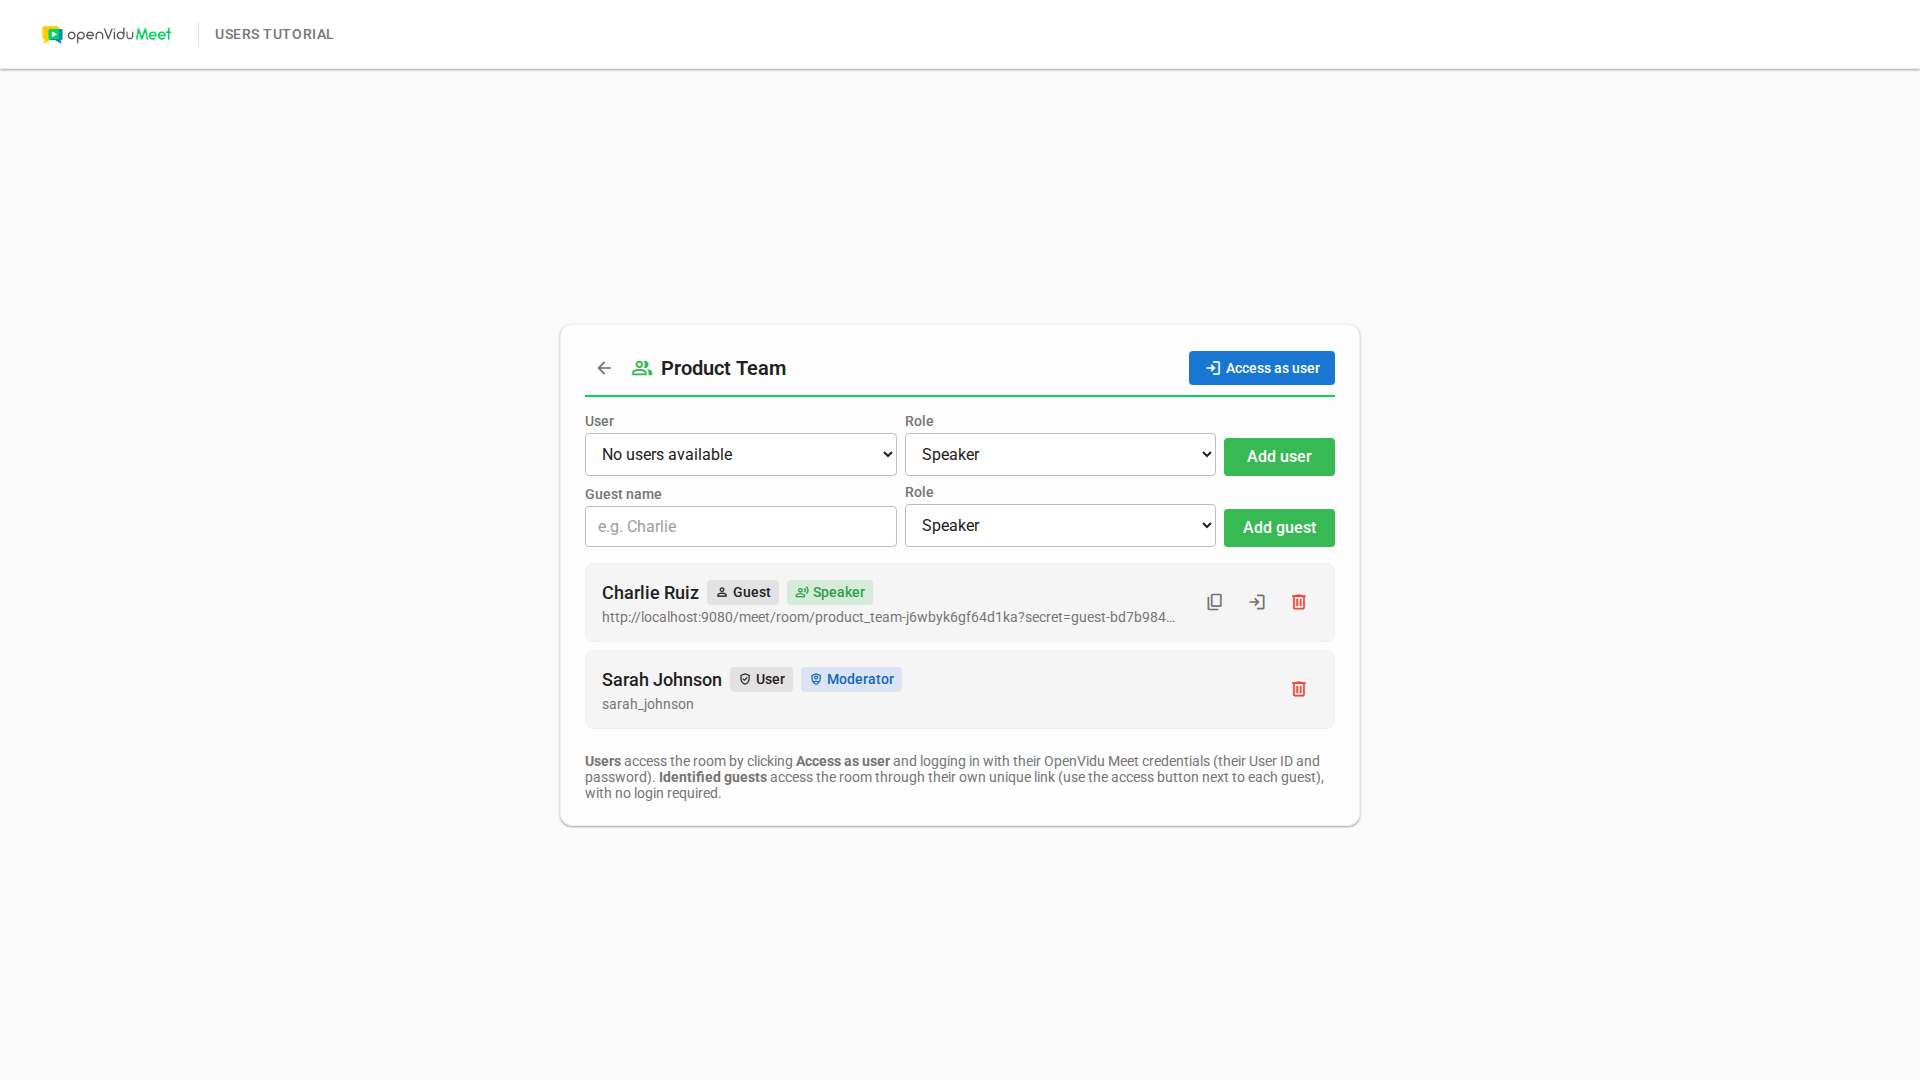
Once the server is up and running, you can test the application by visiting http://localhost:6080. You should see a screen like this:
Understanding the code#
This tutorial builds upon the Identified Guests tutorial: the room management, the anonymous access, the identified-guest handling, the application views and the shared helper functions are the same. Here we focus only on what is new — the Users API — and on the changes needed so a room can admit both users and identified guests.
Backend modifications#
This tutorial adds three endpoints to manage users, and adapts two of the existing member endpoints:
POST /users: Create a new OpenVidu Meet user. (new)GET /users: List the available users. (new)DELETE /users/:userId: Delete a user. (new)POST /rooms/:roomId/members: now adds either a user (userId) or an identified guest (name).GET /rooms/:roomId/members: now lists all members, without filtering by type.
The room endpoints (POST /rooms, GET /rooms, DELETE /rooms/:roomId) and the DELETE /rooms/:roomId/members/:memberId endpoint are identical to the Identified Guests tutorial.
Create user#
The POST /users endpoint creates a new OpenVidu Meet user:
| index.js | |
|---|---|
| |
- The
userId,nameandpasswordare obtained from the request body. - If any of them is missing, the server returns a
400 Bad Requestresponse. - The user is created with the
room_memberrole. Among the available roles (admin,room_managerandroom_member),room_memberis the most restricted: it can only access the rooms where it has been explicitly added as a member, and cannot create or manage rooms. - The server returns a
201 Createdresponse with the created user object.
This endpoint creates a user with the OpenVidu Meet API by sending a POST request to the users endpoint, including the userId, name, password and role. The userId must be between 5 and 20 characters and contain only lowercase letters, numbers and underscores (this is validated in the frontend form).
List users#
The GET /users endpoint retrieves the list of users:
| index.js | |
|---|---|
| |
- Fetch the users by sending a
GETrequest to theusersendpoint, filtering by theroom_memberrole (with a maximum of 100 users).
This endpoint lists only the room_member users. This keeps the tutorial focused on the users it creates and, in particular, excludes admin users, which cannot be added as room members.
Delete user#
The DELETE /users/:userId endpoint deletes a user:
| index.js | |
|---|---|
| |
- The
userIdis obtained from the request parameters. - Delete the user by sending a
DELETErequest to theusers/:userIdendpoint.
Adapting the member endpoints#
Adding a member uses the same POST /rooms/:roomId/members endpoint as the Identified Guests tutorial, but now accepts a userId (to add a user) in addition to a name (to add an identified guest). The field provided selects the member type:
| index.js | |
|---|---|
| |
- The request body now carries either a
userId(the user to add) or aname(the identified guest to add), plus thebaseRole. - If a
userIdis provided, the member is created as auser(linked to a user account); otherwise thenamecreates anidentified_guest. Both are added through the samerooms/:roomId/membersendpoint.
Listing members no longer filters by type, so both users and identified guests are returned:
| index.js | |
|---|---|
| |
- The
typefilter from the Identified Guests tutorial is removed, so the endpoint returns every member of the room regardless of its type.
Removing a member (DELETE /rooms/:roomId/members/:memberId) is exactly the same as in the Identified Guests tutorial.
Frontend modifications#
The frontend adds a panel to manage users, lets the members view add either a user or an identified guest, and adds a Access as user action. The rooms management (including the anonymous access), the identified-guest handling and the shared helpers are unchanged from the Identified Guests tutorial.
Managing users#
When the "Create User" form is submitted, the createUser() function is called:
| app.js | |
|---|---|
| |
- Prevent the default form submission so the page is not reloaded.
- Get the
userId,nameandpasswordfrom the form inputs. Theuser-idinput enforces the format constraints (5-20 characters, lowercase letters, numbers and underscores) through HTML validation attributes. - Make a
POSTrequest to the/usersendpoint to create the user. - Add the new user to the start of the local
usersmap (with theprependToMaphelper, so newly created users appear first) and re-render the list. - If the request fails (for example, a duplicated
userId), the error message returned by the API is shown in the form.
The renderUsers() and deleteUser() functions follow the same pattern as their room counterparts (renderRooms() and deleteRoom()): one renders the list of users from the users map, and the other calls DELETE /users/:userId and removes the user from the list.
Adding a member (user or identified guest)#
The members view now has two add forms. The identified-guest form (and its addGuest() handler) is inherited from the previous tutorial. The new user form is populated from a dropdown of the users that are not already members of the room:
| app.js | |
|---|---|
| |
- Filter out the users that are already members of the room (a user member's
memberIdequals the user'suserId). - Build one
<option>per available user, using theuserIdas the option value.
When the user form is submitted, the addUser() function adds the selected user as a member:
| app.js | |
|---|---|
| |
- Get the selected
userIdfrom the dropdown and the chosenbaseRole. - Make a
POSTrequest to the/rooms/:roomId/membersendpoint with theuserId, which adds the member as auser.
Rendering members of both types#
The getMemberListItemTemplate() function now distinguishes the two member types: identified guests keep their unique link and copy/access buttons, while users only show a remove button (they access through the room's Access as user action):
| app.js | |
|---|---|
| |
- Detect the member type.
member.typeis'identified_guest'or'user'. - Only identified guests get the copy-link and access buttons (their access is the unique link). Users get just the remove button, plus a
User/Guestbadge so both types are easy to tell apart in the list.
Accessing the room as a user#
All user members of a room share the same user access URL, available in the access.user.url property of the room object. The accessAsUser() function accesses the room through that URL, reusing the shared accessRoom() function from the previous tutorial:
accessRoom() is unchanged from the Identified Guests tutorial: it embeds the OpenVidu Meet WebComponent for the given URL and returns to the members view when the participant asks to close OpenVidu Meet.
User members log in inside the meeting
The authenticated access URL (access.user.url) does not carry any secret. When the WebComponent loads it, OpenVidu Meet renders its own login form inside the component, and the user logs in with their OpenVidu Meet credentials (the userId and password created earlier). After logging in, OpenVidu Meet verifies that the user is a member of the room and lets them access the room with the permissions of their base role. Your application never handles the user's password: identity is proven through OpenVidu Meet's login, while membership and permissions are managed through the Room Members API.
Accessing this tutorial from other computers or phones#
To access this tutorial from other computers or phones, follow these steps:
-
Ensure network connectivity: Make sure your device (computer or phone) is connected to the same network as the machine running OpenVidu Meet and this tutorial.
-
Configure OpenVidu Meet for network access: Start OpenVidu Meet by following the instructions in the Accessing OpenVidu Meet from other computers or phones section.
-
Update the OpenVidu Meet server URL: Modify the
OV_MEET_SERVER_URLenvironment variable in your.envfile to match the URL shown when OpenVidu Meet starts. -
Update the OpenVidu Meet WebComponent script URL: In the
public/index.htmlfile, update the<script>tag that includes the OpenVidu Meet WebComponent to use the same base URL as above. -
Restart the tutorial to apply the changes:
-
Access the tutorial: Open your browser and navigate to
https://192-168-1-100.openvidu-local.dev:6443(replacing192-168-1-100with your actual private IP) on the computer where you started the tutorial or any device in the same network.
Connecting this tutorial to an OpenVidu Meet production deployment#
If you have a production deployment of OpenVidu Meet (installed in a server following deployment steps ), you can connect this tutorial to it by following these steps:
-
Update the server URL: Modify the
OV_MEET_SERVER_URLenvironment variable in the.envfile to point to your OpenVidu Meet production deployment URL. -
Update the API key: Ensure the
OV_MEET_API_KEYenvironment variable in the.envfile matches the API key configured in your production deployment. See Generate an API Key section to learn how to obtain it. -
Update the OpenVidu Meet WebComponent script URL: In the
public/index.htmlfile, update the<script>tag that includes the OpenVidu Meet WebComponent to use the same base URL as above. -
Restart the tutorial to apply the changes:
Make this tutorial accessible from other computers or phones
By default, this tutorial runs on http://localhost:6080 and is only accessible from the local machine. If you want to access it from other computers or phones, you have the following options:
- Use tunneling tools: Configure tools like VS Code port forwarding , ngrok , localtunnel , or similar services to expose this tutorial to the internet with a secure (HTTPS) public URL.
- Deploy to a server: Upload this tutorial to a web server and configure it to be accessible with a secure (HTTPS) public URL. This can be done by updating the source code to manage SSL certificates or configuring a reverse proxy (e.g., Nginx, Apache) to serve it.