Create AWS certificate for OpenVidu HA deployment#
You will need this certificate to deploy the High Availability deployment. This guide shows you how to create it.
Prerequisites#
It is important to note that you will need access to the Certificate Manager in your AWS account, as well as access to a domain provider. You will need a domain to be able to create and associate the certificate.
Creation#
These are the steps you need to follow to create the AWS certificate; keep in mind that you need a domain.
First, go to AWS Certificate Manager and request a new public certificate. The following parameter is the most important.
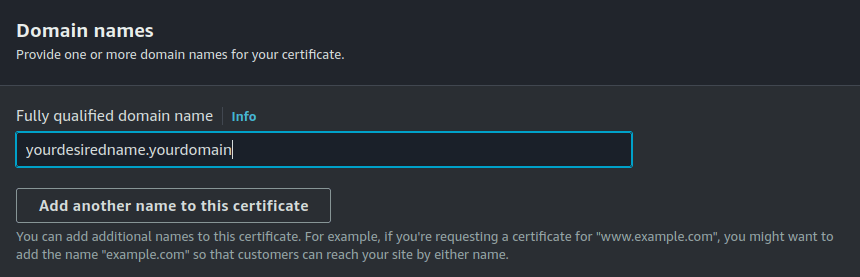
Domain configuration
You need to replace yourdesiredname for whatever name you want and yourdomain for the name of the domain that you own.
Next, leave the rest of the parameters as they are and click request.
The next page will display the certificate status. Here you will need to create a record in your domain provider to validate the status; initially it will show as pending.
Here you will need to create a new CNAME record in the domain you own by using the CNAME name (up to the domain name portion) as the subdomain and the CNAME value as the record value.
In AWS Certificate Manager, you can check the CNAME name and value by clicking on the certificate you want.
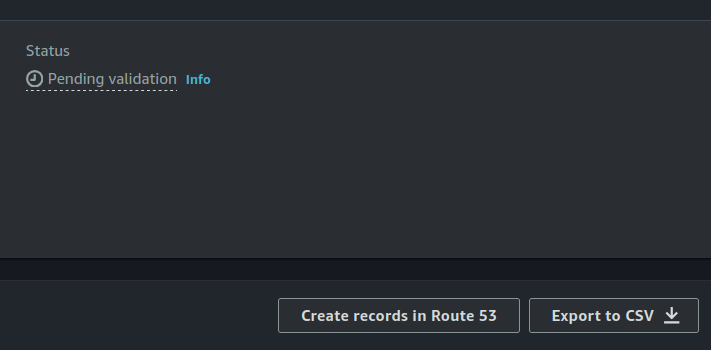
You need to click the button called Create records in Route 53. This will lead you to the next page, where you just click Create records and that's it.
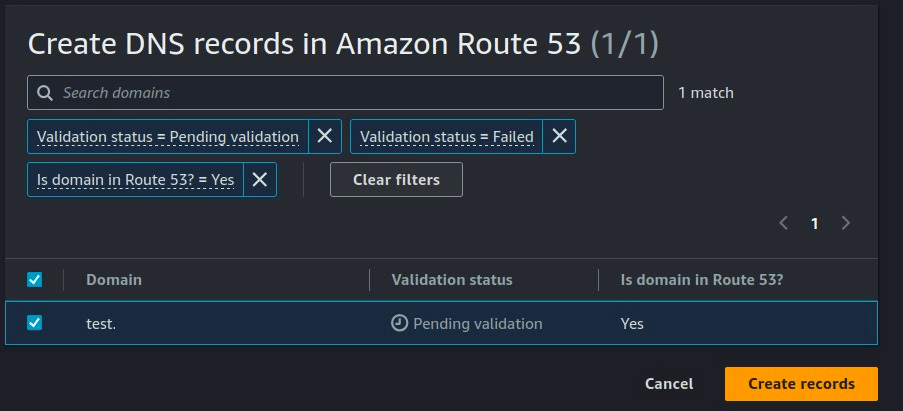
Create record for certificate
Please verify that you have a new entry in the records table of the specified Hosted Zone in Route 53 with the CNAME of the certificate you just created.
Try refreshing until the status changes to Issued (shown in green).
Finally, when deploying the HA stack in CloudFormation, follow these steps:
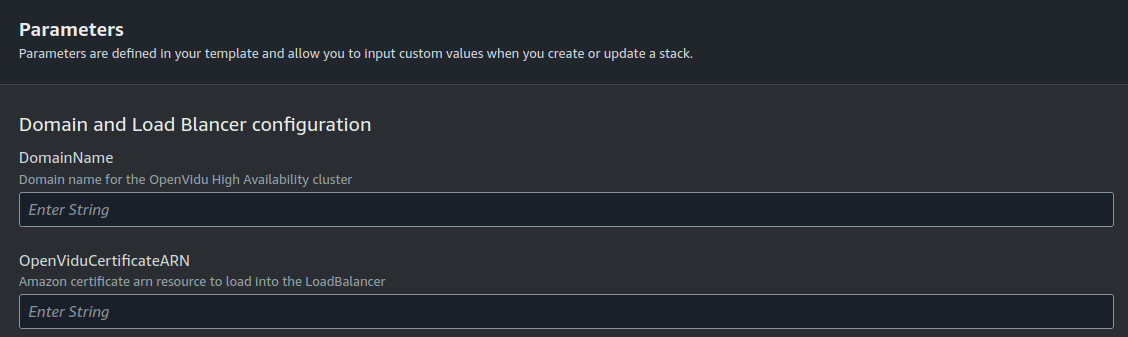
These are parameters related to the certificate you just created.
You have to fill in the DomainName field with the domain name that appears in the certificate you created, the one that matches yourdesiredname.yourdomain mentioned earlier.
Next, for the OpenViduCertificateARN, you can find it at the top of the same page mentioned earlier; it is called ARN, as you can see in the image below.
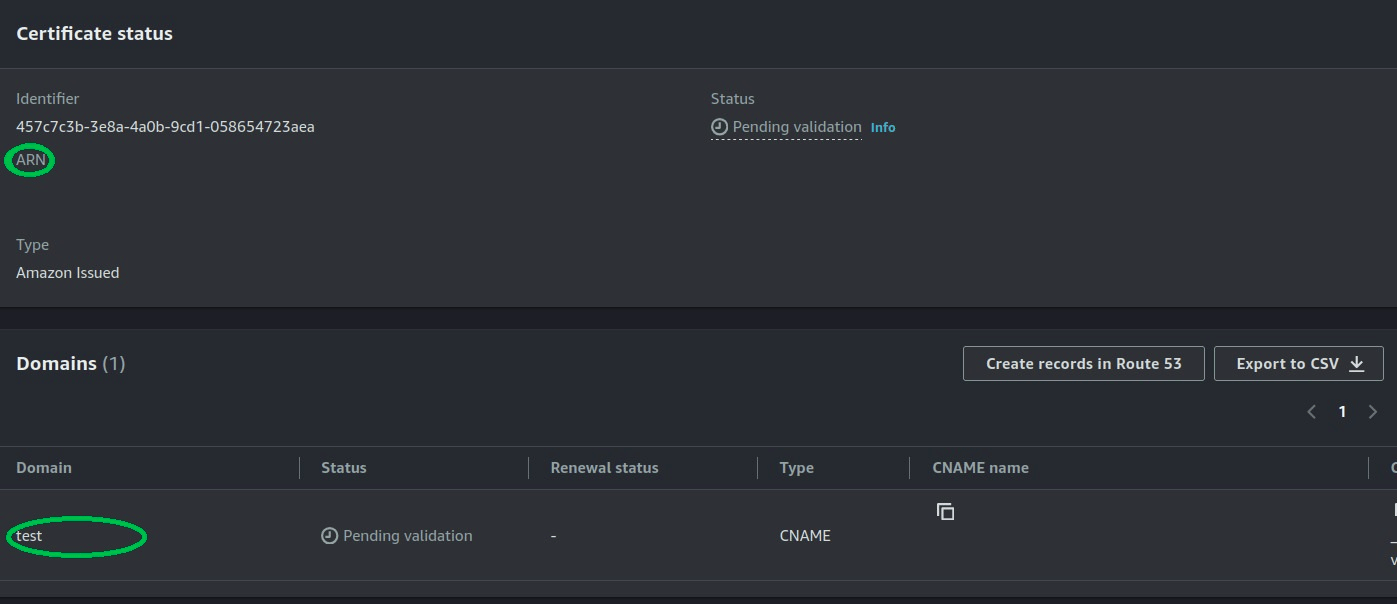
Domain name and ARN location
When everything is up and running, you will need to create a new record in the Hosted Zone referring to the Load Balancer resource created in the stack.
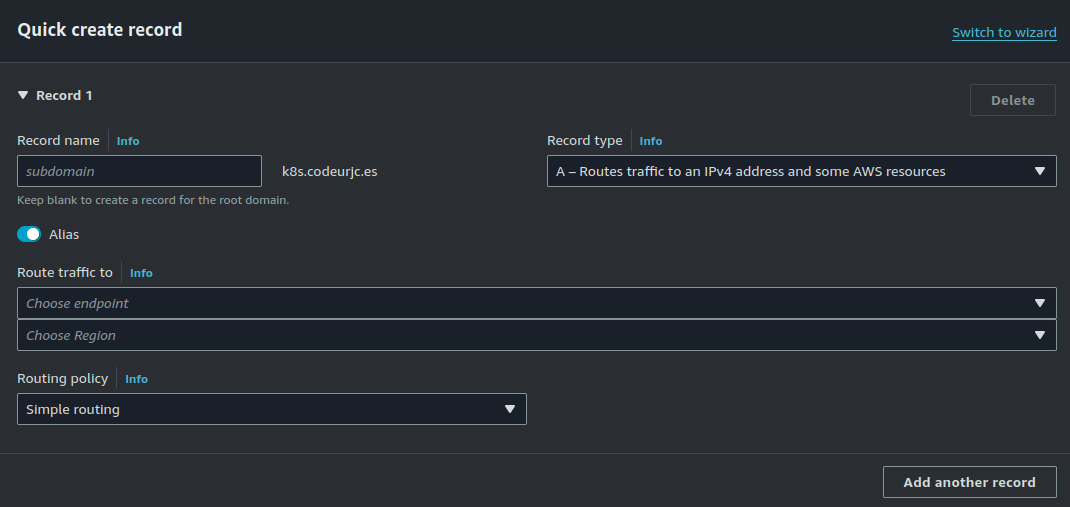
Note that Alias is checked.
In subdomain, just enter the same value you used for yourdesiredname when creating the AWS certificate.
In Choose endpoint, select Alias to Network Load Balancer, and in Choose Region, select the region where the stack is deployed.
After selecting the endpoint and region, a new field will appear; select the load balancer that belongs to the stack you have deployed.
For the other fields, leave them as they are.