Deploy OpenVidu on Hetzner Cloud in 15 Minutes#
This post is a getting-started guide to OpenVidu on Hetzner Cloud. It gathers in one place all the steps needed to go from an empty Hetzner account to a working OpenVidu deployment in a few minutes: which instance to pick, which ports to open, and the one command that installs everything. It is deliberately shorter than the official self-hosting documentation; the goal here is a running deployment today, not covering every option.
The server and its firewall are created in the Hetzner Cloud console , and everything from there on happens over SSH inside the instance. The result is a production-grade video conferencing stack with valid HTTPS, running OpenVidu Meet, reachable from any browser. Hetzner bills by the hour, so if the goal is just to try OpenVidu, the server can be deleted at the end and the whole experiment costs cents.
This is the first post in a series of per-cloud quick starts. Hetzner comes first for two reasons: its hourly billing makes a complete test run cost well under a euro, and this guide adds one more provider alongside the official installation guides for AWS, Azure, GCP, DigitalOcean and Oracle. The deployment below uses the generic on-premises installer, which works on any Ubuntu machine with a public IP.
What you're deploying, and what it costs#
The deployment is OpenVidu Single Node Community. One VM running the OpenVidu server (LiveKit protocol compatible), OpenVidu Meet as a ready-to-use video calling app, an administration dashboard, MinIO for recordings, Redis, MongoDB, and Caddy as a reverse proxy that handles the TLS certificate. It is the same production-ready setup the official docs describe, not a stripped-down demo. It's free and open source, and a single node has far more headroom than a test call needs.
The minimum requirements are 4 GB of RAM, 4 CPU cores, Linux and a public IP. On Hetzner, the plan that covers them is the CPX32, from the Regular Performance shared line (the name shifts slightly by region; in the US datacenters it is CPX31):
| CPX32 | |
|---|---|
| vCPU | 4 (shared AMD) |
| RAM | 8 GB |
| Disk | 160 GB SSD |
| Traffic included | 20 TB |
| Price | ~€42.94/month + €0.50/month for the IPv4 |
| Billed | Hourly (~€0.069/h), capped at the monthly price |
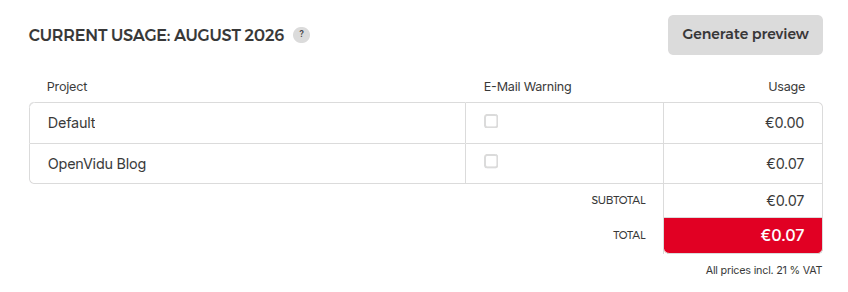
Prices are from August 2026, taken from the server creation form itself; Hetzner has adjusted them several times this year, so check the current pricing before relying on this table. The number that matters for this post is the hourly one: the bill covers the hours the server exists and that's it. For reference, this is what the deployment behind this post actually cost — server, IPv4 and VAT included:
Step 1: Create the server#
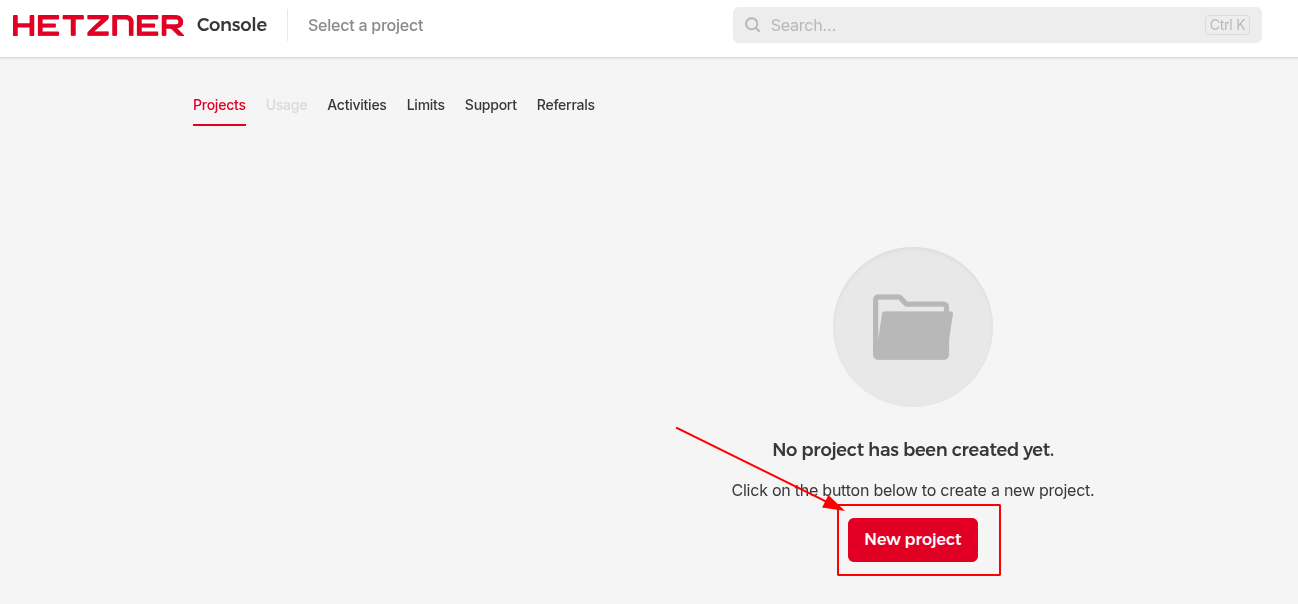
Create a Hetzner Cloud account (sign-up asks for a payment method) and, once inside the console, create a project; the server and its firewall will live in it:
An SSH key is needed to log into the server. If there isn't one on your machine yet, generate it, then print the public half; that's what Hetzner asks for (the private key never leaves your machine):
Then, inside the project, add a server. The creation form is a single page; going through its sections in order:
- Type: under Shared Resources → Regular Performance, select CPX32 (4 vCPU / 8 GB).
- Location: whichever is closest to you. The German and Finnish datacenters are the cheapest; the US and Singapore cost slightly more.
- Image: Ubuntu 24.04 LTS.
- Networking: keep the public IPv4 enabled; an IPv6-only server would lock out clients that can't reach it.
-
SSH keys: click Add SSH key. In the SSH key field, paste the exact output of the
catcommand above — one line starting withssh-ed25519and ending withuser@host. Never paste the private key (the file without.pub). Fill Name with anything that identifies the key and confirm with Add SSH key: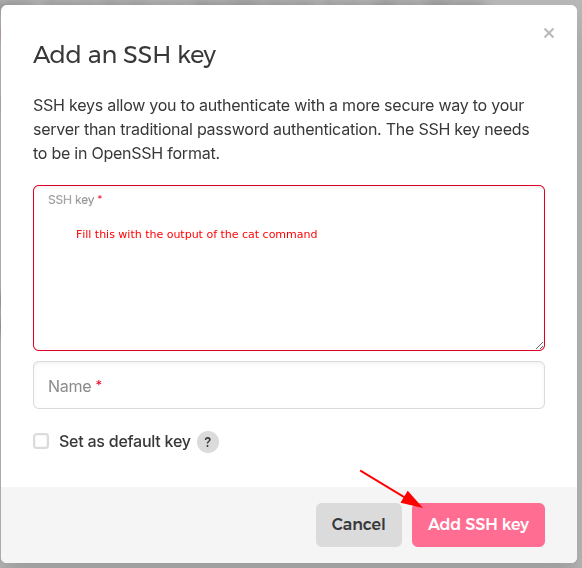
Everything else can stay at its default; the firewall is handled in the next step.
Click Create & Buy now and the server is up in well under a minute. Copy its public IPv4 address from the project's server list; it's <your-server-ip> for the rest of this post.
Step 2: Open the ports#
A detail worth knowing about Hetzner: a fresh cloud server has no firewall at all. Every port is open to the internet. OpenVidu would technically work without touching anything, but a host running MongoDB and Redis should not sit fully exposed, even for an afternoon. So attach a Cloud Firewall.
In the console, go to Firewalls and click Create Firewall:
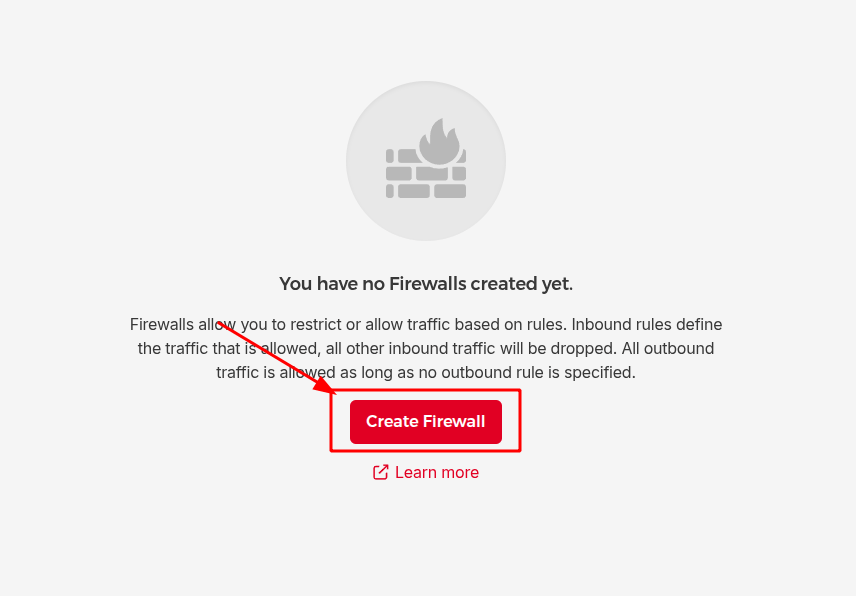
Add these inbound rules and apply the firewall to the server:
| Protocol | Port | Source | Why |
|---|---|---|---|
| TCP | 22 | Any IPv4/IPv6 | SSH (tighten to a single IP if possible) |
| TCP | 80 | Any IPv4/IPv6 | Let's Encrypt validation, HTTP→HTTPS redirect |
| TCP | 443 | Any IPv4/IPv6 | The apps, the APIs and TURN over TLS |
| UDP | 443 | Any IPv4/IPv6 | STUN/TURN over UDP |
| TCP | 7881 | Any IPv4/IPv6 | WebRTC over TCP, for clients behind strict NATs |
| UDP | 50000–60000 | Any IPv4/IPv6 | WebRTC media traffic |
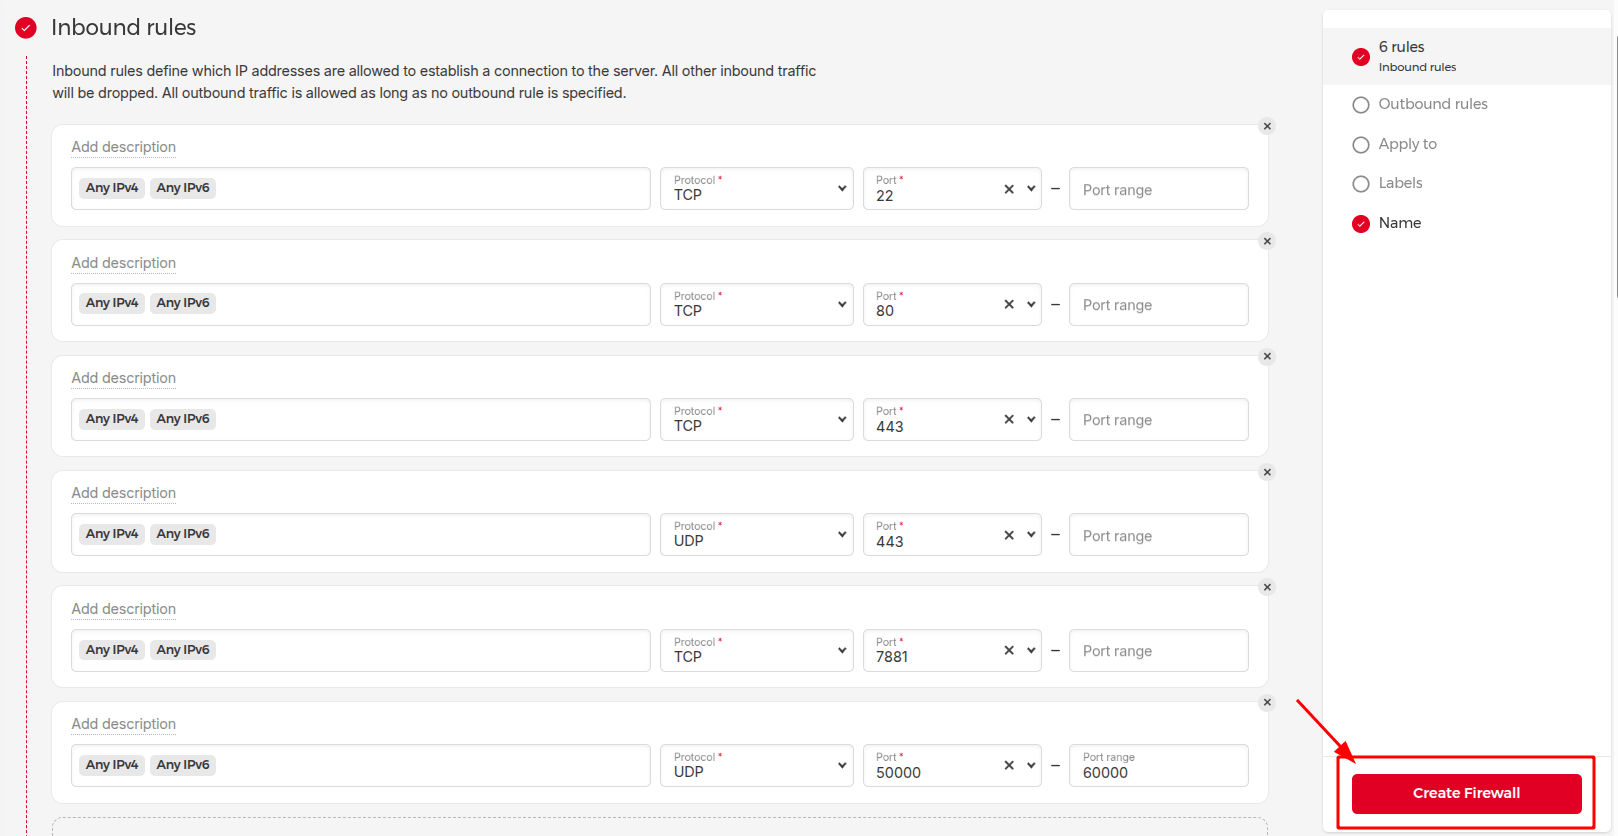
Before clicking Create Firewall, use the Apply to section of the same form to attach it to the server in one step.
The full port table in the docs lists three more optional ports. This guide skips them; each is one more rule away if the deployment ever needs it:
| Protocol | Port | Only needed for |
|---|---|---|
| TCP | 1935 | Ingesting RTMP streams (Ingress service) |
| UDP | 7885 | Ingesting WebRTC streams via WHIP |
| TCP | 9000 | Exposing the MinIO recordings bucket publicly |
Hetzner's Ubuntu images ship with no internal firewall enabled (no ufw, no firewalld), so the Cloud Firewall is the only layer to configure. If you enable ufw yourself out of habit, mirror the same rules there.
Step 3: Run the installer inside the instance#
From here on, everything happens in the instance's terminal. SSH in:
And run the installer:
The script checks for Docker and installs it if missing, then launches a configuration wizard right there in the terminal. For a test deployment you don't even need a domain name: use the defaults suggested by the wizard. What those defaults mean:
- Domain name: empty. Since January 2026, Let's Encrypt issues certificates for bare IP addresses , so the installer requests a valid short-lived certificate for the server's public IP directly. Real HTTPS, no domain, no DNS records, no self-signed warnings to click through.
- Certificate type: Let's Encrypt.
- Modules: OpenVidu Meet and Observability (the Grafana stack, with the deployment's logs and metrics). Both can stay enabled.
- Secrets and passwords: left empty, the wizard generates random values for all of them.
The installer pulls a dozen Docker images, so this step's duration depends mostly on datacenter bandwidth. On Hetzner it's a few minutes. When the banner appears:
everything is installed under /opt/openvidu and registered as a systemd service. Start it and check that it's healthy:
Give it a minute to come up, then confirm every container is running and none is stuck in a restart loop:
Step 4: Make your first call#
Still inside the instance, pull out the credentials. They live in two env files under /opt/openvidu/config/:
grep MEET_INITIAL_ADMIN /opt/openvidu/config/meet.env
grep -E 'LIVEKIT_URL|LIVEKIT_API_KEY|LIVEKIT_API_SECRET' /opt/openvidu/config/openvidu.env
Now open https://<your-server-ip>/ in a browser — the same public IPv4 the server list shows in the Hetzner console:
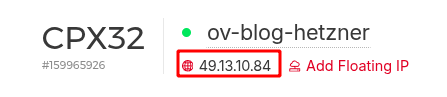
That's OpenVidu Meet, served from that address. Log in with admin and the MEET_INITIAL_ADMIN_PASSWORD value from meet.env to reach the management console:
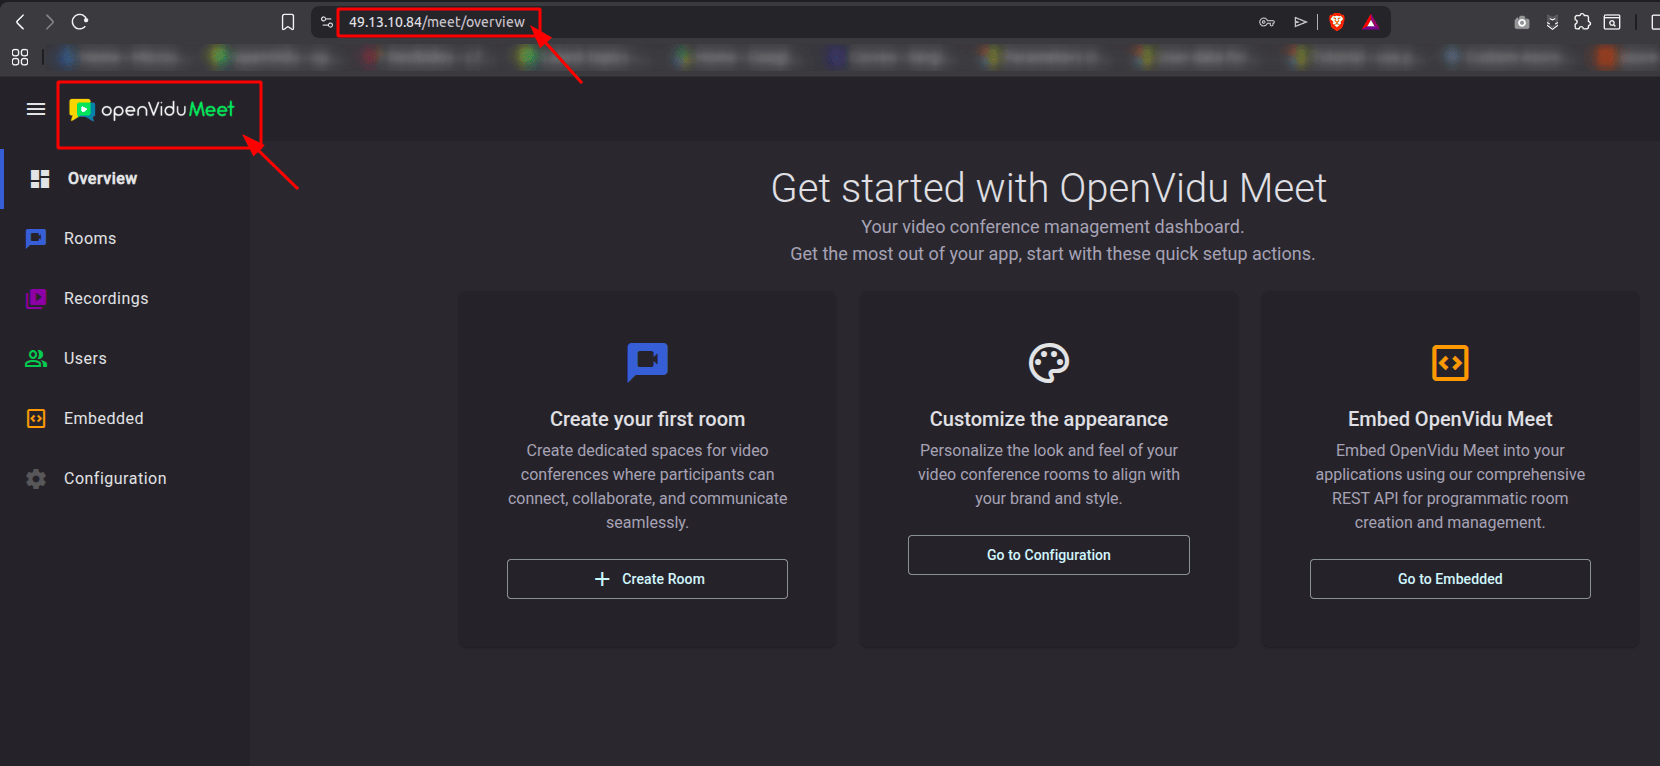
From there, Create Room, and open the invite link on your phone.
A few more things worth checking while the server is up:
- The dashboard, at
https://<your-server-ip>/dashboard(credentials inopenvidu.env). It shows rooms and participants live, which makes the "is this actually working?" question easy to answer. - The OpenVidu Platform API, based on LiveKit. The
LIVEKIT_URL,LIVEKIT_API_KEYandLIVEKIT_API_SECRETvalues grepped above are what an application uses to create rooms and tokens programmatically, with any LiveKit SDK. - The OpenVidu Meet API, a higher-level REST API to manage rooms, recordings and users without touching the LiveKit layer. Generate its API key from the console's Embedded section and authenticate requests with the
X-API-KEYheader.
Move it to production#
The stack deployed here is already production-grade; what separates a test from a deployment worth keeping is mostly configuration. Three upgrades finish the job:
- Point a domain at it. Create an
Arecord for, say,video.yourdomain.compointing to the server IP, then setDOMAIN_NAMEin/opt/openvidu/config/openvidu.envand restart the service. Changing the configuration covers the details. Certificates for a proper FQDN are the recommended setup for production. - Turn on backups in Hetzner (20% of the server price) or schedule snapshots.
- Lean on the Observability module. Grafana is already running at
https://<your-server-ip>/grafana(credentials inopenvidu.env), with the deployment's logs and metrics — useful the day something behaves oddly.
Why bother? Because this same server can do much more than a demo call: recordings stored in its built-in MinIO, AI services like live captions and transcription, RTMP stream ingestion, and a complete video calling product — OpenVidu Meet — ready to embed into your own application.
And if this was just a test, remember to delete the server in the Hetzner console so it doesn't keep billing hours; the IPv4 is released with it. To come back later, take a snapshot first (about a cent per GB per month) and restore it whenever.
Need more than this?#
This post took the shortest honest path, which means it skipped options you might need. The on-premises installation guide covers all of them: custom and ZeroSSL certificates, running behind your own proxy, plain Docker Compose installation, and a non-interactive mode to bake the whole install into cloud-init or Terraform.
And a single node is only the first of the deployment types. When one machine stops being enough, OpenVidu Elastic scales media nodes with demand and OpenVidu High Availability removes the single points of failure. The single node deployed here uses the same configuration model, so nothing learned today gets thrown away.
If you would like to explore this further, two good next steps could be:
- Compare the deployment options that fit a real workload, from this single node to elastic and HA setups.
- If what you actually need is video calls inside your own product, look at embedding OpenVidu Meet with your deployment's API key, or build directly on OpenVidu Platform with the LiveKit SDKs. You already have everything both require.
Next up in this series: the same fifteen minutes on other clouds. Same OpenVidu, different consoles.