OpenVidu High Availability administration: DigitalOcean#
DigitalOcean
The OpenVidu High Availability deployment on DigitalOcean is fully automated using the Terraform CLI. It provisions 4 Droplets for the Master Nodes, while Media Nodes are plain Droplets created and removed by a DigitalOcean Function that acts as the autoscaler.
Internally, the DigitalOcean High Availability deployment mirrors the On Premises High Availability deployment, allowing you to follow the same administration and configuration guidelines of the On Premises High Availability documentation. However, there are specific considerations unique to the DigitalOcean environment that are worth keeping in mind:
How Media Nodes are managed
- Terraform deploys the autoscaler as a DigitalOcean Function (namespace
<STACK_NAME>-autoscaler, functionautoscaler/check) and a scheduled trigger named<STACK_NAME>-autoscale-cronthat invokes it every four minutes. - Media Nodes created by the autoscaler are Droplets named
<STACK_NAME>-media-<TIMESTAMP>-<RANDOM>and tagged<STACK_NAME>-media-node-tag. They are not managed by Terraform, and they are not part of any Droplet Autoscale Pool. minNumberOfMediaNodes,maxNumberOfMediaNodes,initialNumberOfMediaNodes,scaleTargetCPUandmediaNodeInstanceTypeare baked into the function when it is deployed. They are changed by editingterraform.tfvarsand runningterraform apply, which redeploys the function: there is no autoscaling setting to edit in the DigitalOcean console.- If
fixedNumberOfMediaNodesis greater than 0, no autoscaler function is deployed and Media Nodes are Terraform-managed Droplets named<STACK_NAME>-media-node-<N>.
Cluster shutdown and startup#
You can start and stop the OpenVidu High Availability cluster at any time. Master Nodes are Droplets that you power off and on, while Media Nodes are ephemeral: they are drained and re-created instead of being powered off. The following sections detail the procedures:
To shut down the cluster, stop the autoscaler, then remove the Media Nodes, and finally power off the Master Nodes.
-
From the directory containing your Terraform state, remove the autoscaler so that no new Media Nodes are created:
This deletes only the scheduled trigger, the function and its namespace. The rest of the deployment is untouched.
Info
In a deployment with a fixed number of Media Nodes (
fixedNumberOfMediaNodesgreater than 0) there is no autoscaler function. Skip this step and power off the<STACK_NAME>-media-node-<N>Droplets the same way as the Master Nodes in step 4. -
Drain every Droplet tagged
<STACK_NAME>-media-node-tagas described in Removing a Media Node gracefully. Each Media Node waits for its active Rooms to end and then deletes itself. - After confirming that no Media Node is left, navigate to the DigitalOcean Droplet Web .
- Select the droplet called
<STACK_NAME>-master-node-1. Click on it to go to the Master Node 1 instance, then click "Power" and then "Turn off" the droplet.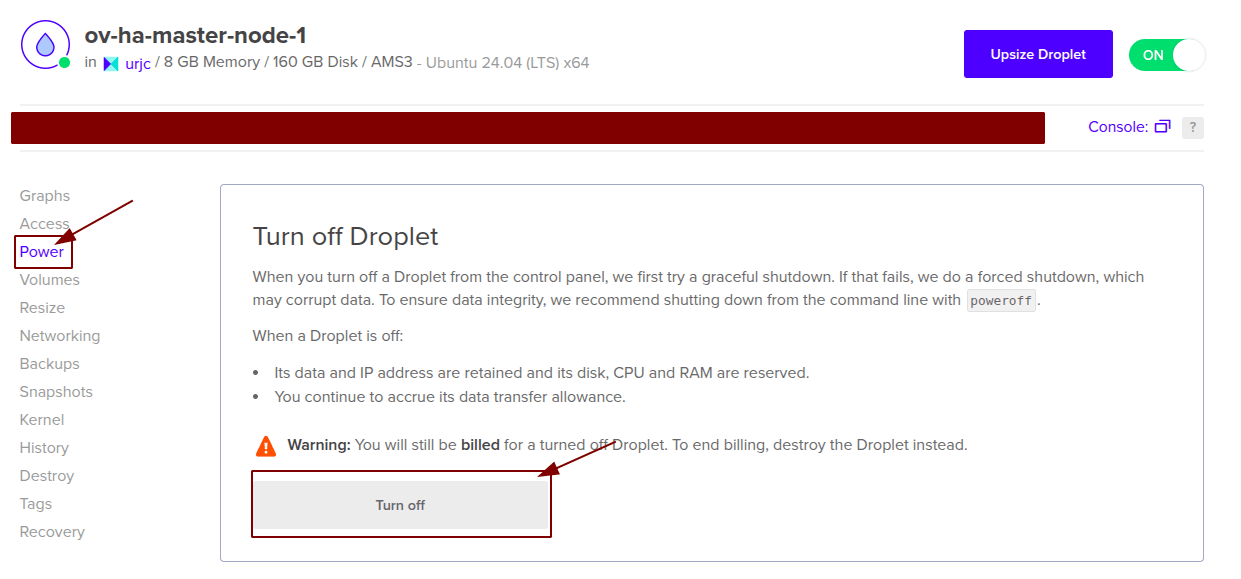
- Repeat step 4 for all Master Nodes.
To start the cluster, start the Master Nodes first and then let the autoscaler re-create the Media Nodes.
- Navigate to the DigitalOcean Droplet Web .
-
Select the droplet named
<STACK_NAME>-master-node-1, then go to "Power" and then "Turn on" the droplet.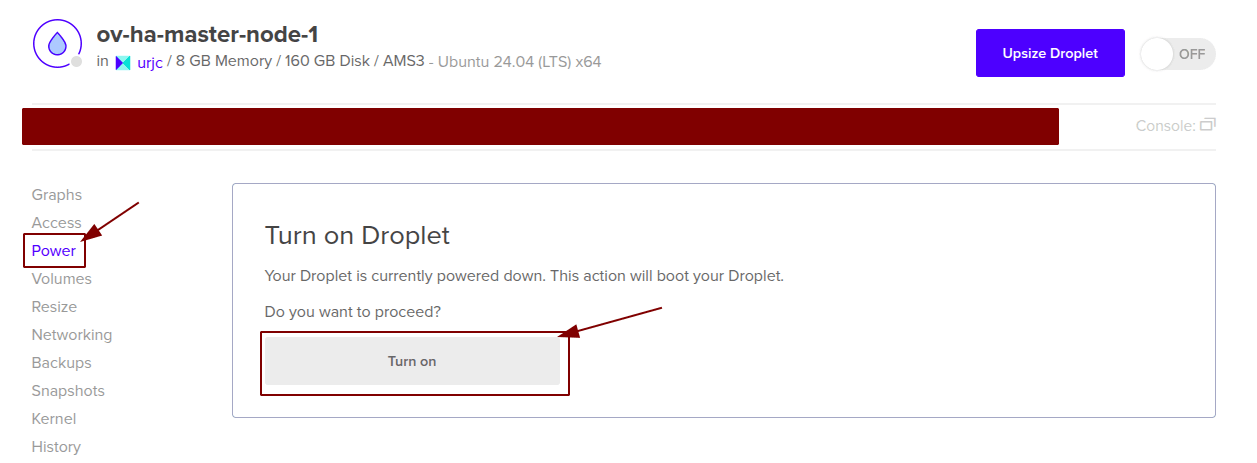
-
Wait until the instance is running.
- Repeat steps 2 and 3 until all Master Nodes are up and running.
-
Redeploy the autoscaler from the directory containing your Terraform state:
Terraform re-creates the function and its scheduled trigger and invokes the function once immediately, so the cluster goes back to
max(minNumberOfMediaNodes, initialNumberOfMediaNodes)Media Nodes without waiting for the first scheduled run.Info
With a fixed number of Media Nodes, power on the
<STACK_NAME>-media-node-<N>Droplets instead, following steps 2 and 3.
Removing a Media Node gracefully#
Media Nodes are removed through the <STACK_NAME>-draining tag. Every Media Node checks its own tags every two minutes and, as soon as the draining tag is present, it waits for its active Rooms to conclude and then deletes its own Droplet. This is exactly what the autoscaler does on a scale-in decision, and you can trigger it manually on any Media Node:
- Navigate to the DigitalOcean Droplet Web and click on the Media Node you want to remove. Media Nodes created by the autoscaler are named
<STACK_NAME>-media-<TIMESTAMP>-<RANDOM>. - Open the "Tags" section of the droplet and add the tag
<STACK_NAME>-draining. - In the same section, remove the tag
<STACK_NAME>-media-node-tagso the autoscaler stops counting this droplet as an active Media Node. - Within two minutes the Media Node starts its graceful shutdown. The droplet disappears once its active Rooms have finished.
Warning
Do not power off a Media Node to remove it. The autoscaler counts Droplets by tag, so a powered-off Media Node still counts towards minNumberOfMediaNodes and maxNumberOfMediaNodes while reporting no CPU metrics, and it never runs its graceful shutdown script.
If you do not need the graceful behavior, destroy the droplet directly ("Destroy" in the console). Active Rooms on it are interrupted, and the autoscaler brings the number of Media Nodes back to minNumberOfMediaNodes on its next run.
Info
With a fixed number of Media Nodes (fixedNumberOfMediaNodes greater than 0) the tag watcher is not installed, so tagging has no effect. Instead, SSH into the Media Node and run /usr/local/bin/graceful_shutdown.sh: it waits for the active Rooms to end and then deletes the droplet. Run terraform apply afterwards to re-create it.
Change the instance size#
It is possible to change the instance size of both the Master Nodes and the Media Nodes. Master Nodes are resized from the DigitalOcean console, while the Media Node size is a Terraform variable because Media Nodes are created by the autoscaler. The following section details the procedures:
Warning
This procedure requires downtime, as it involves stopping the Master Node.
-
Info
You can stop only the Master Node droplet to change its droplet size, but it is recommended to stop the whole cluster to avoid any issues.
-
Go to the DigitalOcean Droplet Web and locate the resource with the name
<STACK_NAME>-master-node-1and click on it. -
Click on "Upsize" and select the Droplet size you desire and click on "Resize"

-
Repeat step 3 on every Master Node.
- Start the cluster.
- Go to the
terraform.tfvarsfile and set mediaNodeInstanceType to the Droplet size you want. -
Open a terminal and run the following command:
-
Confirm the change that Terraform proposes. The Media Node size is baked into the autoscaler function, so Terraform redeploys it with the new value.
- Running Media Nodes keep their current size: only Media Nodes created after the apply use the new one. To roll out the change immediately, drain the running Media Nodes as described in Removing a Media Node gracefully; the autoscaler replaces them with Droplets of the new size on its next run.
Info
With a fixed number of Media Nodes, terraform apply applies the new size to the <STACK_NAME>-media-node-<N> Droplets that Terraform manages, which interrupts the Rooms running on them. To avoid that, first SSH into each Media Node and run /usr/local/bin/graceful_shutdown.sh (it waits for the active Rooms to end and then deletes the droplet), and then run terraform apply to re-create them with the new size.
Media Nodes Autoscaling Configuration#
You can modify the autoscaling configuration of the Media Nodes via terraform.tfvars file and terraform apply:
-
Go to the
terraform.tfvarsfile and change the config related to autoscaling, such as:- scaleTargetCPU
- minNumberOfMediaNodes
- maxNumberOfMediaNodes
- initialNumberOfMediaNodes
-
Open a terminal and write the following command once you've changed the value/s.
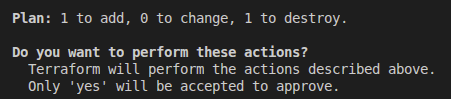
- Say yes to the proposed change that Terraform is suggesting (the changes are the autoscaler function redeploying with the new values), and your changes will be applied. The function is invoked once right after being redeployed, so the new limits take effect without waiting for the next scheduled run. Running Media Nodes are not affected.
How the autoscaler uses these values
- On a run where no Media Node exists, the cluster is brought straight to
max(minNumberOfMediaNodes, initialNumberOfMediaNodes)Media Nodes. The same logic re-creates missing Media Nodes: whenever the number of Media Nodes drops belowminNumberOfMediaNodes, the autoscaler creates the ones needed. - On every other run, the average CPU usage of the last four minutes across all Media Nodes is compared against
scaleTargetCPU: above it, one Media Node is added (never exceedingmaxNumberOfMediaNodes); below it, one Media Node is drained (never going belowminNumberOfMediaNodes). - Setting
minNumberOfMediaNodesequal tomaxNumberOfMediaNodeskeeps an exact number of Media Nodes while still using the autoscaler, so failed or drained nodes are replaced automatically. - If
initialNumberOfMediaNodesis greater thanmaxNumberOfMediaNodes, the extra Media Nodes are drained again on the following runs.
Tip
Every autoscaler run returns its full log in the activation result. You can review its decisions in the DigitalOcean console under "Functions", in the <STACK_NAME>-autoscaler namespace.
Change Fixed Number of Media Nodes#
You can change the fixed number of Media Nodes in case you put a number of fixed Media Nodes by following these steps:
- Go to the
terraform.tfvarsfile and set fixedNumberOfMediaNodes to the number of Media Nodes you want. - Open a terminal and write the following command once you've changed the value.
- Say yes to the proposed change that Terraform is suggesting. Terraform creates or destroys
<STACK_NAME>-media-node-<N>Droplets until their number matches the new value.
Warning
Lowering the value destroys Droplets without draining them, so the Rooms running on them are interrupted. To avoid this, SSH into the highest-numbered Media Nodes (they are the ones Terraform removes first) and run the /usr/local/bin/graceful_shutdown.sh script, which waits for the active Rooms to end and then deletes the droplet. Then lower fixedNumberOfMediaNodes and run terraform apply.
Activate Scale In when Fixed Number of Media Nodes#
You can activate or deactivate the scale in when you decide you need autoscale option activated or not.
-
Go to the
terraform.tfvarsfile and change the config related to autoscaling, such as:- fixedNumberOfMediaNodes needs to be set to 0.
- scaleTargetCPU if you don't want the default.
- minNumberOfMediaNodes if you don't want the default.
- maxNumberOfMediaNodes if you don't want the default.
- initialNumberOfMediaNodes if you don't want the default.
-
Open a terminal and write the following command once you've changed the value/s.
- Say yes to the proposed change that Terraform is suggesting (the changes are destroying the fixed number of media nodes and deploying the autoscaler function), and your changes will be applied. The autoscaler is invoked right after being deployed and creates
max(minNumberOfMediaNodes, initialNumberOfMediaNodes)Media Nodes.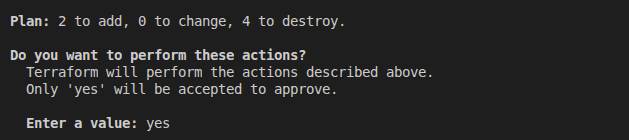
Warning
The fixed Media Node Droplets are destroyed without being drained, so their active Rooms are interrupted. Drain them first with the /usr/local/bin/graceful_shutdown.sh script if you need a graceful transition.
-
Go to the
terraform.tfvarsfile and change the config related to autoscaling, such as:- fixedNumberOfMediaNodes needs to be set to your desired value.
-
Open a terminal and write the following command once you've changed the value/s.
- Say yes to the proposed change that Terraform is suggesting. Terraform removes the autoscaler function (trigger, function and namespace), deletes every Droplet tagged
<STACK_NAME>-media-node-tagor<STACK_NAME>-draining, and creates the<STACK_NAME>-media-node-<N>Droplets. When the apply finishes, check in the Droplets console that the expected number of Media Nodes is running.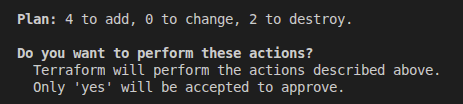
Warning
The Media Nodes are deleted without being drained, so their active Rooms are interrupted. Drain them first as described in Removing a Media Node gracefully if you need a graceful transition.
Administration and configuration#
Regarding the administration of your deployment, you can follow the instructions in section On Premises High Availability Administration.
Regarding the configuration of your deployment, you can follow the instructions in section Changing Configuration. Additionally, the How to Guides offer multiple resources to assist with specific configuration changes.
In addition to these, a DigitalOcean deployment provides the capability to manage global configurations by downloading secrets.env file of the bucket and changing it, then upload it again. Here are the detailed steps:
- Navigate to the DigitalOcean Spaces Object Storage and click on the cluster data bucket that you are using for the deployment.
-
Download the
secrets.envfile that is in the bucket.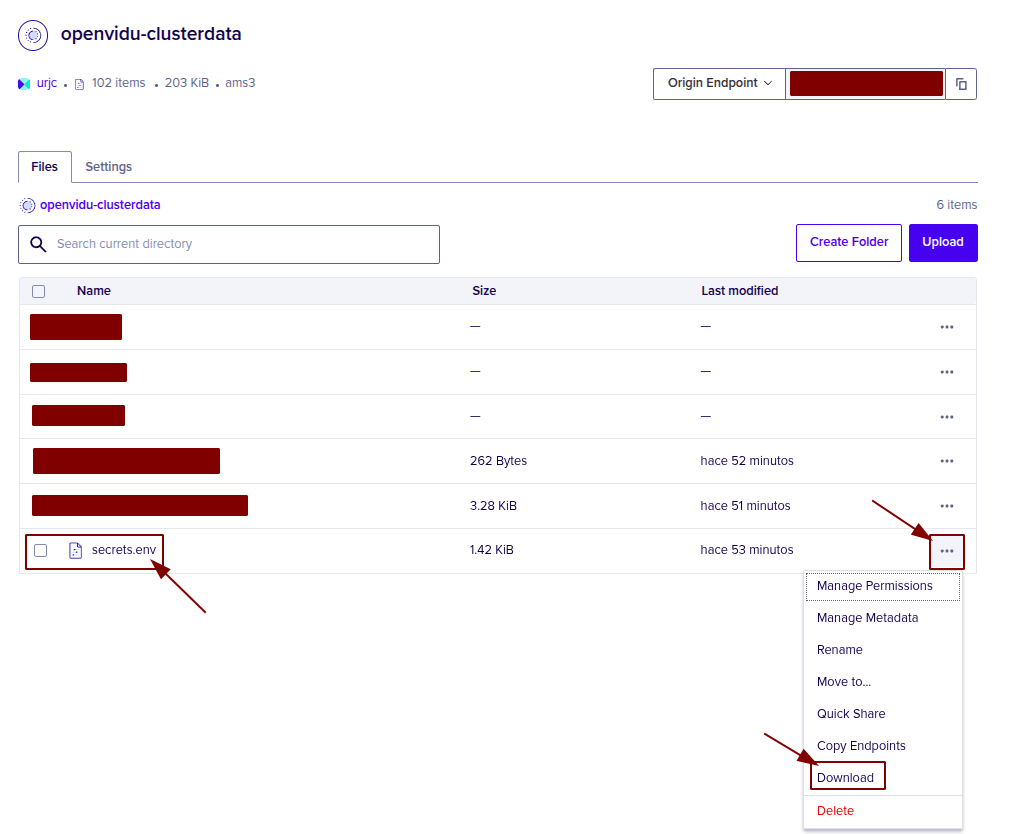
-
Open it and edit the credential values of your choice.
-
Upload the edited
secrets.envto the bucket, select private file and replace it.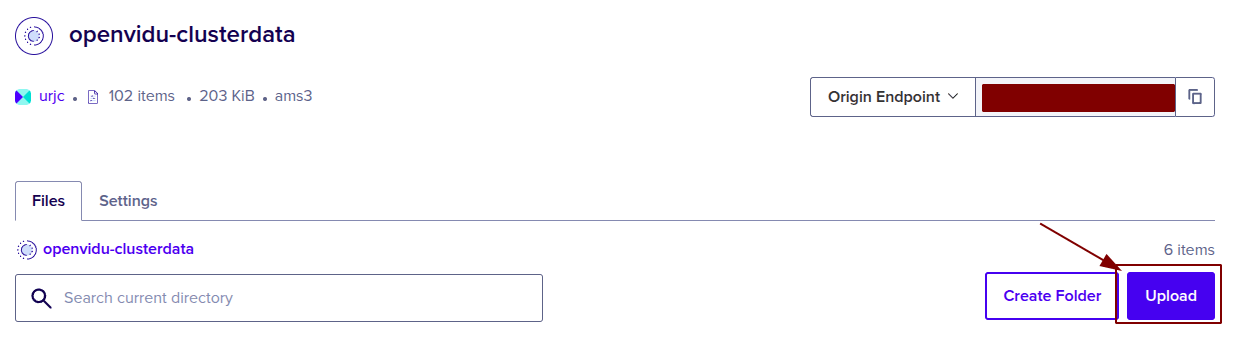
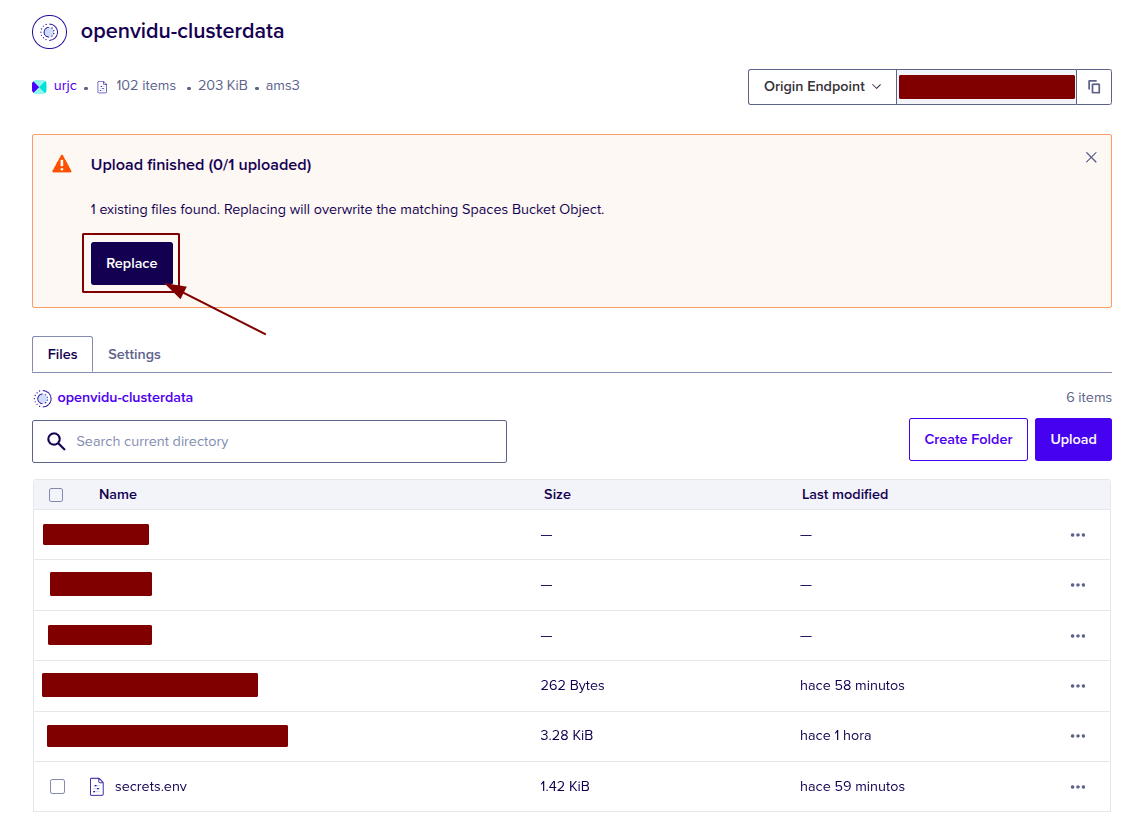
-
Restart Master Node 1 by shutting it down and then starting it again. Changes will be applied automatically in all the nodes of your OpenVidu High Availability deployment.
Backup and Restore#
Review the Backup and restore OpenVidu deployments guide for recommended backup workflows.