OpenVidu Single Node: AWS configuration and administration#
Warning
While in BETA this section is subject to changes. We are working to simplify the configuration and administration of OpenVidu Single Node.
AWS deployment of OpenVidu Single Node is internally identical to the on-premises deployment, so you can follow the same instructions from the On Premises Single Node for administration and configuration. The only difference is that the deployment is automated with AWS CloudFormation.
However, there are certain things worth mentioning:
Start and stop OpenVidu through AWS Console#
You can start and stop all services as explained in the On Premises Single Node section. But you can also start and stop the EC2 instance directly from the AWS Console. This will stop all services running in the instance and reduce AWS costs.
- Go to the EC2 Dashboard of AWS.
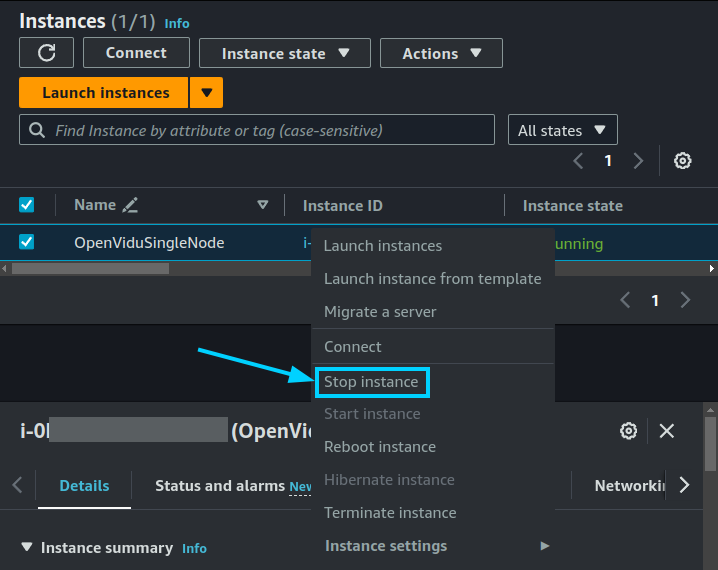
- Right-click on the instance you want to start and select "Stop instance".
- Go to the EC2 Dashboard of AWS.
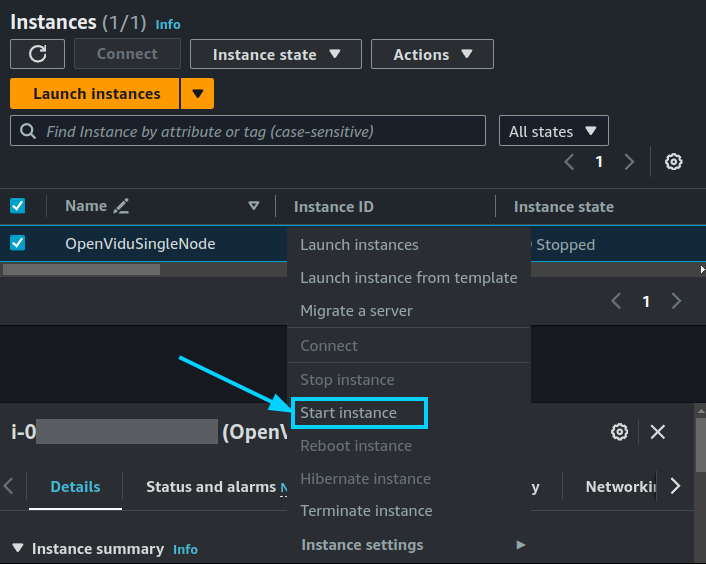
- Right-click on the instance you want to start and select "Start instance".
Change the instance type#
You can change the instance type of the OpenVidu Single Node instance to adapt it to your needs. To do this, follow these steps:
- Stop the instance.
-
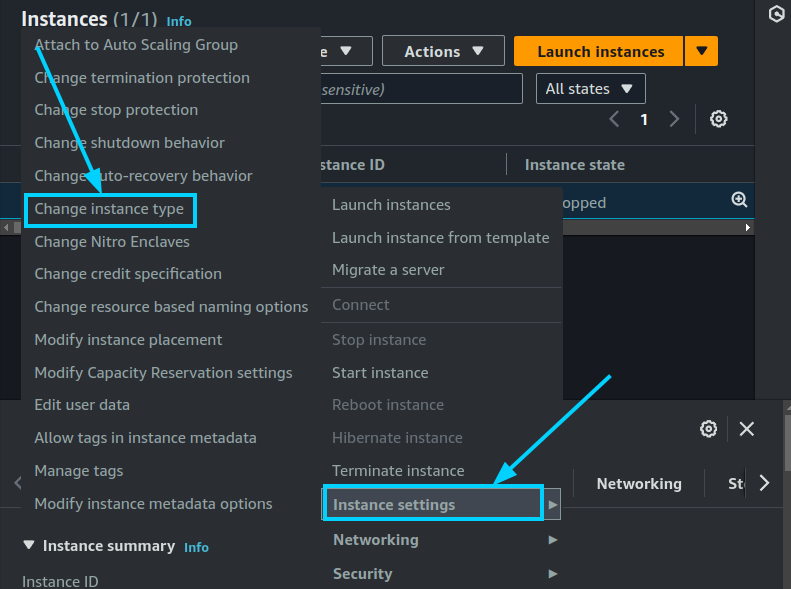
Right-click on the instance and select "Instance Settings > Change Instance Type".
-
Select the new instance type and click on "Apply".
Advanced configuration#
For any advanced configuration, you can follow the instructions from the On Premises Single Node section.


