OpenVidu Single Node COMMUNITY installation: Google Cloud Platform#
Google Cloud Platform
This section contains instructions for deploying a production-ready OpenVidu Single Node COMMUNITY deployment on Google Cloud Platform. The deployed services are the same as in the On Premises Single Node installation, but the process is automated through the Google Cloud Console.
To deploy OpenVidu on Google Cloud Platform, log in to Infrastructure Manager in the GCP Console. Then follow the next steps and fill in your preferred parameters.
This is what the deployment architecture looks like:

Deployment details#
Info
We recommend to create a new project to deploy OpenVidu there, avoiding possible conflicts between resources. Enable Secrets Manager Api first in that project and then deploy the stack. You might need to deploy multiple times to let the APIs activate.
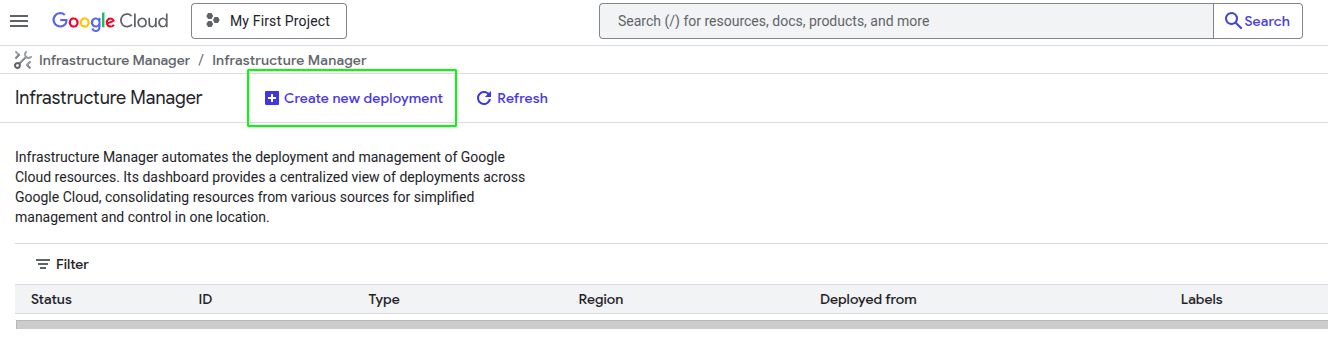
To deploy OpenVidu, first create a new deployment using the top-left button, as shown in the image.
Once you click the button, you will see this window.
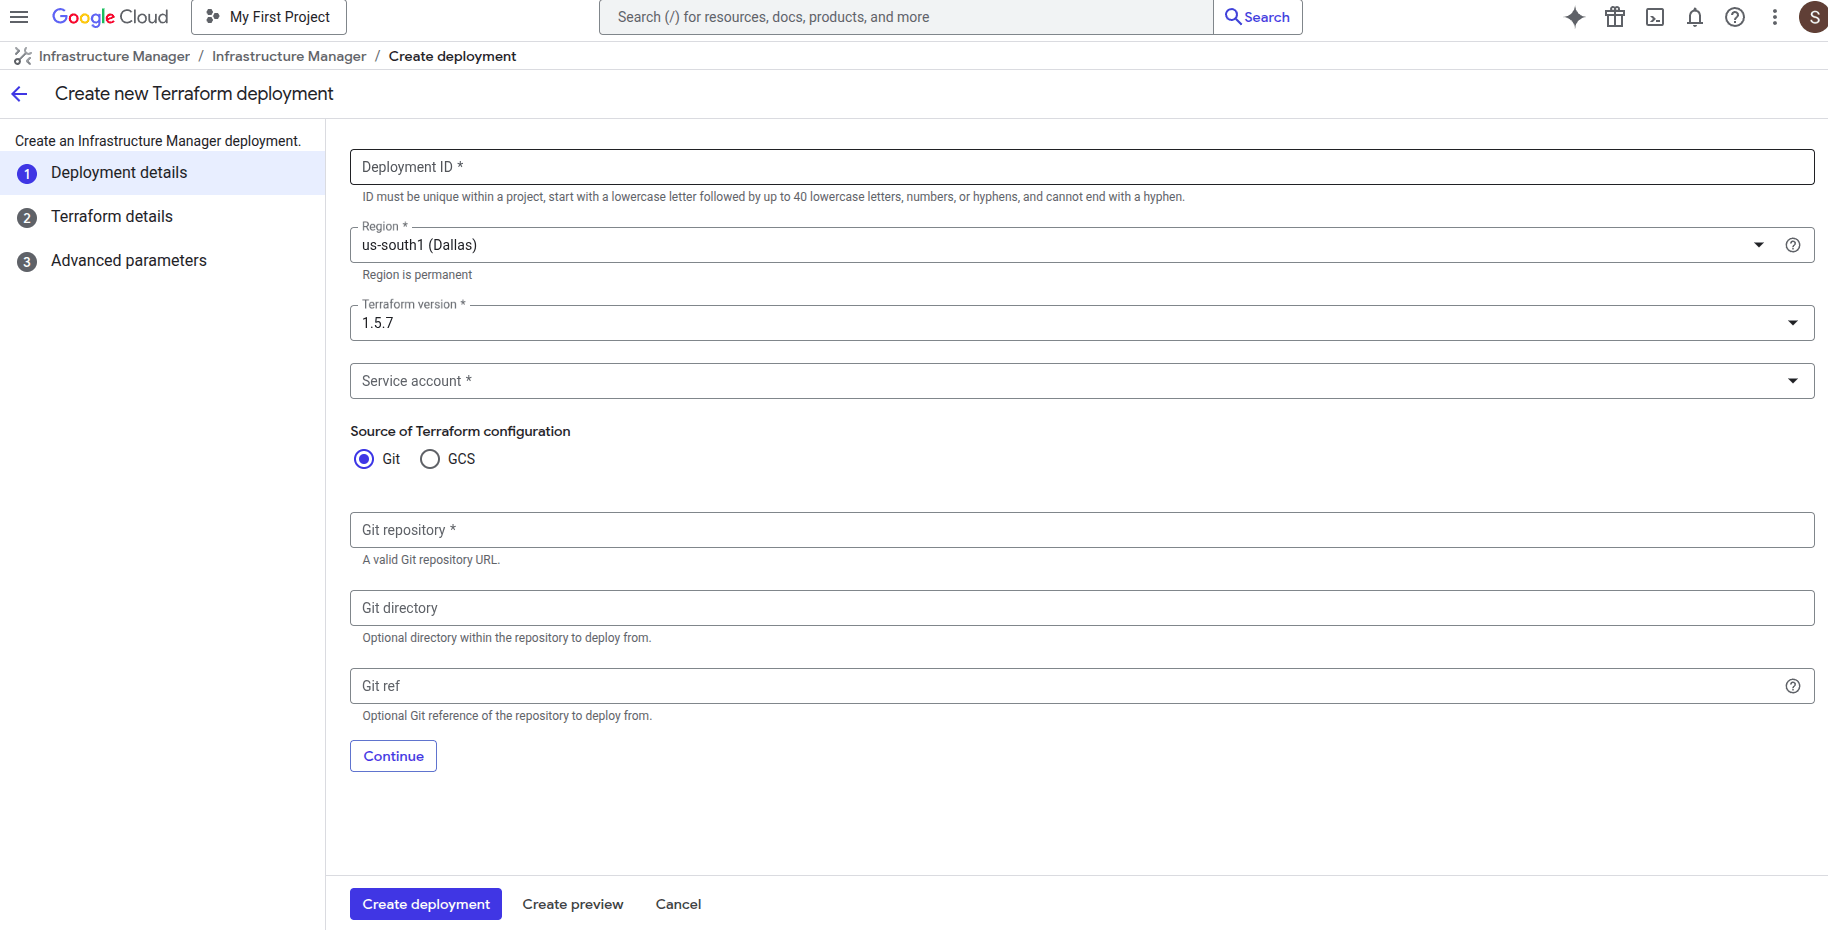
- Fill Deployment ID with any name you prefer (for example, openvidu-singlenode-deployment).
- Change the Region to the one you prefer.
Warning
If you change the region in the previous step, don't forget to update the region and zone in the Terraform values.
- Leave Terraform version as 1.5.7.
- For Service Account, you will need to create a new one with "Owner" permissions. To do this, click the "Service Account" label and then "New Service Account". Choose your service account name, click "Create and Continue", select the "Owner" role, click "Continue", and then "Done".
New Service Account Steps


- Fill Git repository with this link
https://github.com/OpenVidu/openvidu.git, which corresponds to our Git repository where the Terraform files to deploy OpenVidu are located. - Fill the Git directory with the following path
openvidu-deployment/community/singlenode/gcp - For the Git ref, use
v3.6.0, corresponding to the version you want to deploy.
Finally, click Continue.
Input Values#
In Google Cloud Platform, there is no built-in template with parameters. You need to manually enter in the console the parameters declared in our Terraform files, so below is a detailed table of all optional and mandatory parameters.
Mandatory Parameters#
| Input Value | Description |
|---|---|
| projectId | GCP project id where the resources will be created. |
| stackName | Stack name for OpenVidu deployment. |
Optional Parameters#
| Input Value | Default Value | Description |
|---|---|---|
| region | "europe-west2" | GCP region where resources will be created. |
| zone | "europe-west2-b" | GCP zone that some resources will use. |
| certificateType | "letsEncrypt" | Certificate type for OpenVidu deployment. Options:
Warning: sslip.io is currently experiencing Let's Encrypt rate limiting issues, which may prevent SSL certificates from being generated. It is recommended to use your own domain name. Check this community thread for troubleshooting and updates. |
| publicIpAddress | (none) | Previously created Public IP address for the OpenVidu Deployment. Blank will generate a public IP. |
| domainName | (none) | Domain name for the OpenVidu Deployment. |
| ownPublicCertificate | (none) | If certificate type is 'owncert', this parameter will be used to specify the public certificate in base64 format. |
| ownPrivateCertificate | (none) | If certificate type is 'owncert', this parameter will be used to specify the private certificate in base64 format. |
| initialMeetAdminPassword | (none) | Initial password for the 'admin' user in OpenVidu Meet. If not provided, a random password will be generated. |
| initialMeetApiKey | (none) | Initial API key for OpenVidu Meet. If not provided, no API key will be set and the user can set it later from Meet Console. |
| instanceType | "e2-standard-2" | Specifies the GCE machine type for your OpenVidu instance. |
| bucketName | (none) | Name of the GCS bucket to store data and recordings. If empty, a bucket will be created. |
| additionalInstallFlags | (none) | Additional optional flags to pass to the OpenVidu installer (comma-separated, e.g., '--flag1=value, --flag2'). |
For more details, you can check the variables.tf file to see additional information about the inputs.
Warning
It's important that you enter the input variables with the exact same names as they appear in the table, as shown in the next image.

Deploying the stack#
When you are satisfied with your input values, click "Continue" and then "Create deployment". The deployment will be validated and all resources will be created. Wait around 5 to 10 minutes for the instance to install OpenVidu.
Warning
In case of failure, check the Cloud Build logs that appear at the top of the screen and redeploy after applying the required changes. If the issue is related to an API, delete the deployment and create a new one. If it keeps failing, contact us.

When everything is ready, you can check the secrets on the Secret Manager or by connecting through SSH to the instance:
-
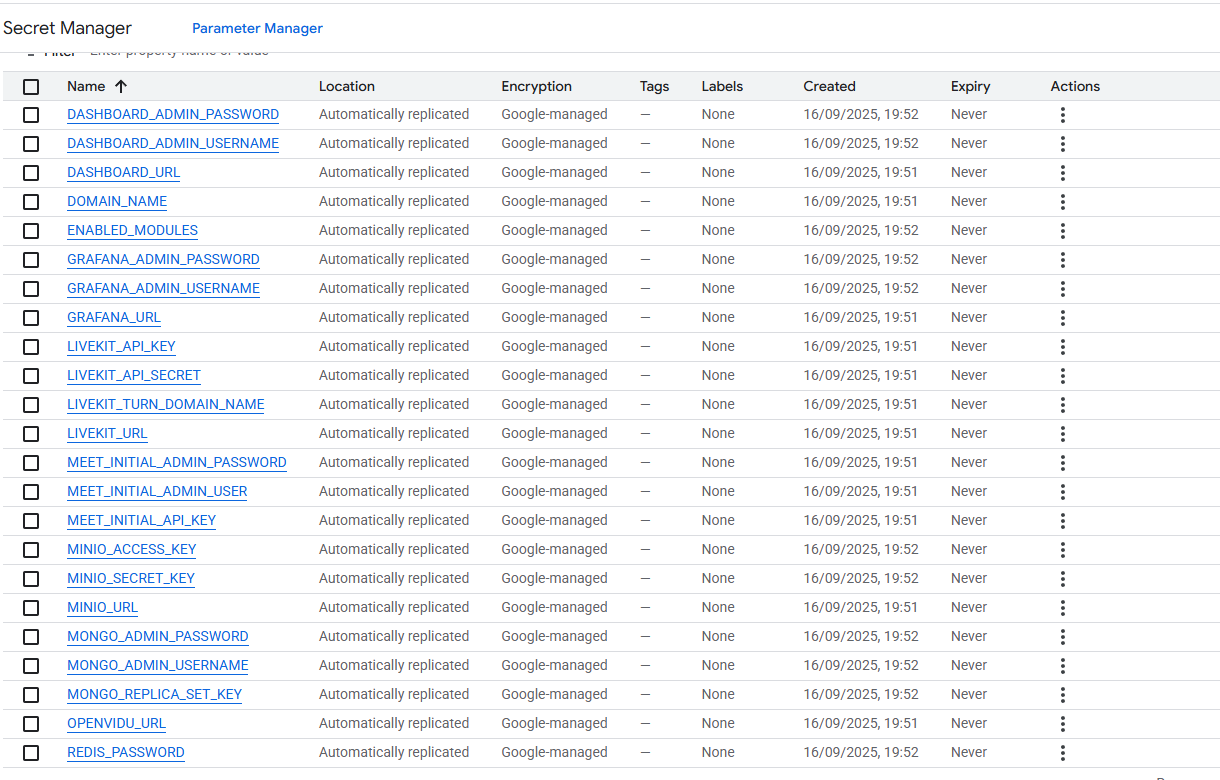
Go to the Secret Manager .
-
Once you are in Secret Manager, you will see all secrets by name.
-
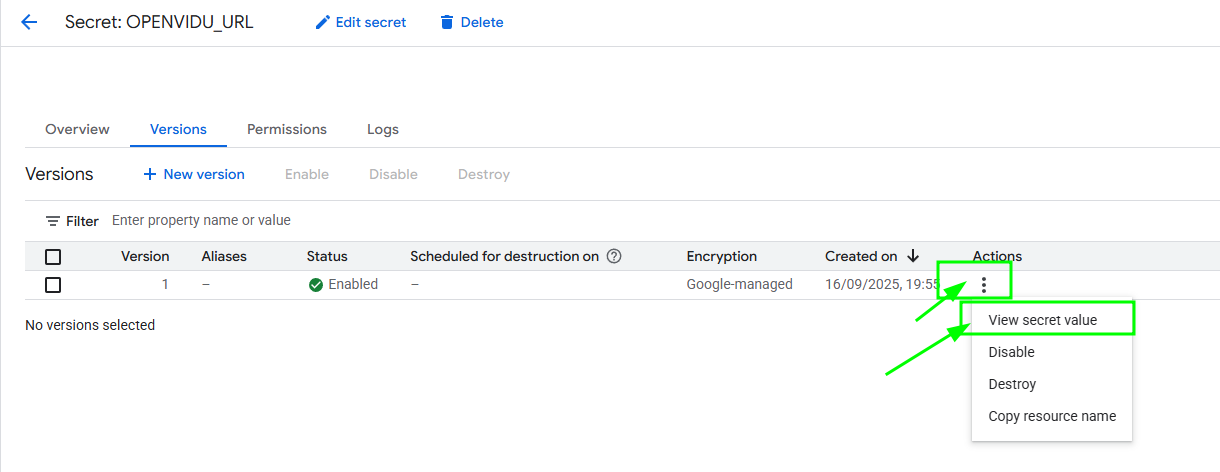
Click the secret you want, select the latest version, and then click "3 dots" -> "View secret value" to retrieve it.
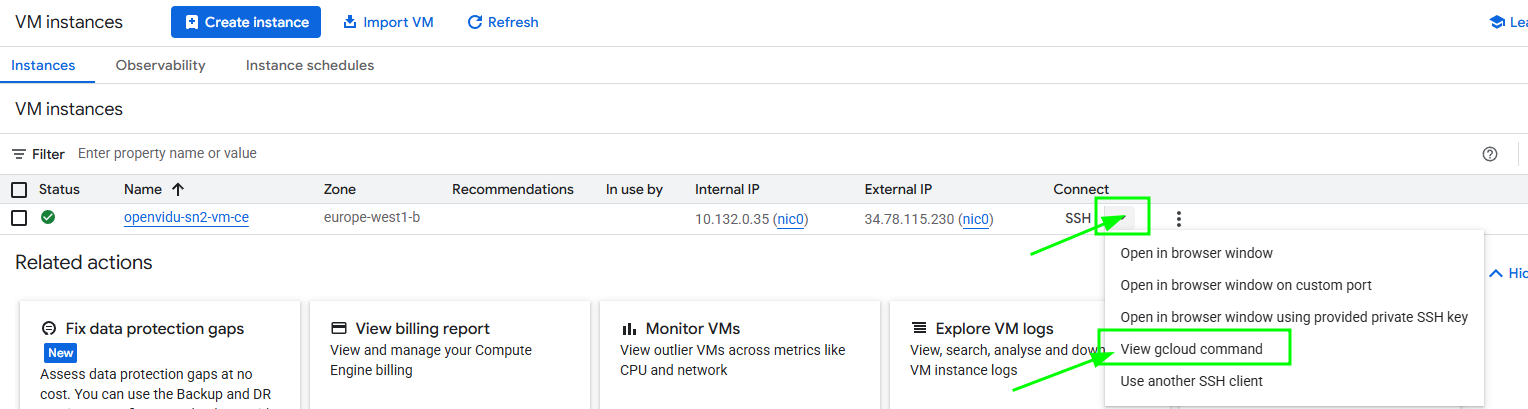
SSH into the instance using the gcloud command generated in the web console, then navigate to the /opt/openvidu/config folder. Files with the deployment outputs are:
openvidu.envmeet.env
To find the command, go to Compute Engine Instances , click the arrow next to SSH, and then click "View gcloud command".
To install gcloud in your shell, follow the official instructions .
Configure your application to use the deployment#
You need the secret outputs from Google Cloud Platform to configure your OpenVidu application. You can check these secrets in Secret Manager using either of these two methods: (Check deployment outputs in GCP Secret Manager) or (Check deployment outputs in the instance).
Your authentication credentials and the URL to point your applications to are:
OpenVidu Meet:
OPENVIDU_URL: The URL to access OpenVidu Meet, which is alwayshttps://yourdomain.example.io/MEET_INITIAL_ADMIN_USER: User to access OpenVidu Meet Console. It is alwaysadmin.MEET_INITIAL_ADMIN_PASSWORD: Password to access OpenVidu Meet Console.MEET_INITIAL_API_KEY: API key to use OpenVidu Meet Embedded and OpenVidu Meet REST API.
Note
The MEET_INITIAL_ADMIN_USER, MEET_INITIAL_ADMIN_PASSWORD, and MEET_INITIAL_API_KEY values are initial settings that cannot be changed from GCP Secret Manager. They can only be changed from the Meet Console.
OpenVidu Platform:
LIVEKIT_URL: The URL to use LiveKit SDKs, which can bewss://yourdomain.example.io/orhttps://yourdomain.example.io/depending on the client library you are using.LIVEKIT_API_KEY: API Key for LiveKit SDKs.LIVEKIT_API_SECRET: API Secret for LiveKit SDKs.
Troubleshooting initial Google Cloud Platform deployment creation#
If something goes wrong during the initial GCP deployment creation, your stack may reach some failed status for multiple reasons. It could be due to a misconfiguration in the parameters, a lack of permissions, or a problem with GCP services. When this happens, the following steps can help you troubleshoot the issue and identify what went wrong:
- Check if the instance or instances are running. If they are not, check the GCP cloud build logs for any error messages.
-
If the instance or instances are running, SSH into the instance and check the logs by running this command:
journalctl -u google-startup-scripts | cat
These logs will give you more information about the GCP deployment creation process.
-
If everything seems fine, check the status and the logs of the installed OpenVidu services.
Configuration and administration#
When your Google Cloud Platform deployment reaches the Active state, it means that all resources have been created. You will need to wait around 5 to 10 minutes for the instance to install OpenVidu, as mentioned before. After this time, try connecting to the deployment URL. If it doesn't work, we recommend checking the previous section. Once everything is ready, you can check the Administration section to learn how to manage your deployment.