OpenVidu Single Node COMMUNITY installation: Azure#
Azure
This section contains instructions for deploying a production-ready OpenVidu Single Node COMMUNITY deployment on Azure. The deployed services are the same as in the On Premises Single Node installation, but the process is automated through ARM Template Specs.
To import the template into Azure, click the button below (you will be redirected to Azure).

This is what the deployment architecture looks like:

Template Parameters#
To deploy the template, you need to fill in the following parameters.
Resource Group and Stack Name#
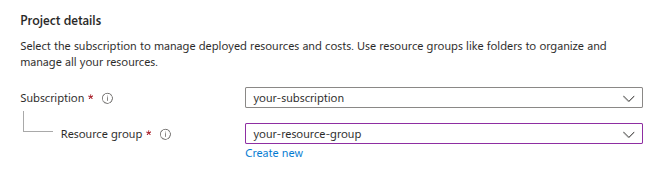
Select your Subscription and the Resource Group where you want to deploy OpenVidu.
Warning
It is highly recommended to deploy OpenVidu in a brand new Azure Resource Group. Reusing an existing Resource Group can lead to conflicts. The only reason to reuse an existing Resource Group is to use the same IP and Azure Blob Storage Account as a previous OpenVidu deployment. The rest of resources are not reusable and should be eliminated before deploying OpenVidu in the same Resource Group.
Select the Region and choose a descriptive Stack Name. It will be used as a prefix in the name of all the resources created by the template.

Domain and SSL Certificate Configuration#
There are three possible scenarios for this section:
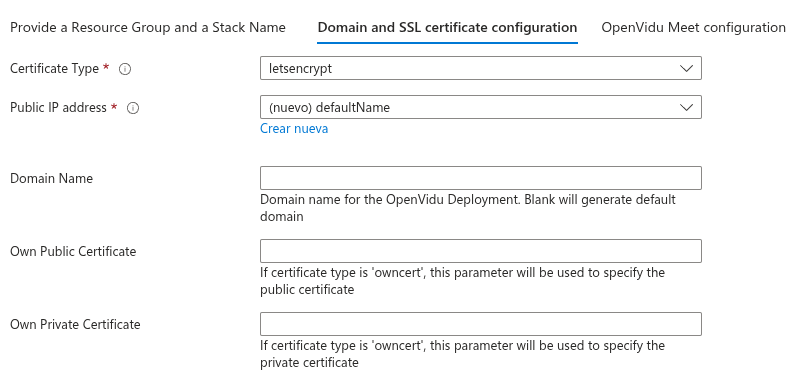
If you don't have a Domain Name and want to quickly test OpenVidu on Azure, you can use this option by selecting Certificate Type as letsencrypt and keeping the rest of the parameters empty.
It will deploy OpenVidu with a Let's Encrypt certificate generated using sslip.io based on the public IP created for the deployment.
sslip.io rate limiting
sslip.io is currently experiencing Let's Encrypt rate limiting issues, which may prevent SSL certificates from being generated. It is recommended to use your own domain name. Check this community thread for troubleshooting and updates.
For a production-ready setup, this scenario is ideal when you have an FQDN (Fully Qualified Domain Name) and a Public IP at your disposal. It leverages the services of Let's Encrypt to automatically generate valid certificates.
First, make sure your FQDN points to the Public IP you are going to use.
Then, fill in the following parameters:
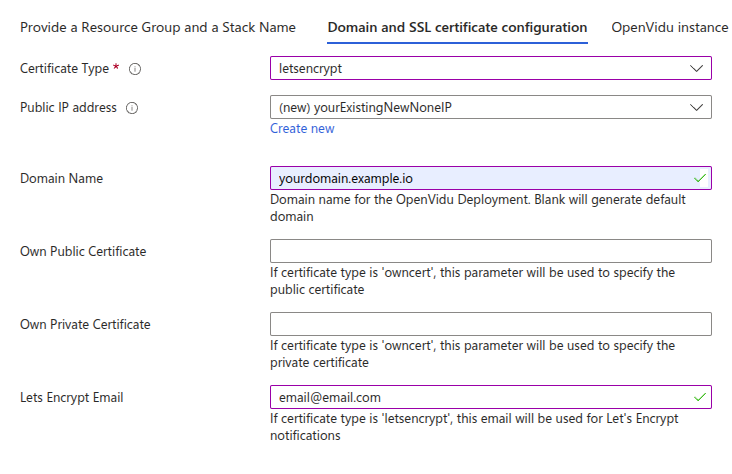
As you can see, specify Public IP Address with the Public IP that the domain points to, Domain Name with your FQDN, and Lets Encrypt Email with your email address for Let’s Encrypt notifications. These parameters are mandatory.
Opt for this method if you possess your own certificate for an existing FQDN. It enables you to deploy OpenVidu on Azure using your certificates.
Ensure your FQDN points to a previously created Public IP.
The configured parameters would look like this:
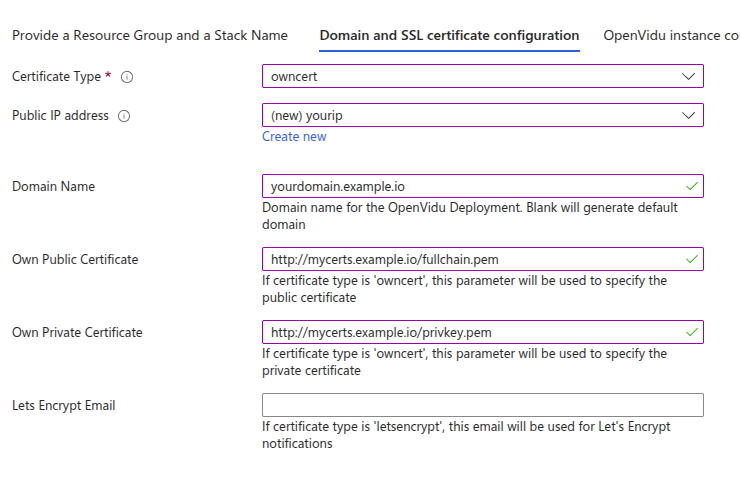
Specify the certificate files in base64 in Own Public Certificate and Own Private Certificate. The Domain Name and Public IP Address parameters are mandatory.
Certificates need to be in PEM format and base64 encoded. You can encode them using the following command in a terminal where fullchain.pem is your public certificate and privkey.pem is your private certificate:
This is the most straightforward option for deploying OpenVidu on Azure when you do not have a Fully Qualified Domain Name (FQDN). This method allows for the immediate use of OpenVidu with ARM Templates.
However, this convenience comes with the caveat that users will need to manually accept the certificate in their web browsers. Please be aware that this configuration is solely for developmental and testing purposes and is not suitable for a real production environment.
These are the parameters needed in this section to use self-signed certificates:
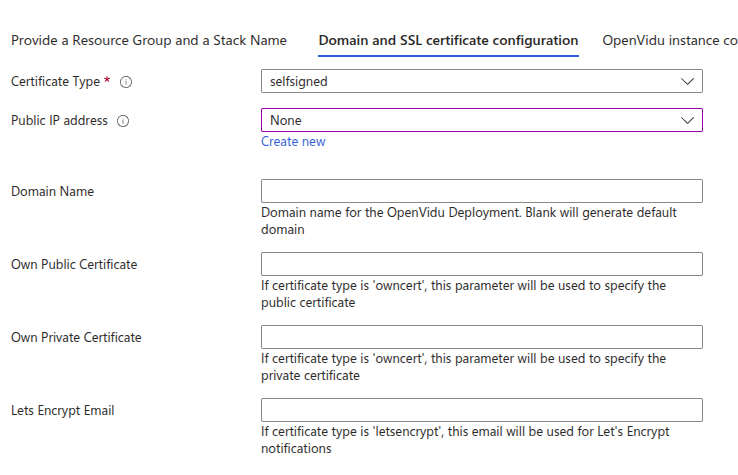
You don’t need to specify any parameters; just select the CertificateType as self-signed. The domain name used will be an Azure-generated one.
OpenVidu Meet Credentials#
Configure the initial credentials for accessing OpenVidu Meet:
Parameters in this section look like this:
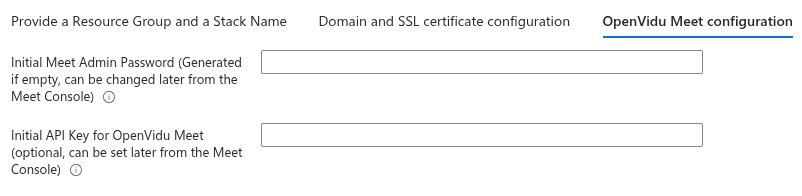
- InitialMeetAdminPassword: Initial password for the "admin" user in OpenVidu Meet. If not provided, a random password will be generated and stored in the Azure Key Vault.
- InitialMeetApiKey: Initial API key for OpenVidu Meet. If not provided, no API key will be set and the user can configure it later from the Meet Console.
Both parameters are optional. If you don't specify them, you can retrieve the generated credentials from the Azure Key Vault after deployment.
Azure Instance Configuration#
Specify properties for the Azure instance that will host Openvidu.
Parameters in this section look like this:
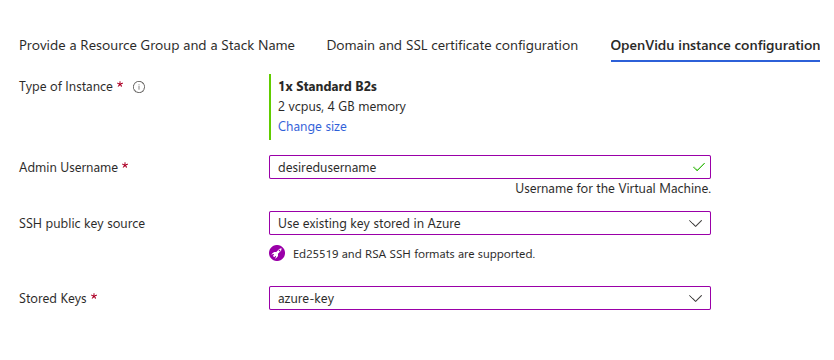
Simply select the type of instance you want to deploy in Type of Instance. Fill in Admin Username, which will be set as the admin username on the instance. Select the SSH key you created previously in SSH public key source (or create a new one in the same drop-down) to allow SSH access to the instance.
Storage Account#
You need to fill some parameters about the storage account that the deployment will use to save the recordings.
Warning
Recordings are not available in OpenVidu v2 Compatibility mode (v2compat) for OpenVidu Azure deployments.
Parameters in this section look like this:
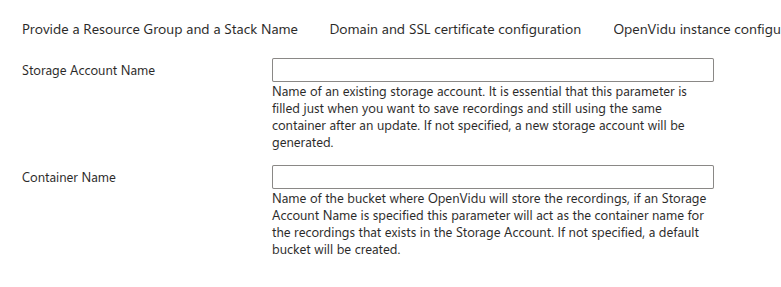
Storage Account Name: leave blank to create a new Storage Account for this deployment. You can specify an already existing Storage Account name if you want (remember it must belong to the same resource group as your deployment).
Container Name is the name that you desire for the container that of the storage account where the recordings will be saved. If you leave it blank it will create the container with name openvidu-appdata.
(Optional) Additional flags#
Additional optional flags to pass to the OpenVidu installer (comma-separated, e.g., --flag1=value, --flag2).
Parameters in this section look like this:
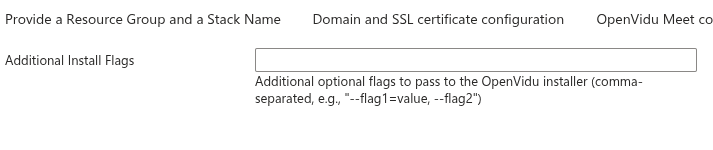
For example (optional), you can use --force-utc-timezone to force UTC as the timezone for OpenVidu. By default, OpenVidu uses the timezone configured on the host machine where it is installed. In general, UTC is recommended, and Azure VMs already default to UTC, so this flag is not usually necessary.
Deploying the stack#
Whenever you are satisfied with your Template parameters, just click on "Next" to trigger the validation process. If correct, click on "Create" to start the deployment process (which will take about 5 to 10 minutes).
Warning
In case of failure, it may be due to a role creation failure. In this case, redeploy in a new resource group and change the Stack Name. To remove a role in a resource group, visit Remove Azure role assignments .
When everything is ready, you can check the output secrets on the Key Vault or by connecting through SSH to the instance:
-
Go to the Key Vault created called yourstackname-keyvault in the Resource Group that you deployed. You can access it from the Azure Portal Dashboard .
-
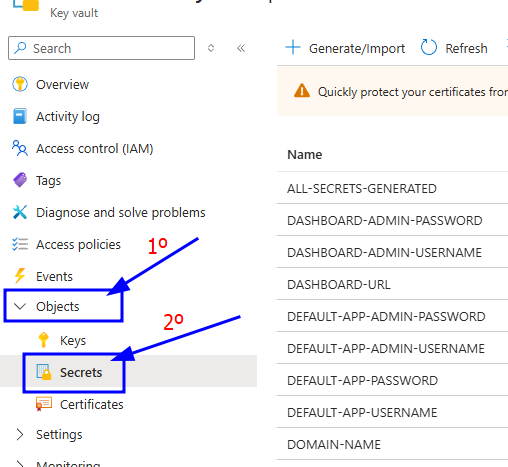
Once you are in the Key Vault, click "Objects" 🡒 "Secrets" in the left panel.
-
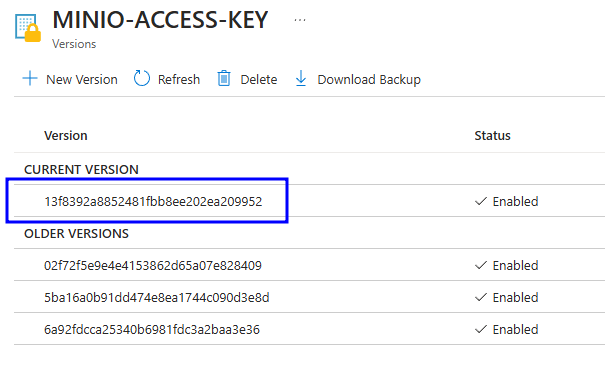
Click the secret you want to inspect, then click the current version of that secret.
-
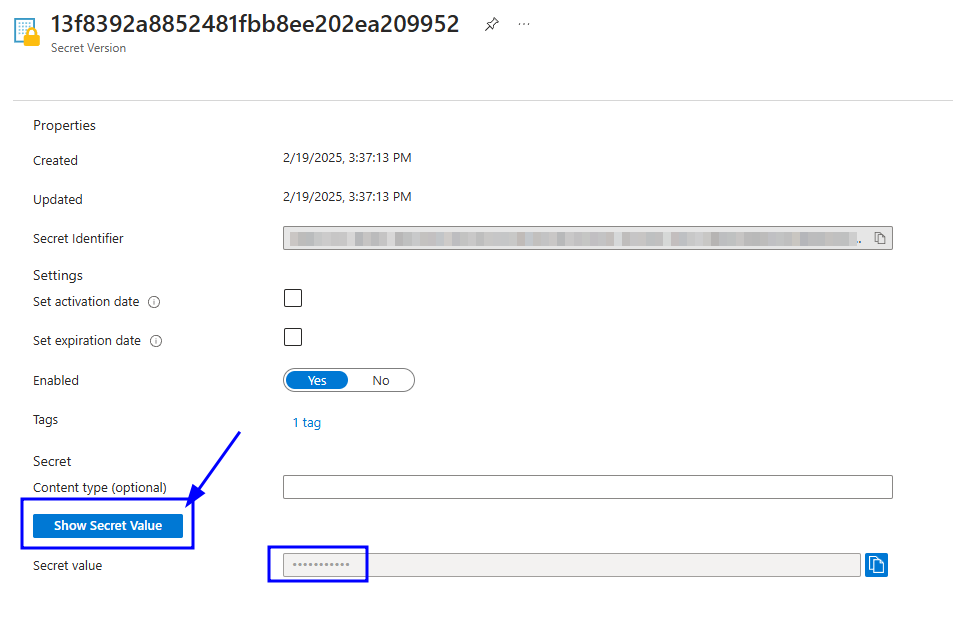
You will see many properties, but the value you need is at the bottom. Click "Show Secret Value" to reveal it.
SSH to the instance and navigate to the config folder /opt/openvidu/config. Files with the deployment outputs are:
openvidu.envmeet.env
Configure your application to use the deployment#
You need your Azure deployment outputs to configure your OpenVidu application. If you have permissions to access the Key Vault you will be able to check there all the outputs (Check deployment outputs in Azure Key Vault). If you don't have permissions to access the Key Vault you can still check the outputs directly in the instance through SSH (Check deployment outputs in the instance).
Your authentication credentials and the URL to point your applications to are:
OpenVidu Meet:
OPENVIDU-URL: The URL to access OpenVidu Meet, which is alwayshttps://yourdomain.example.io/MEET-INITIAL-ADMIN-USER: User to access OpenVidu Meet Console. It is alwaysadmin.MEET-INITIAL-ADMIN-PASSWORD: Password to access OpenVidu Meet Console.MEET-INITIAL-API-KEY: API key to use OpenVidu Meet Embedded and OpenVidu Meet REST API.
Note
The MEET-INITIAL-ADMIN-USER, MEET-INITIAL-ADMIN-PASSWORD, and MEET-INITIAL-API-KEY values are initial settings that cannot be changed from Azure Key Vault. They can only be changed from the Meet Console.
OpenVidu Platform:
LIVEKIT-URL: The URL to use LiveKit SDKs, which can bewss://yourdomain.example.io/orhttps://yourdomain.example.io/depending on the client library you are using.LIVEKIT-API-KEY: API Key for LiveKit SDKs.LIVEKIT-API-SECRET: API Secret for LiveKit SDKs.
Troubleshooting initial Azure stack creation#
If something goes wrong during the initial Azure stack creation, your stack may reach some failed status for multiple reasons. It could be due to a misconfiguration in the parameters, a lack of permissions, or a problem with Azure services. When this happens, the following steps can help you troubleshoot the issue and identify what went wrong:
- Check if the instance or instances are running. If they are not, check the Azure deployment events for any error messages.
-
If the instance or instances are running, SSH into the instance and check the logs of the following files:
/var/log/cloud-init-output.log/var/log/cloud-init.log
These logs will give you more information about the Azure stack creation process.
-
If everything seems fine, check the status and the logs of the installed OpenVidu services.
Configuration and administration#
When your Azure stack reaches the Succeeded status, it means that all resources have been created. You will need to wait about 5 to 10 minutes for the instance to install OpenVidu, as mentioned before. After this time, try connecting to the deployment URL. If it doesn't work, we recommend checking the previous section. Once everything is ready, you can check the Administration section to learn how to manage your deployment.