OpenVidu Single Node COMMUNITY administration: AWS#
AWS
AWS deployment of OpenVidu Single Node is internally identical to the on-premises deployment, so you can follow the same instructions from the On Premises Single Node for administration and configuration. The only difference is that the deployment is automated with AWS CloudFormation.
However, there are certain things worth mentioning:
Start and stop OpenVidu through AWS Console#
You can start and stop all services as explained in the On Premises Single Node section. But you can also start and stop the EC2 instance directly from the AWS Console. This will stop all services running in the instance and reduce AWS costs.
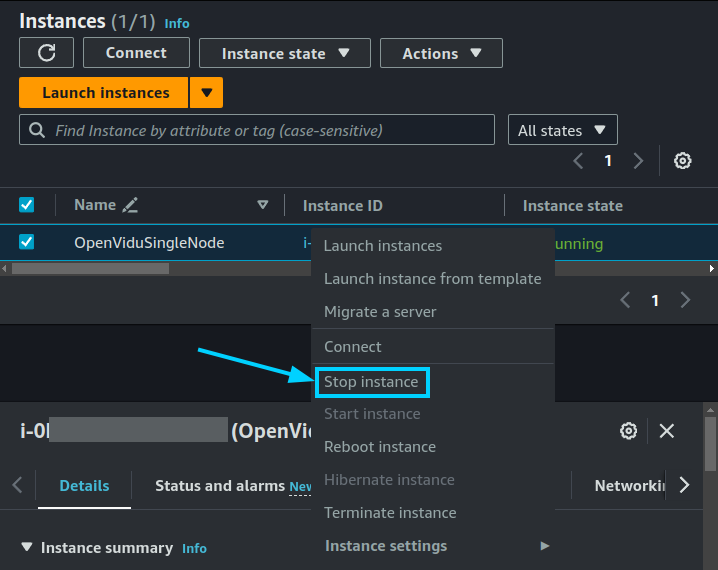
- Go to the EC2 Dashboard of AWS.
- Right-click on the instance you want to start and select "Stop instance".
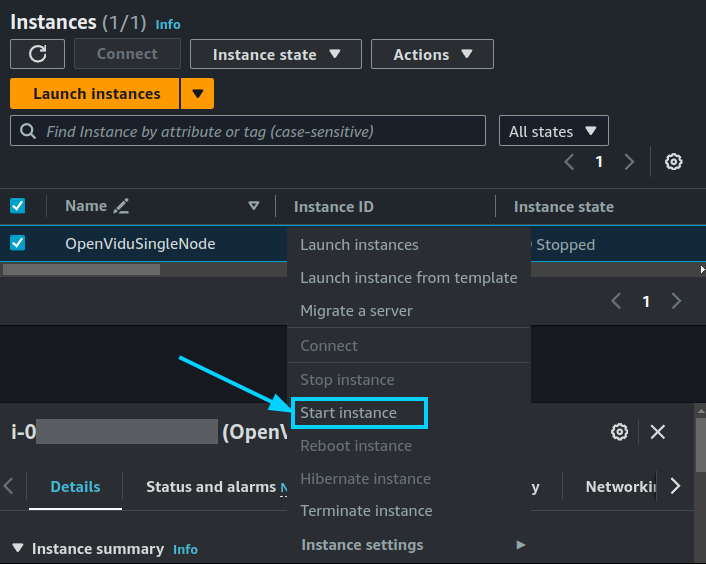
- Go to the EC2 Dashboard of AWS.
- Right-click on the instance you want to start and select "Start instance".
Change the instance type#
You can change the instance type of the OpenVidu Single Node instance to adapt it to your needs. To do this, follow these steps:
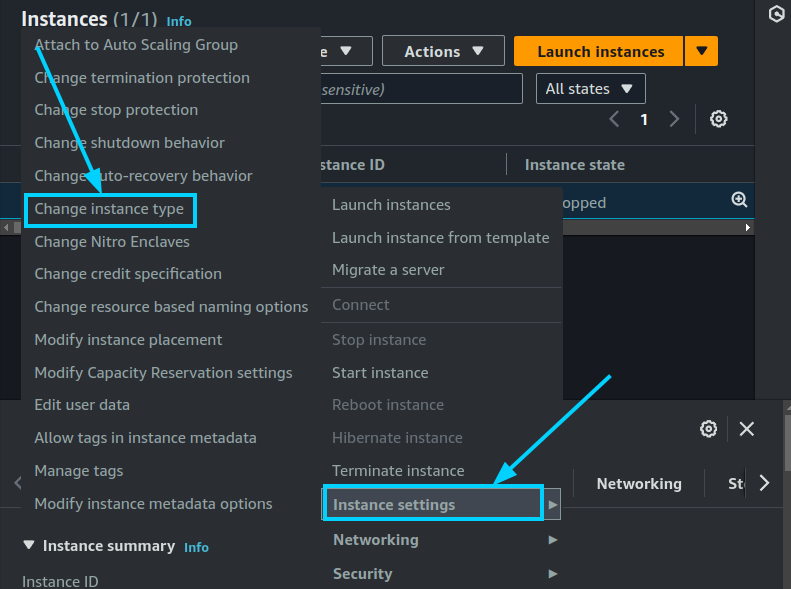
- Stop the instance.
-
Right-click on the instance and select "Instance Settings > Change Instance Type".
-
Select the new instance type and click on "Apply".
Administration and configuration#
For administration, you can follow the instructions from the On Premises Single Node Administration section.
Regarding the configuration, in AWS it is managed similarly to an on-premises deployment. For detailed instructions, please refer to the Changing Configuration section. Additionally, the How to Guides offer multiple resources to assist with specific configuration changes.
In addition to these, an AWS deployment provides the capability to manage global configurations via the AWS Console using AWS Secrets created during the deployment. To manage configurations this way, follow these steps:
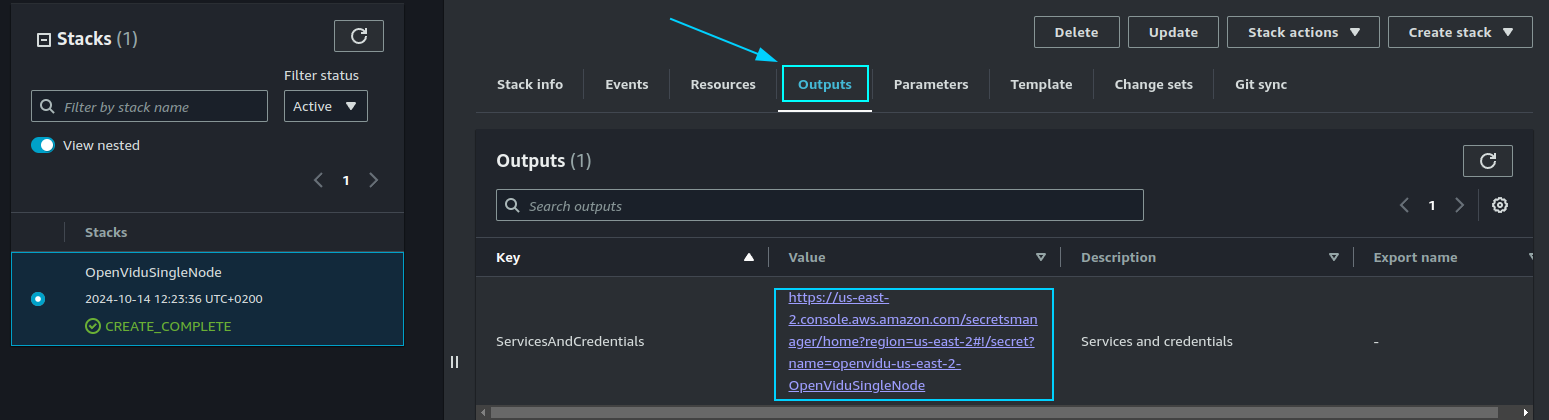
- Navigate to the CloudFormation Dashboard on AWS.
- Select the CloudFormation Stack that you used to deploy OpenVidu Single Node.
- In the "Outputs" tab, click the Link at "ServicesAndCredentials". This will open the AWS Secrets Manager which contains all the configurations of the OpenVidu Single Node deployment.
- Click on the "Retrieve secret value" button to get the JSON with all the information.
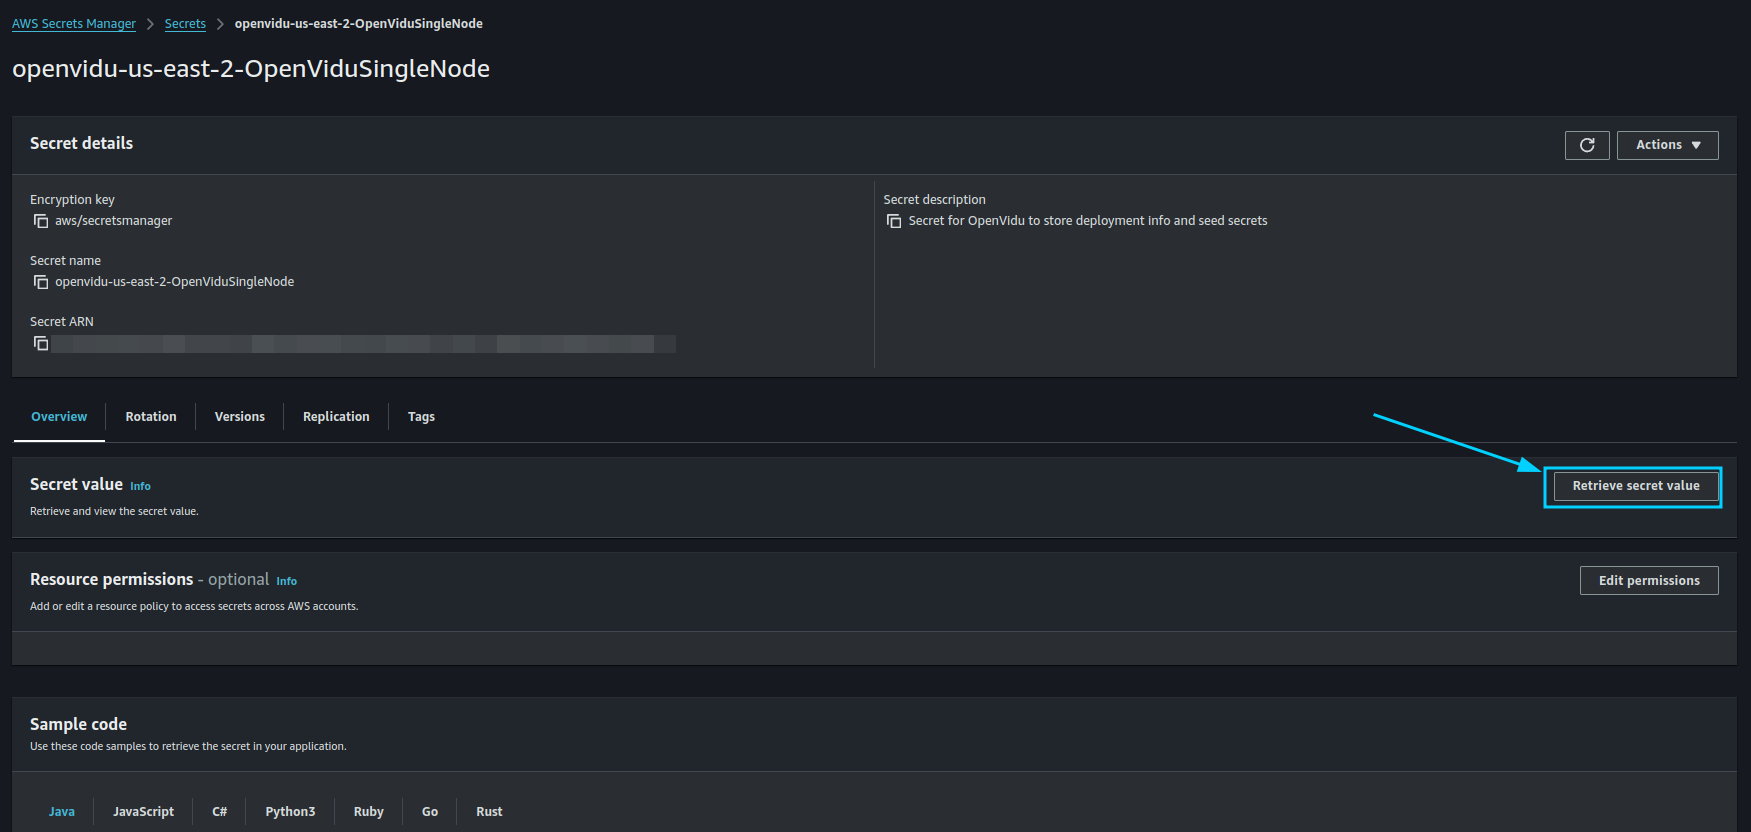
- Modify the parameter you want to change and click on "Save".
- Go to the EC2 Console and click on "Reboot instance" to apply the changes to the Master Node.
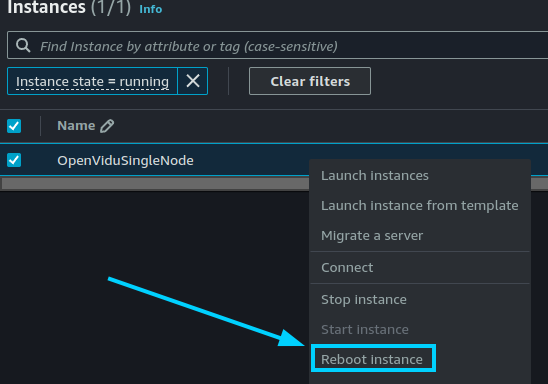
Changes will be applied automatically.
Backup and Restore#
Review the Backup and restore OpenVidu deployments guide for recommended backup workflows.