OpenVidu High Availability installation: AWS#
AWS
Info
OpenVidu High Availability is part of OpenVidu PRO. Before deploying, you need to create an OpenVidu account to get your license key. There's a 15-day free trial waiting for you!
This section contains instructions for deploying a production-ready OpenVidu High Availability deployment on AWS. The deployed services are the same as in the On Premises High Availability installation, but the process is automated through AWS CloudFormation.
First of all, import the template in the AWS CloudFormation console. You can click the following button...
...or access your AWS CloudFormation console and manually set this S3 URL in the Specify template section:
Info
If you want to deploy a specific version of OpenVidu HA, replace latest with the version you want to deploy. For example, to deploy version 3.6.0, use the following URL:
This is what the deployment architecture looks like.

- The Load Balancer distributes HTTPS traffic to the Master Nodes.
- If RTMP media is ingested, the Load Balancer also routes this traffic to the Media Nodes.
- WebRTC traffic (SRTP/SCTP/STUN/TURN) is routed directly to the Media Nodes.
- 4 fixed EC2 Instances are created for the Master Nodes. It must always be 4 Master Nodes to ensure high availability.
- An autoscaling group of Media Nodes is created to scale the number of Media Nodes based on the system load.
CloudFormation Parameters#
Depending on your needs, you need to fill the following CloudFormation parameters:
Domain and Load Balancer configuration#
In this section, you need to specify the domain name and the SSL certificate to use from AWS Certificate Manager.
The parameters in this section might look like this:
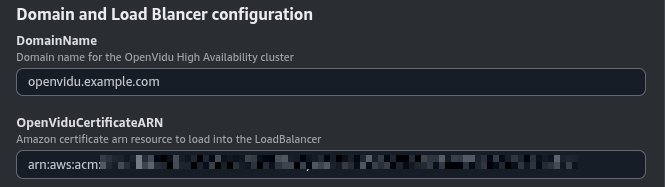
Set the DomainName parameter to the domain name you intend to use for your OpenVidu deployment. Ensure this domain is not currently pointing to any other service; you can temporarily point it elsewhere.
For the OpenViduCertificateARN parameter, specify the ARN of the SSL certificate you wish to use. This certificate should be created in the AWS Certificate Manager and configured for the domain specified in DomainName.
OpenVidu HA Configuration#
In this section, you need to specify some properties needed for the OpenVidu HA deployment.
Parameters of this section look like this:
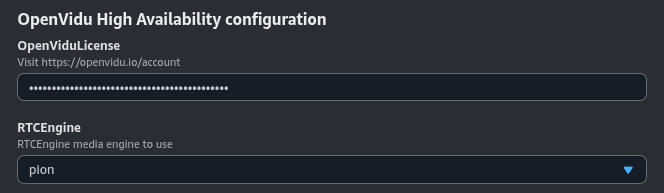
Make sure to provide the OpenViduLicense parameter with the license key. If you don't have one, you can request one here.
For the RTCEngine parameter, you can choose between Pion (the default engine used by LiveKit) and Mediasoup (with a boost in performance). Learn more about the differences here.
OpenVidu Meet Credentials#
Configure the initial credentials for accessing OpenVidu Meet:
Parameters in this section look like this:
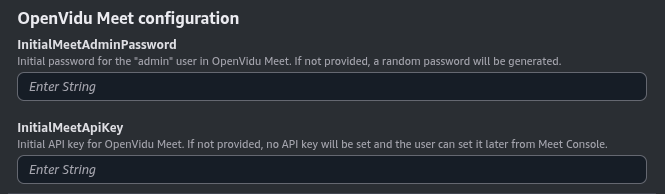
- InitialMeetAdminPassword: Initial password for the "admin" user in OpenVidu Meet. If not provided, a random password will be generated and stored in the AWS Secret Manager.
- InitialMeetApiKey: Initial API key for OpenVidu Meet. If not provided, no API key will be set and the user can configure it later from the Meet Console.
Both parameters are optional. If you don't specify them, you can retrieve the generated credentials from the AWS Secret Manager after deployment.
EC2 Instance Configuration#
You need to specify some properties for the EC2 instances that will be created.
Parameters in this section look like this:
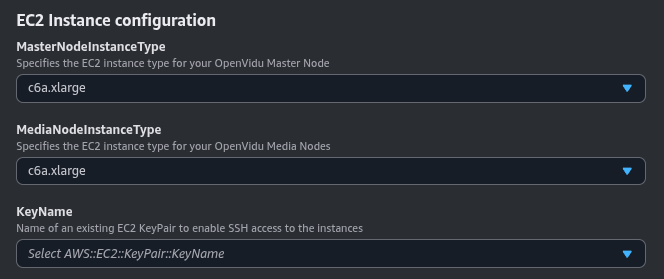
Simply select the type of instance you want to deploy at MasterNodeInstanceType and MediaNodeInstanceType, the SSH key you want to use to access the machine at KeyName, and the Ubuntu distribution you want to use at OperatingSystem.
By default, the parameter OperatingSystem is configured to use the latest LTS Ubuntu AMI, so ideally you don’t need to modify this.
Media Nodes Autoscaling Group Configuration#
The number of Media Nodes can scale up or down based on the system load. You can configure the minimum and maximum number of Media Nodes and a target CPU utilization to trigger the scaling up or down.
Parameters in this section look like this:
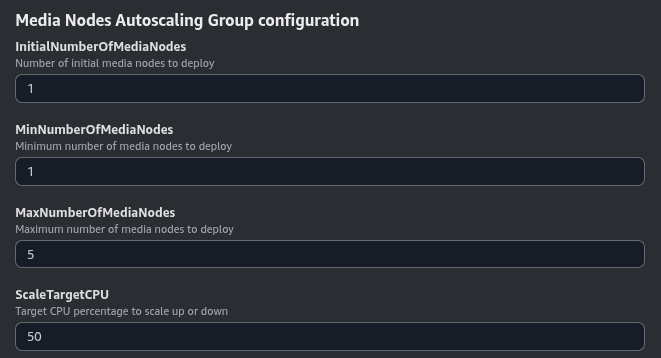
The InitialNumberOfMediaNodes parameter specifies the initial number of Media Nodes to deploy. The MinNumberOfMediaNodes and MaxNumberOfMediaNodes parameters specify the minimum and maximum number of Media Nodes that you want to be deployed.
The ScaleTargetCPU parameter specifies the target CPU utilization to trigger the scaling up or down. The goal is to keep the CPU utilization of the Media Nodes close to this value. The autoscaling policy is based on Target Tracking Scaling Policy .
S3 bucket for application data, cluster data and recordings#
You can specify two S3 buckets to store the application data, cluster data, and recordings.
Parameters in this section look like this:

If these parameters are not specified, new S3 buckets will be created by the CloudFormation stack.
VPC Configuration#
In this section, you need to specify the VPC and Subnet configuration for the deployment.
Parameters in this section look like this:
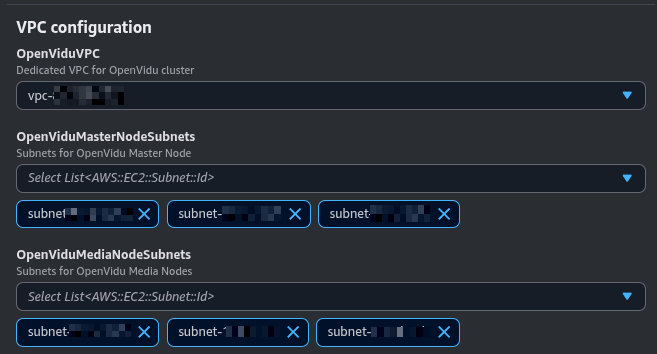
The OpenViduVPC parameter specifies the VPC where the deployment will be created.
The OpenViduMasterNodeSubnets specifies the subnets where the Master Nodes will be deployed. You can specify a maximum of 4 subnets.
The OpenViduMediaNodeSubnets specifies the subnets where the Media Nodes will be deployed. There is no limit on the number of subnets you can specify.
Warning
- It is recommended to deploy in a region with at least 4 availability zones and deploy the Master Nodes in 4 subnets, one in each availability zone. This is to ensure high availability.
- You must use public subnets for the Master Nodes and Media Nodes and have enabled the auto-assign public IP option.
Volumes Configuration#
In this section, you need to specify the configuration for the EBS volumes that will be created for the Master Nodes. Master Nodes will host all the recordings and metrics data replicated across all of them. The disk size of the EBS volumes is the same for all Master Nodes.
Parameters in this section look like this:

The MasterNodesDiskSize parameter specifies the size of the EBS volumes in GB.
(Optional) Additional flags#
Additional optional flags to pass to the OpenVidu installer (comma-separated, e.g., --flag1=value, --flag2).
Parameters in this section look like this:

For example (optional), you can use --force-utc-timezone to force UTC as the timezone for OpenVidu. By default, OpenVidu uses the timezone configured on the host machine where it is installed. In general, UTC is recommended, and AWS EC2 instances already default to UTC, so this flag is not usually necessary.
Deploying the stack#
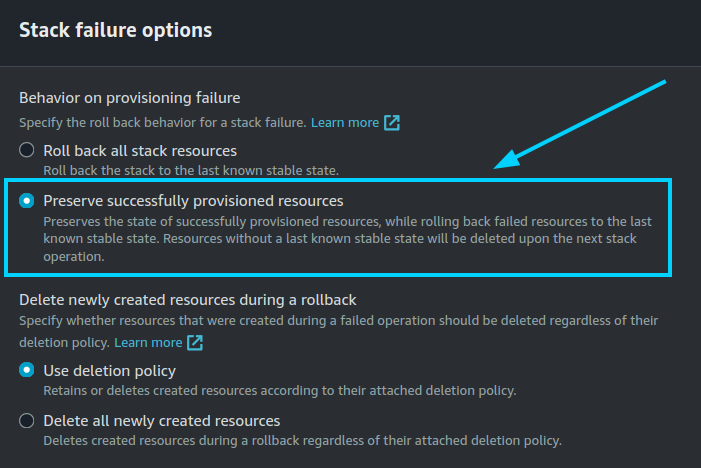
When you are ready with your CloudFormation parameters, just click on "Next", specify in "Stack failure options" the option "Preserve successfully provisioned resources" to be able to troubleshoot the deployment in case of error, click on "Next" again, and finally "Submit".
When everything is ready, you will see the following links in the "Outputs" section of CloudFormation:
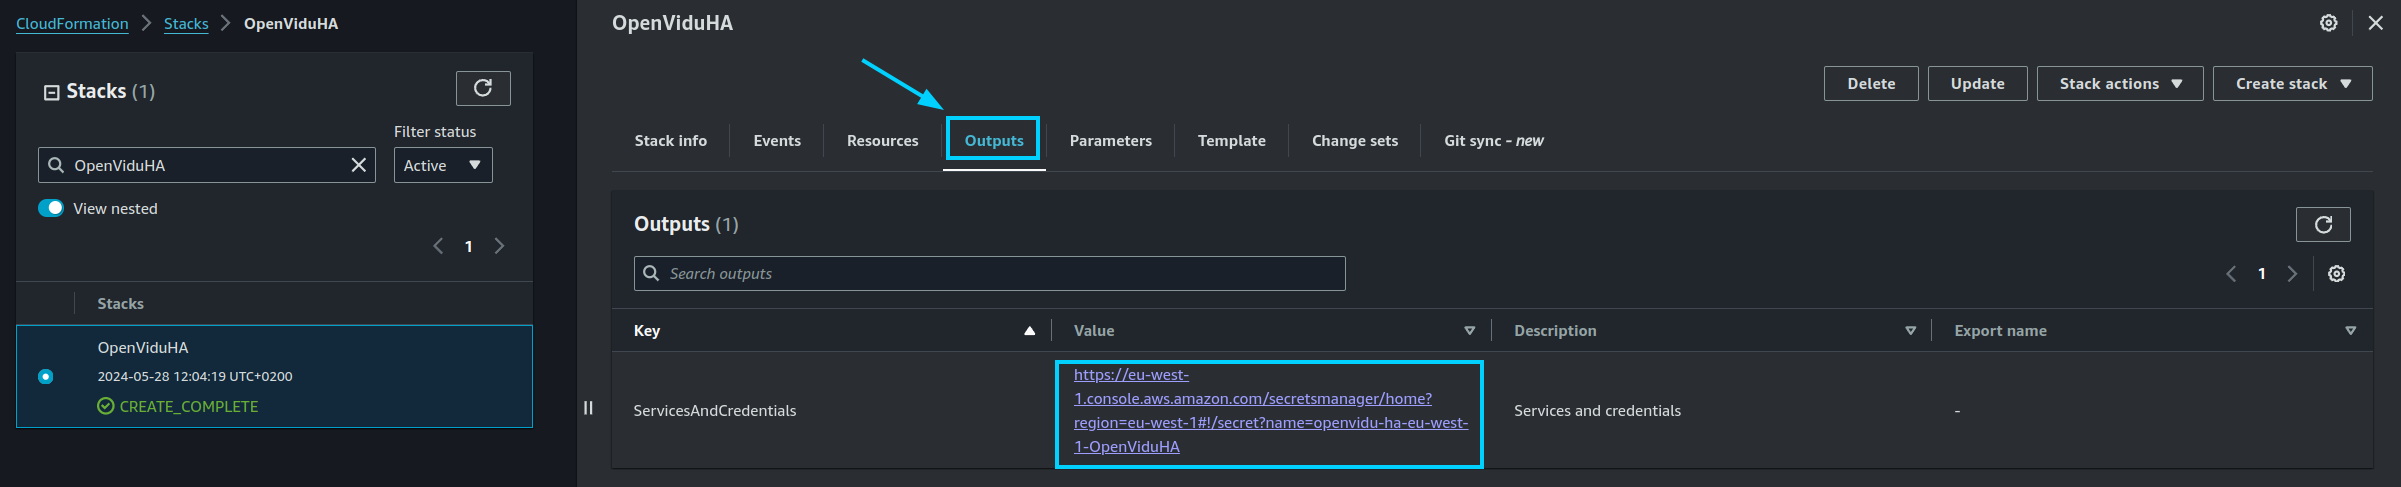
Configure your application to use the deployment#
The Output Key ServicesAndCredentials of the previous section points to an AWS Secret Manager secret that contains all URLs and credentials to access the services deployed. You can access the secret by clicking on the link in the Output Value column.
Then, click on Retrieve secret value to get the JSON with all the information.
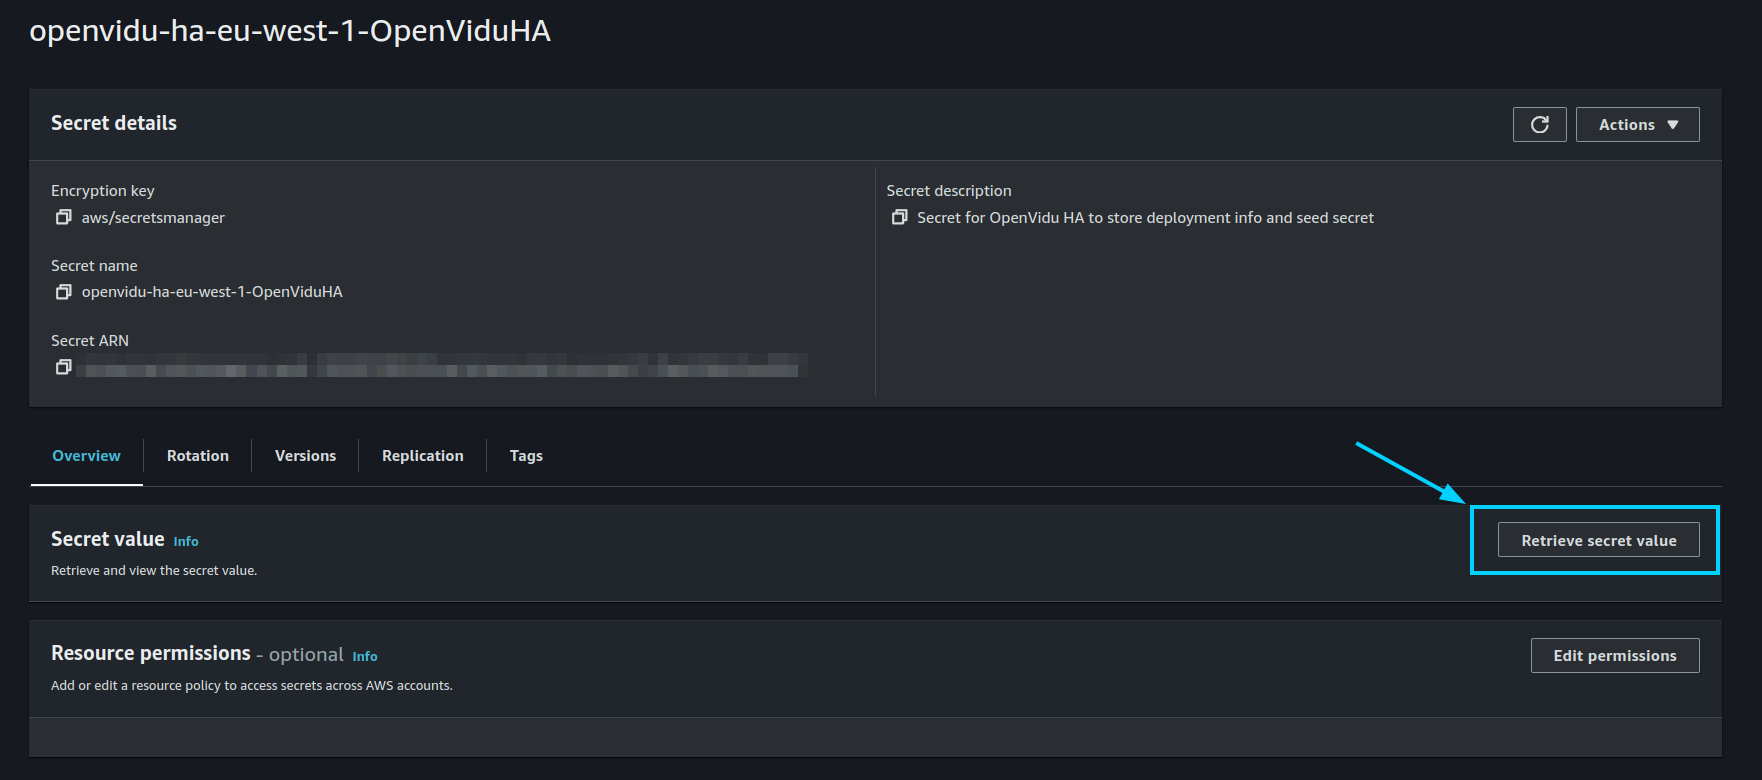
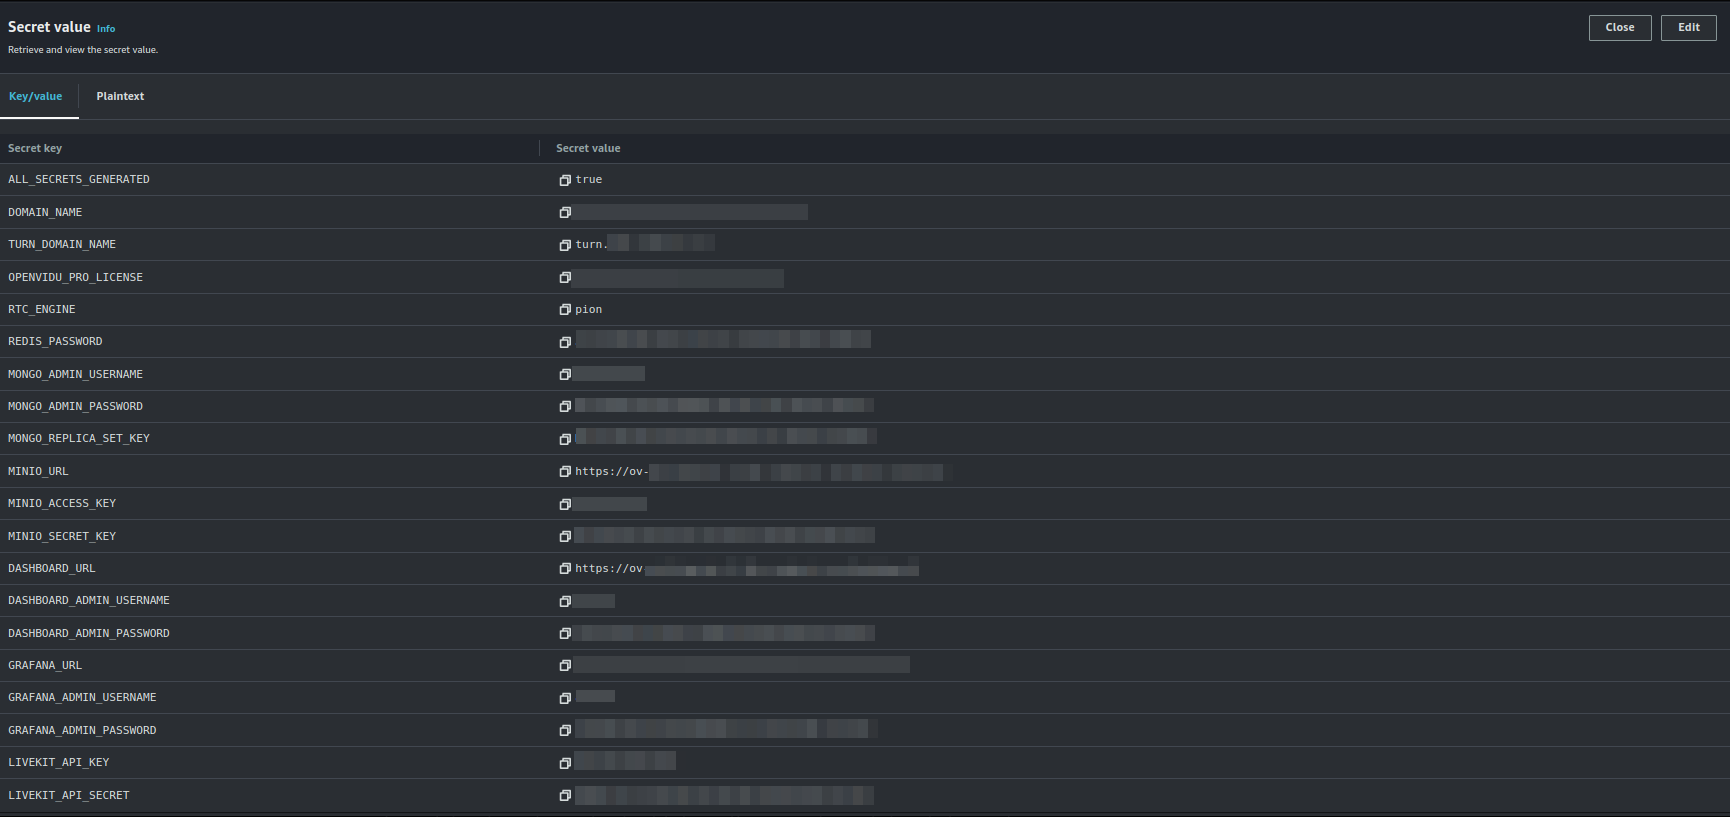
To use your OpenVidu deployment, check the values of the JSON secret. All access credentials of all services are defined in this object. The most relevant ones are:
OpenVidu Meet:
OPENVIDU_URL: The URL to access OpenVidu Meet, which is alwayshttps://yourdomain.example.io/MEET_INITIAL_ADMIN_USER: User to access OpenVidu Meet Console. It is alwaysadmin.MEET_INITIAL_ADMIN_PASSWORD: Password to access OpenVidu Meet Console.MEET_INITIAL_API_KEY: API key to use OpenVidu Meet Embedded and OpenVidu Meet REST API.
Note
The MEET_INITIAL_ADMIN_USER, MEET_INITIAL_ADMIN_PASSWORD, and MEET_INITIAL_API_KEY values are initial settings that cannot be changed from AWS Secret Manager. They can only be changed from the Meet Console.
OpenVidu Platform:
LIVEKIT_URL: The URL to use LiveKit SDKs, which can bewss://yourdomain.example.io/orhttps://yourdomain.example.io/depending on the client library you are using.LIVEKIT_API_KEY: API Key for LiveKit SDKs.LIVEKIT_API_SECRET: API Secret for LiveKit SDKs.
OpenVidu V2 Compatibility Credentials
This section is only needed if you want to use OpenVidu v2 compatibility.
- URL: The URL to access OpenVidu, which is the value of
OPENVIDU_URL(e.g.,https://yourdomain.example.io/) - Username: Basic auth user for OpenVidu v2 compatibility. It is always
OPENVIDUAPP. - Password: Basic auth password for OpenVidu v2 compatibility is the same as
LIVEKIT_API_SECRET.
Troubleshooting Initial CloudFormation Stack Creation#
If something goes wrong during the initial CloudFormation stack creation, your stack may reach the CREATE_FAILED status for multiple reasons. It could be due to a misconfiguration in the parameters, a lack of permissions, or a problem with the AWS services. When this happens, the following steps can help you troubleshoot the issue and identify what went wrong:
-
While deploying the stack, make sure at "Stack failure options" you have selected the option "Preserve successfully provisioned resources" to be able to troubleshoot the deployment in case of an error.
-
Check if the EC2 instance or instances are running. If they are not, check the CloudFormation events for any error messages.
-
If the EC2 instance or instances are running, SSH into the instance and check the logs of the following files:
/var/log/cloud-init-output.log/var/log/cloud-init.log
These logs will give you more information about the CloudFormation stack creation process.
-
If everything seems fine, check the status and the logs of the installed OpenVidu services in all the Master Nodes and Media Nodes.
Configuration and administration#
When your CloudFormation stack reaches the CREATE_COMPLETE status, your OpenVidu High Availability deployment is ready to use. You can check the Administration section to learn how to manage your deployment.