Live Captions tutorial#
This tutorial is a simple variation of the JavaScript client tutorial, adding live captions thanks to the use of OpenVidu Live Captions service.
Running this tutorial#
1. Run OpenVidu Server#
-
Download OpenVidu
-
Configure the local deployment
-
Enable the Speech Processing agent
Modify file
openvidu-local-deployment/community/agent-speech-processing.yamlto enable the Speech Processing agent. At least you need to set the following properties:enabled: true live_captions: processing: automatic provider: YOUR_SPEECH_PROVIDER # Followed by your provider specific configurationInfo
Visit Supported AI providers for more information about the available providers and their specific configuration. Many of them provide a free tier, so you can quickly test them without any cost!
-
Run OpenVidu
To use a production-ready OpenVidu deployment, visit the official deployment guide.
Enable the Live Captions service
Once your deployment is up and running, enable the Live Captions service following the official instructions.
2. Download the tutorial code#
3. Run a server application#
To run this server application, you need Node.js installed on your device.
- Navigate into the server directory
- Install dependencies
- Run the application
For more information, check the Node.js tutorial.
To run this server application, you need Go installed on your device.
- Navigate into the server directory
- Run the application
For more information, check the Go tutorial.
To run this server application, you need Ruby installed on your device.
- Navigate into the server directory
- Install dependencies
- Run the application
For more information, check the Ruby tutorial.
To run this server application, you need Java and Maven installed on your device.
- Navigate into the server directory
- Run the application
For more information, check the Java tutorial.
To run this server application, you need Python 3 installed on your device.
-
Navigate into the server directory
-
Create a python virtual environment
-
Activate the virtual environment
-
Install dependencies
-
Run the application
For more information, check the Python tutorial.
To run this server application, you need Rust installed on your device.
- Navigate into the server directory
- Run the application
For more information, check the Rust tutorial.
To run this server application, you need PHP and Composer installed on your device.
- Navigate into the server directory
- Install dependencies
- Run the application
Warning
LiveKit PHP SDK requires library BCMath. This is available out-of-the-box in PHP for Windows, but a manual installation might be necessary in other OS. Run sudo apt install php-bcmath or sudo yum install php-bcmath
For more information, check the PHP tutorial.
To run this server application, you need .NET installed on your device.
- Navigate into the server directory
- Run the application
Warning
This .NET server application needs the LIVEKIT_API_SECRET env variable to be at least 32 characters long. Make sure to update it here and in your OpenVidu Server.
For more information, check the .NET tutorial.
4. Run the client application#
To run the client application tutorial, you need an HTTP web server installed on your development computer. A great option is http-server. You can install it via NPM:
-
Navigate into the application client directory:
-
Serve the application:
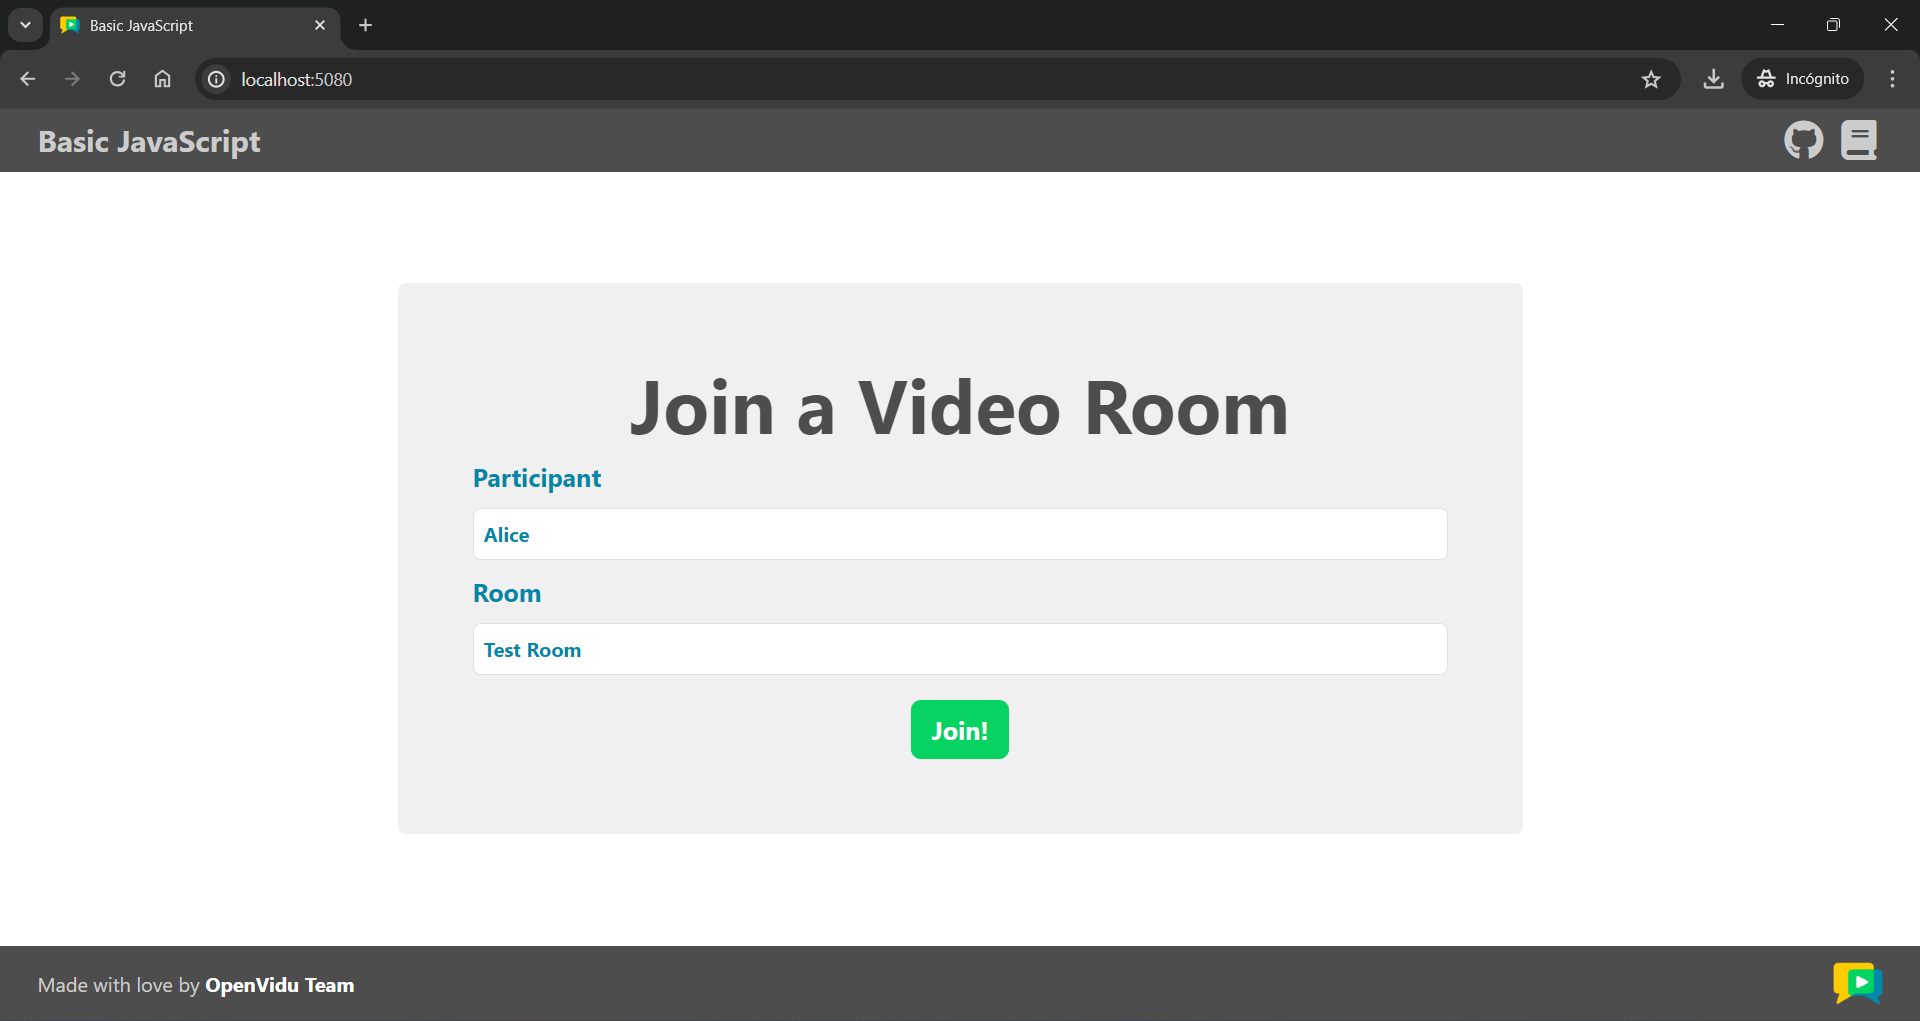
Once the server is up and running, you can test the application by visiting http://localhost:5080. You should see a screen like this:
Accessing your application client from other devices in your local network
One advantage of running OpenVidu locally is that you can test your application client with other devices in your local network very easily without worrying about SSL certificates.
Access your application client through https://xxx-yyy-zzz-www.openvidu-local.dev:5443, where xxx-yyy-zzz-www part of the domain is your LAN private IP address with dashes (-) instead of dots (.). For more information, see section Accessing your local deployment from other devices on your network.
Understanding the code#
You can first take a look at the JavaScript client tutorial, as this application shares the same codebase. The only thing added by this tutorial is a new handler for the Room object to receive transcription messages and display them as live captions in the HTML:
| app.js | |
|---|---|
| |
- Use method Room.registerTextStreamHandler to register a handler on topic
lk.transcription. Transcription messages will arrive to this handler. - Await each transcription message.
- Read attribute
lk.transcription_finalto determine if the transcription message is a final or an interim one. See Final vs Interim transcriptions. - Read attribute
lk.transcribed_track_idto know which specific audio track has been transcribed. - Build your live caption message as desired and append it to the HTML.
Using method Room.registerTextStreamHandler we subscribe to topic lk.transcription. All transcription messages will arrive to this handler.
Apart from the message itself (which you get by awaiting method reader.readAll()) there are two main attributes in the transcription message (which you can access via reader.info.attributes):
lk.transcription_final: Indicates whether the transcription message is final or interim. See Final vs Interim transcriptions for more details.lk.transcribed_track_id: The ID of the audio track that has been transcribed. This is useful to know which specific participant's audio track has been transcribed, if necessary.
Once you have all the information about the transcription message, you can build your live caption text as desired and display it in the HTML (in this case, using a simple <textarea> element).